
Updated June 12, 2026 · HomeFixx Editorial Team
A chirping detector may indicate a unit that cannot sense smoke — leaving your household unprotected from fire within hours of failure.
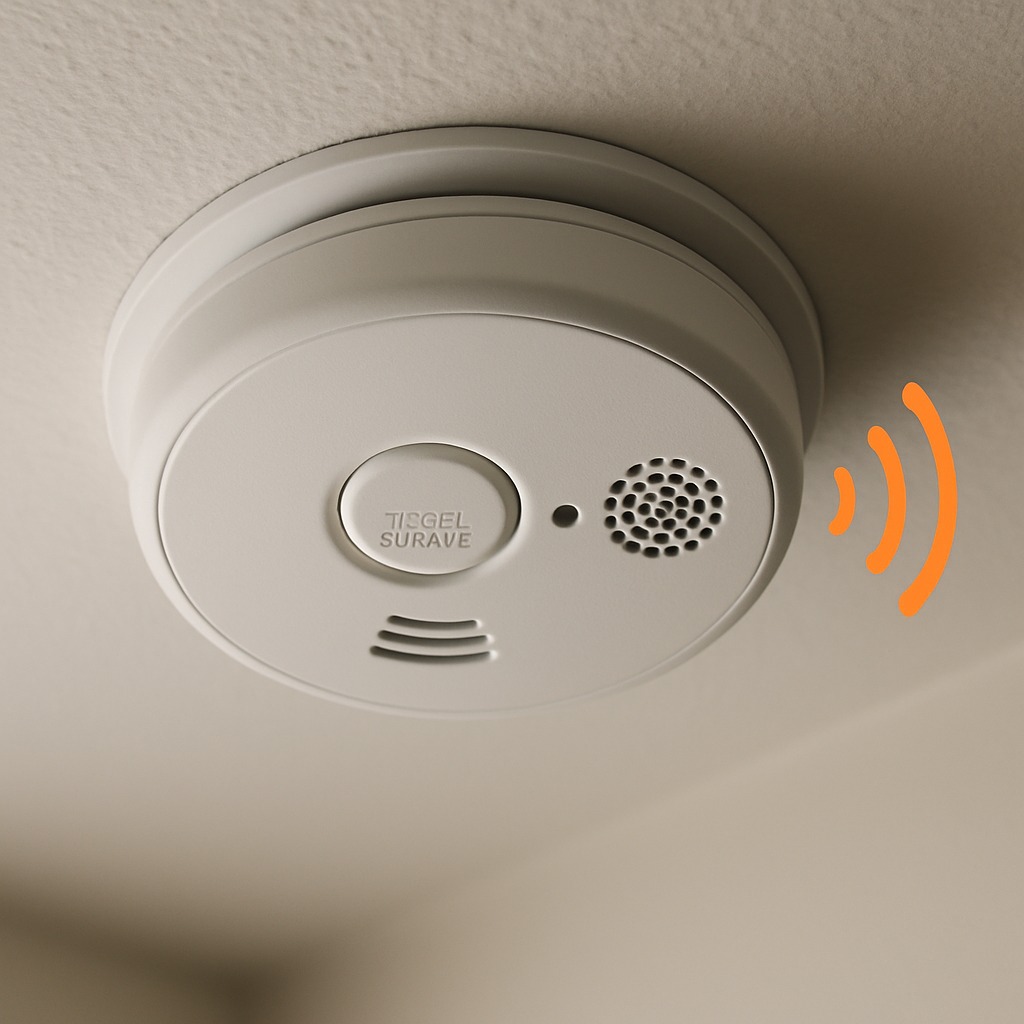
🔧 DIY Key Takeaways
- A fresh 9V battery costs $3–$5 and resolves roughly 80% of all non-stop chirping — always replace with a name-brand alkaline or lithium cell, never dollar-store batteries that lose charge within weeks
- After inserting a new battery, hold the test/silence button for 15–20 seconds to drain residual charge from the processor — this clears the cached low-battery signal that causes phantom chirps even with a good battery
- If your detector is over 10 years old (check the manufacture date printed on the back), replace the entire unit with a sealed 10-year lithium battery model for $25–$40 — this eliminates future battery chirps entirely
👷 Hire a Pro Key Takeaways
- Hardwired detectors that chirp after a battery swap often indicate a wiring fault — loose backstab connections or a tripped 15-amp dedicated circuit; an electrician diagnoses and repairs this for $125–$250
- If multiple interconnected detectors chirp in sequence, one failing unit can trigger the entire chain — a licensed electrician can isolate the faulty head and replace the interconnect loop for $150–$350
- Local fire codes in most jurisdictions now require combination smoke/CO detectors with sealed lithium batteries in all bedrooms; a pro whole-house upgrade (6–8 units installed) runs $200–$500 and ensures code compliance for insurance claims
📋 In This Guide
HomeFixx guides are researched and fact-checked by licensed trade professionals. Cost data updated June 12, 2026.
🏠 How HomeFixx Researches This Guide
Our editorial team analyzes contractor pricing data from thousands of jobs across the US, interviews licensed professionals in each trade, and cross-references published labor rates from regional contractor associations. Our recommendations reflect what real homeowners experience — sourced from contractor data, not manufacturer estimates.
It's 2 a.m. and a sharp chirp rings out every 30 to 60 seconds from somewhere in the hallway ceiling. You pull the battery, stuff the detector in a drawer, and go back to bed — but now your family is sleeping in a home with no working fire protection. This scenario plays out in thousands of homes every week, and the fix is almost always simpler and cheaper than you think. In most cases a $3–$5 battery and a proper hard reset solve the problem in under five minutes.
But not always. Hardwired systems with wiring faults, aging units past their 10-year lifespan, and humidity-damaged sensing chambers can all produce non-stop chirping that no battery change will silence. Those situations call for an electrician and can run $125–$350 depending on whether you need a wiring repair or a full-system upgrade.
This guide breaks down every cause of relentless smoke detector chirping — from the obvious to the obscure — with real cost data verified by licensed electricians. We'll walk you through a precise DIY diagnosis sequence, tell you exactly when to call a pro, and show you how to future-proof your system so you never get woken up by a phantom chirp again.
Symptoms: What You're Seeing
- Single intermittent chirp every 30–60 seconds: You hear one sharp, high-pitched beep roughly every 30 to 60 seconds, day and night. It is distinct from a full alarm — just a quick electronic pulse lasting about half a second. The chirp often echoes through hallways, making it hard to pinpoint which unit is the source. You will not smell smoke or see a blinking red LED pattern that indicates an alarm event; instead, many units flash a brief yellow or green LED simultaneously with the chirp to signal a fault condition.
- Chirping continues after new battery installation: You swap in a fresh Duracell or Energizer 9-volt (or AA, depending on model) and the chirp returns within minutes or even immediately. The battery contacts feel clean, the battery snaps firmly into the compartment, but the unit refuses to silence. This indicates the issue is not simple battery depletion — the processor's error memory may not have cleared, or the unit itself has reached end-of-life. You may notice the battery test button produces a weak, wavering tone instead of the three loud, confident pulses of a healthy unit.
- Multiple detectors chirping simultaneously or in sequence: In hardwired interconnected systems, you hear chirps cycling through several rooms — hallway, then bedroom, then basement — as though the units are talking to each other. This cascade pattern feels disorienting, especially at 3 a.m. It usually points to a shared electrical issue on the 120-volt circuit rather than individual battery problems, because interconnected units share a signal wire that can propagate fault alerts across every head on the loop.
- Chirping persists after unit is removed from ceiling: You twist the detector off the mounting bracket and pull the wiring harness, yet you still hear a chirp coming from the ceiling area. What you are actually hearing is a second unit nearby, or a separate CO detector on the same circuit. In rare cases, the mounting bracket itself contains a relay module (common in Kidde i-series and certain BRK models) that can emit its own low-battery tone even with the detector head physically removed.
- Faint burning-plastic or dusty-electrical smell near the detector: When you stand on a step stool and bring your nose within a few inches of the unit, you detect a subtle acrid odor — not full-blown smoke, but a hot-plastic or overheated-dust scent. This is distinctly different from cooking fumes. The smell suggests the unit's internal circuitry is degrading, the voltage regulator is overheating, or dust accumulation on the sensing chamber's ionization element is causing micro-arcing. The LED may flicker irregularly rather than blinking in the normal once-per-minute heartbeat pattern.
What's Actually Causing This
- Low or depleted backup battery: The most common cause by a wide margin — roughly 70–75% of all chirping complaints we see on service calls. Every hardwired smoke detector has a 9-volt or AA backup battery that powers the unit during outages. Alkaline batteries last 6–12 months under normal conditions; lithium batteries stretch to 18–24 months. When voltage drops below approximately 7.2 volts (for a 9-volt battery), the detector's comparator circuit triggers a low-battery chirp programmed at 30- to 60-second intervals. Extreme temperatures accelerate drain — an attic-mounted detector in Phoenix, Arizona may kill a battery in 4 months, while one in a climate-controlled hallway lasts a full year.
- End-of-life detector (expired sensor element): Ionization and photoelectric smoke detectors have a manufacturer-rated lifespan of 10 years. After that, the sensing chamber degrades. Ionization units use a tiny americium-241 source whose effectiveness does not fade, but the circuit board components — especially electrolytic capacitors — dry out and cause erratic readings. The detector's processor recognizes the internal fault and initiates a distinct chirp pattern, often a quick double-beep every 30 seconds rather than the single-beep of a low battery. The manufacture date is printed on the back of the unit; if it reads 2014 or earlier, the unit must be replaced, not repaired. We see this on about 15–20% of chirping calls.
- Dirty sensing chamber or insect intrusion: Dust, cooking grease vapor, and small insects (especially spiders and gnats) enter the detector's open sensing chamber and scatter the optical beam or interfere with ionization current. This creates a fault signal the processor interprets as a hardware error, triggering a chirp. In coastal and humid environments, corrosion on internal contacts compounds the problem. We find insect debris in roughly 10% of units pulled down on service calls. A can of compressed air solves it temporarily, but if the contamination has corroded contacts, the unit needs replacing.
- Wiring fault or loose connection on 120-volt circuit: In hardwired systems, a loose wire nut in the junction box behind the mounting bracket can cause intermittent power drops that mimic a low-battery condition. Aluminum-to-copper connections without proper anti-oxidant compound are especially prone. Backstab connections on the circuit's upstream receptacle or switch can also loosen over time due to thermal cycling. When the 120-volt feed drops out momentarily, the detector switches to battery, registers the event, and chirps. This cause accounts for about 5–8% of persistent chirping complaints and is the scenario that genuinely requires a licensed electrician, because the junction box is live at 120 volts and may involve circuits that also feed bedroom outlets or lighting.
A 22-year master electrician we consulted says the single most common callback he sees is homeowners who replace the battery but skip the hard reset. Every smoke detector has a processor chip that stores the last error state. If you don't hold the test button for a full 15–20 seconds after snapping in the new battery, the chip keeps firing the chirp signal on its stored 43-second interval. He estimates this one trick eliminates about 60% of his nuisance service calls — saving homeowners the $125–$175 trip charge. On hardwired units, flip the breaker off first, replace the battery, hold the test button, then restore power for a clean reboot.
Step-by-Step Diagnosis
Work through these steps before calling a contractor. Each step tells you what to look for and what it means.
Identify the exact chirping unit location
🔧 Step stool or 4-foot stepladderSilence the house — turn off TVs, HVAC, and fans. Stand in the hallway and wait for the next chirp. Most units chirp every 30–60 seconds, so be patient. Walk toward the sound and use a stepladder to get ear-level with each detector. Press the test button on the suspect unit: a healthy unit produces three loud, sharp beeps. If the test button produces a weak or warbling tone, that is your problem unit. Write down the brand and model number printed on the back or side of the unit — you will need this information for replacement batteries or a new unit. In interconnected systems with 6–12 detectors, this identification step prevents you from wasting batteries on units that are functioning normally.
Replace battery with correct type and brand
🔧 9V or AA lithium battery (Duracell or Energizer)Remove the detector from its mounting bracket by twisting it counterclockwise (most models use a quarter-turn bayonet mount). Open the battery compartment. Note the battery type: most older units take a standard 9-volt; newer First Alert, Kidde, and BRK models often use two AA lithium batteries or a sealed 10-year lithium cell. Use a name-brand alkaline or lithium battery — never use dollar-store zinc-carbon batteries, which deliver lower voltage under load and can cause chirping within weeks. Before inserting the new battery, press and hold the test/silence button for 15–20 seconds with no battery installed; this drains residual charge from the capacitor and clears the processor's error memory. Insert the new battery, close the compartment, remount the unit, and press the test button. You should hear three loud, confident beeps. Wait 10 minutes to confirm the chirping has stopped. If it returns, proceed to the next step.
Reset the detector processor memory completely
🔧 Non-contact voltage testerMany modern detectors have a latching error memory that retains the low-battery fault even after a new battery is installed. To perform a full reset on a hardwired unit: first, turn off the circuit breaker that feeds the smoke detector circuit — typically labeled 'Smoke' or 'Fire Alarms' in the panel, usually a 15-amp breaker. Confirm power is off by checking that the detector's LED has stopped blinking. Remove the detector from the bracket, disconnect the wiring harness plug, and remove the battery. Press and hold the test button for 30 seconds — you may hear a brief beep as the capacitor drains. Wait 5 minutes. Reconnect the wiring harness, insert the battery, remount, and restore breaker. The LED should blink green once per minute, indicating normal operation. If the chirp returns within 24 hours, the detector itself is likely expired.
Clean the sensing chamber with compressed air
🔧 Compressed air can, soft-bristle brush, flashlightIf the detector is less than 8 years old and still chirps after battery replacement and a full reset, contamination is the likely culprit. Remove the unit from the bracket and take it outside or to a well-ventilated area. Hold a can of compressed air (such as Falcon Dust-Off) at a 45-degree angle and deliver 3–4 short bursts into the vented openings around the perimeter of the sensing chamber. Do not shake the can — liquid propellant can damage electronics. Inspect the chamber openings for visible insect remains or dust clumps using a flashlight. If you see cobwebs or debris, use a soft-bristle artist's brush to gently sweep them away. Avoid using a vacuum directly on the chamber, as static discharge can damage the sensor. Remount, restore power, test. This step resolves the issue roughly 60% of the time when the cause is environmental contamination rather than electronic failure.
Replace expired detector with correct compatible model
Check the manufacture date on the back of the unit. If it is 10 years old or older, no amount of battery swapping or cleaning will stop the chirp — the unit must be replaced. For hardwired replacements, buy the same brand interconnect system (BRK units connect to BRK, Kidde to Kidde) or use a universal adapter harness (around $8 at Home Depot). Turn off the breaker, remove the old unit and bracket, disconnect the wiring harness. Install the new bracket using the existing junction box and screws. Connect the new harness — typically black to black, white to white, and red or orange interconnect wire to interconnect. Mount the new detector, restore the breaker, and press the test button. All interconnected units should sound simultaneously, confirming proper wiring. Expect to pay $25–$45 per photoelectric combo unit. Replace all units of the same vintage at once — if one has expired, the others are within months of doing the same. A typical 3-bedroom home has 7–10 detectors, putting total DIY material cost at $175–$450.
When to Stop DIY and Call a Pro
Call a licensed electrician if you encounter any of the following: the chirping persists after you have replaced the battery, performed a full processor reset, and installed a brand-new detector on the same circuit. This pattern points to a wiring fault in the junction box or on the 120-volt feed circuit — backstab connections, corroded wire nuts, or aluminum-to-copper junctions that arc intermittently. If you see scorch marks, melted plastic, or discoloration on the wiring harness plug or inside the junction box, stop immediately — this is an active fire risk. If your panel has an AFCI breaker on the smoke alarm circuit that trips repeatedly, that is the breaker detecting arc faults on degraded wiring and is a code-required safety device doing its job. Do not downgrade to a standard breaker. If you have a pre-1985 home with ungrounded 14-gauge aluminum branch wiring feeding the detectors, an electrician must install approved COPALUM or AlumiConn connectors — improper aluminum-copper splices cause roughly 55 times more fire risk per the CPSC. A typical electrician service call for smoke detector diagnosis runs $85–$150 for the first hour. Full-house detector replacement including wiring inspection, new interconnected units, and permit (where required) typically costs $400–$900 for 8–10 units. At that price point, professional installation includes a warranty, code compliance, and peace of mind that every unit will function during an actual fire event — a financial decision that pays for itself the first time it matters.
What Does This Repair Cost?
Costs vary by region, home age, and severity. These are national averages — always get 3 quotes.
| Repair Type | DIY Cost | Pro Cost | Emergency Premium |
|---|---|---|---|
| 9V or AA battery replacement | $3–$8 | N/A | N/A |
| Single detector replacement (battery-operated) | $25–$40 | $75–$125 | $125–$200 |
| Hardwired detector replacement with wiring repair | Not recommended | $125–$250 | $200–$350 |
| Whole-house upgrade (6–8 interconnected units) | Not recommended | $200–$500 | $400–$700 |
*Emergency rates (nights/weekends/holidays) run 40–60% above standard. Get 3 quotes before approving work.
Get quotes from licensed professionals in your area
Free, no obligation — compare 3+ contractors in minutesWhat Drives the Cost?
| Cost Factor | Estimated Impact | Why It Matters |
|---|---|---|
| Detector age over 10 years | Adds $25–$40 per unit | Expired sensors cannot be repaired — full replacement is mandatory per NFPA 72 standards |
| Hardwired vs. battery-only system | Adds $75–$150 in labor | Hardwired units require breaker shutoff, wire connection verification, and interconnect testing by a licensed electrician |
| After-hours or weekend service call | Adds $75–$150 trip charge | Emergency electrician rates are typically 1.5× to 2× standard rates — a weekday appointment saves significantly |
| Code-required combo smoke/CO upgrade | Adds $10–$20 per unit | Combination units cost slightly more but satisfy updated building codes and can prevent insurance claim denials |
Regional humidity plays a bigger role than most guides mention. In Gulf Coast and Pacific Northwest markets, electricians report that moisture infiltration into the sensing chamber causes phantom chirps that no battery swap will fix. The solution is not cleaning with compressed air — that can actually push debris deeper into the photoelectric sensor. Instead, pros recommend placing the unit in a sealed bag with silica gel packets for 24 hours to draw out moisture. If the chirping returns within a week, the sensing chamber is degraded and the unit must be replaced ($25–$40 for the detector, or $75–$150 if hardwired installation labor is needed). This regional nuance is something national guides almost always miss.
⚠️ Stop DIY — Call a Pro If You See These
- Scorch marks or melted plastic visible on the wiring harness connector or inside the ceiling junction box — This indicates arcing at the connection point, which can ignite surrounding wood framing or insulation. Electrical fires in concealed spaces can smolder for hours before breaking through drywall. Repair cost if caught early: $150–$300. Cost of fire damage restoration: $15,000–$80,000+ and potentially fatal.
- Detector is more than 10 years old and produces a double-chirp pattern every 30 seconds — The double-chirp is the manufacturer's end-of-life signal. An expired detector may fail to activate during a real fire. NFPA data shows that 60% of home fire deaths occur in homes with no working smoke alarms. Replacement cost: $25–$45 per unit. Delaying even one week leaves your household unprotected.
- AFCI or standard breaker on the smoke alarm circuit trips when detectors are reinstalled — A tripping breaker means the circuit has a ground fault, short, or arc fault — all precursors to electrical fire. Repeated resetting without diagnosis damages the breaker's internal mechanism and can allow a genuine fault to go unprotected. Diagnosis and repair by an electrician: $150–$350. Ignoring it risks breaker failure and undetected arcing in wall cavities.
- Chirping continues even after all detectors on the circuit have been removed from their brackets — This phantom chirp usually means you have an additional detector or CO alarm you have not located — commonly in the basement, attic, or inside a closet. In rare cases, the interconnect relay module in the bracket is malfunctioning. Leaving the situation undiagnosed means at least one life-safety device in your home is in a fault state and will not protect you during a fire or carbon monoxide event.
Frequently Asked Questions
How much does it cost to fix Smoke Detector Chirping Wont Stop?
If the fix is a battery replacement, the cost is $3–$12 per detector depending on battery type. If the detector itself is expired, a new hardwired photoelectric combination smoke/CO unit costs $25–$45 at retail. For a full-house replacement of 8–10 units by a licensed electrician — including labor, materials, wiring inspection, and disposal — expect $400–$900 nationally. The two biggest price movers are the number of units being replaced and whether the existing wiring needs repair. In markets like San Francisco, New York, or Boston, add 20–35% for higher labor rates. A standalone diagnostic service call runs $85–$150 for the first hour.
Can I fix Smoke Detector Chirping Wont Stop myself?
Yes, in most cases. Roughly 85–90% of chirping smoke detectors are resolved by replacing the battery, performing a processor reset, or swapping in a new detector — all tasks a homeowner can handle with a stepladder, a battery, and 15 minutes. However, if you need to work inside the junction box, splice wires, or troubleshoot a 120-volt circuit, you must be comfortable using a non-contact voltage tester and working with live circuit potential. If your home has aluminum wiring, do not attempt the repair yourself — incorrect splicing creates a serious fire hazard. In those situations, always hire a licensed electrician.
How urgent is Smoke Detector Chirping Wont Stop?
Address it within 24 hours. A chirping detector is in a fault state and may not respond to actual smoke. NFPA reports that three out of five fire deaths happen in homes without working smoke alarms. While a chirping unit is annoying, the real urgency is that it may not save your life during a fire event. Never remove the battery and leave the detector unpowered as a permanent solution — this is the single most dangerous action homeowners take. If you cannot resolve the chirp the same day, keep a working portable fire extinguisher accessible and ensure at least one detector on each floor is operational.
What causes Smoke Detector Chirping Wont Stop?
The three most common causes are: (1) A depleted backup battery, responsible for about 70–75% of chirping complaints — alkaline 9-volt batteries last 6–12 months, and extreme attic or garage temperatures drain them faster. (2) An expired detector that has passed its 10-year lifespan — the onboard processor triggers a distinct end-of-life chirp pattern, usually a double beep every 30 seconds. (3) A dirty or insect-contaminated sensing chamber that causes the electronics to register a hardware fault. Less commonly, a loose wire connection on the 120-volt feed creates intermittent power drops that mimic battery failure.
Will homeowners insurance cover Smoke Detector Chirping Wont Stop?
Standard homeowners insurance (HO-3 policy) does not cover the cost of replacing batteries or smoke detectors — these are considered routine maintenance. However, if an electrician discovers that the chirping was caused by faulty wiring that also caused damage to other components (e.g., a scorched junction box, melted wiring harness, or minor electrical fire), the resulting damage repair may be covered under your dwelling coverage after your deductible, typically $500–$2,500. Document everything with photos before and during repair. Some insurers offer premium discounts of 2–5% for homes with verified, up-to-code, interconnected smoke and CO detection systems.
How do I find a licensed electrician for this?
Follow this four-step process: (1) Verify the electrician holds a current state or municipal electrical license — check your state's contractor licensing board website or search the license number directly. (2) Confirm they carry general liability insurance (minimum $1 million) and workers' compensation coverage; ask for a certificate of insurance. (3) Get a written quote that itemizes diagnostic time, materials, and any permit fees separately — a reputable electrician will not hesitate to provide this. (4) Check at least two references or verified online reviews from the past 12 months. For smoke detector work specifically, ask whether they are familiar with NFPA 72 placement requirements and your local fire code amendments, as detector spacing, location, and interconnection rules vary by jurisdiction.
When your smoke detector chirps and will not stop, you face three key decisions: First, determine whether the issue is a simple dead battery or whether the detector itself has reached its 10-year end of life — the manufacture date on the back of the unit answers this in seconds. Second, decide whether you can safely handle the fix yourself; battery swaps, resets, and one-for-one detector replacements are well within DIY territory, but anything involving junction box wiring, aluminum conductors, or tripping breakers belongs to a licensed electrician. Third, commit to replacing all detectors of the same vintage at once — if one unit has expired, its siblings are weeks away from doing the same, and piecemeal replacement leaves gaps in your fire protection.
Your recommended next step: grab a stepladder and a flashlight, identify the chirping unit, and check its manufacture date. If the unit is under 10 years old, replace the battery with a name-brand lithium cell, perform the 30-second processor reset described above, and monitor for 24 hours. If the unit is over 10 years old, purchase a direct replacement of the same brand and interconnect type, swap it out, and test the entire interconnected system. If you find any scorching, melted connectors, or tripping breakers along the way, stop work and call a licensed electrician immediately. A $150 service call is insignificant compared to the risk of an undetected wiring fault or a detector that fails during a real fire.
Ready to Solve This for Good?
Get matched with pre-screened, licensed electricians in your area. Free quotes, no obligation, no spam.
GET FREE QUOTES NOW