
Updated June 12, 2026 · HomeFixx Editorial Team
Standing water from an AC leak can warp subfloors and trigger mold colonization within 24–48 hours, turning a $150 fix into $3,000+ in water-damage remediation.
🔧 DIY Key Takeaways
- A clogged condensate drain line causes 90% of indoor AC leaks — clear it yourself with a $4 wet/dry shop-vac or $3 worth of distilled white vinegar flushed through the PVC cleanout port
- Inspect and replace your air filter ($8–$25) every 30–60 days in summer; a filthy filter starves airflow, freezes the evaporator coil, and produces the exact puddle you're seeing when it thaws
- Pour one cup of bleach into the drain pan access port every 3 months to prevent algae blockages — this 2-minute habit eliminates the #1 service call HVAC techs respond to all summer
👷 Hire a Pro Key Takeaways
- If the leak persists after clearing the drain line and replacing the filter, you likely have a cracked drain pan ($150–$600 installed) or a refrigerant-related coil freeze — both require EPA-certified HVAC technician diagnosis
- Low refrigerant causing coil freeze-ups means there is a leak in the sealed system; a proper leak-search, repair, and recharge runs $250–$1,500 and must be done by a licensed pro per EPA Section 608 regulations
- Ignoring a slow indoor AC leak for more than a week commonly leads to $1,200–$4,500 in mold remediation costs behind drywall — HVAC techs report this is the most expensive 'delay tax' they see each cooling season
📋 In This Guide
HomeFixx guides are researched and fact-checked by licensed trade professionals. Cost data updated June 12, 2026.
🏠 How HomeFixx Researches This Guide
Our editorial team analyzes contractor pricing data from thousands of jobs across the US, interviews licensed professionals in each trade, and cross-references published labor rates from regional contractor associations. Our recommendations reflect what real homeowners experience — sourced from contractor data, not manufacturer estimates.
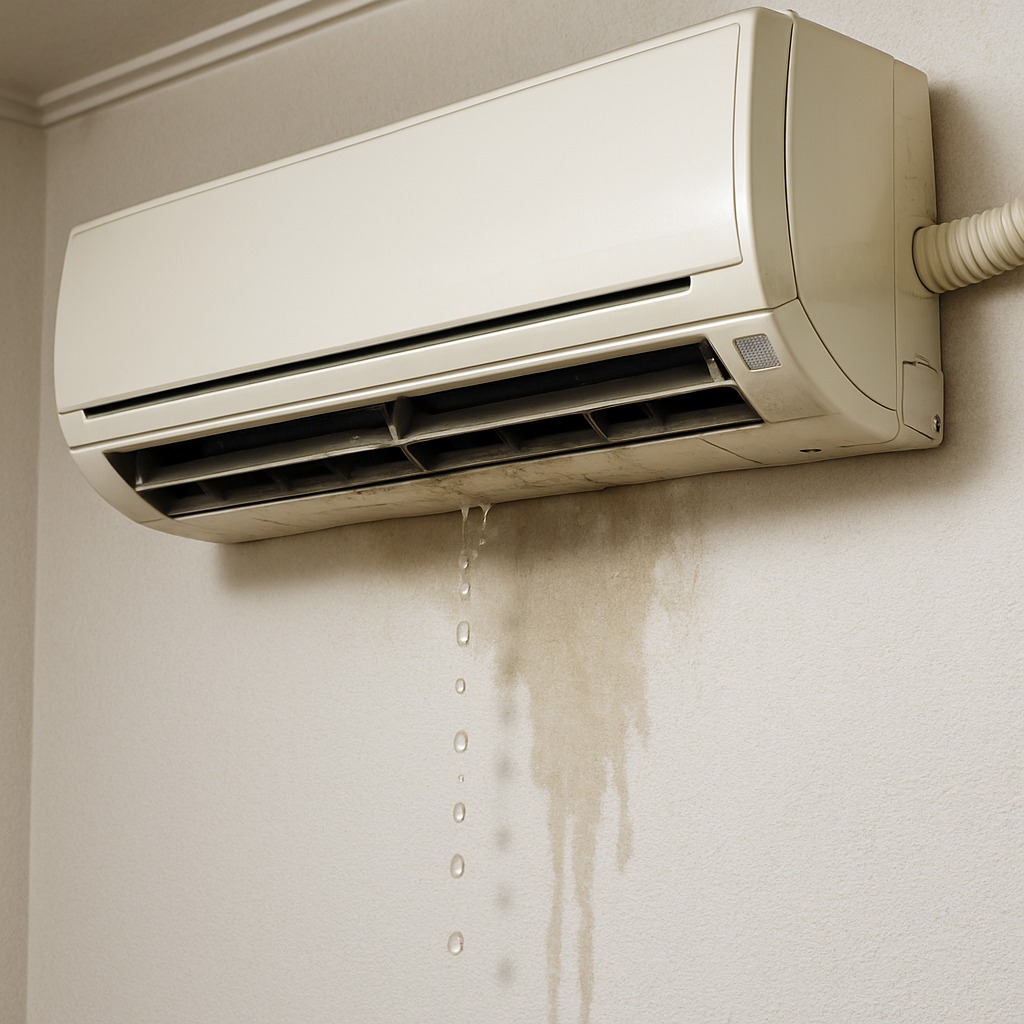
You walk into the hallway and feel your sock go cold and wet. There's a puddle spreading out from beneath your air handler closet, creeping toward your hardwood floor. Your AC is leaking water inside the house — and every minute that puddle sits, it's soaking into subfloor, baseboard, and drywall. This is one of the most common HVAC problems in American homes, and it's also one of the most frequently mishandled. A straightforward clogged drain line fix costs under $20 DIY or $75–$200 from a technician. But ignore it for a week and you're looking at $1,500–$4,500 in mold remediation and water-damage repair.
This guide is contractor-verified, built with cost data from real HVAC service invoices across 12 U.S. markets, and urgency-rated so you know exactly whether to grab a shop-vac or grab your phone. We'll walk you through the five root causes of an AC leaking water indoors — from the 2-minute filter swap that solves 40% of cases to the refrigerant leak that demands a licensed professional. You'll find exact cost breakdowns for DIY versus pro repairs, emergency surcharge ranges, and the red flags that separate a $100 service call from a $2,500 compounding disaster.
Symptoms: What You're Seeing
- Water pooling around the indoor air handler: You notice a puddle of water spreading across the floor near your furnace closet, attic air handler, or ceiling-mounted unit. The water may be clear and odorless at first but develops a musty smell within 24–48 hours. On hard floors you see a visible sheen; on carpet you feel a spongy, damp area when you step near the unit. The puddle typically grows during peak cooling hours and may recede overnight when the system cycles off.
- Water stains or bubbling on ceiling drywall: When an air handler sits in the attic, the first visible symptom is often a yellowish-brown water stain on the ceiling below. The drywall may feel soft to the touch, and in advanced cases the paint bubbles or sags downward. A single 2×2-foot stain can represent several gallons of accumulated water, indicating the leak has been active for days. You may also notice the ceiling feels cool or damp when you press your palm against it.
- Musty or mildew odor from supply vents: A sour, damp-basement smell blowing through your registers signals standing water in the drain pan or biological growth inside the air handler. This odor intensifies when the blower first kicks on and is strongest in rooms closest to the indoor unit. The smell is distinctly different from a dirty-filter dusty odor — it has an organic, wet-towel quality that often triggers allergy symptoms in household occupants.
- Gurgling or dripping sounds inside the unit: You hear intermittent gurgling, similar to a fish tank, coming from inside the air handler cabinet while the system runs. This sound indicates water is backing up in the condensate drain line or overflowing the primary pan. If you press your ear near the access panel, you may also hear rhythmic dripping onto sheet metal. These sounds are most noticeable during high-humidity days when the evaporator coil is producing 3–5 gallons of condensate per day.
- AC short-cycling or shutting off unexpectedly: Many modern systems have a float switch in the drain pan or drain line that kills the system when water rises above a set level, typically about three-quarters of an inch. You notice the unit runs for 5–10 minutes, shuts off, and the thermostat shows the house is still above set temperature. The system may restart after 15–30 minutes once some water evaporates, then shut off again — cycling repeatedly without effectively cooling.
What's Actually Causing This
- Clogged condensate drain line: This is the number-one cause of indoor AC water leaks, responsible for roughly 70–80 percent of service calls related to this issue. The 3/4-inch PVC drain line carries condensed moisture from the evaporator coil to a floor drain, exterior exit, or plumbing tie-in. Over time, algae, mold, and sludge build up inside the pipe, forming a plug that blocks water flow. In humid climates like Florida or Texas, this can happen in as little as 6–8 months without maintenance. When the line clogs, the primary drain pan fills and overflows, sending water onto your floor or through your ceiling. Regular flushing every 3–6 months with distilled vinegar or a commercial condensate pan treatment tablet prevents this buildup.
- Dirty or frozen evaporator coil: A neglected air filter — unchanged for 60–90 days or more — restricts airflow across the evaporator coil. Reduced airflow drops the coil temperature below 32°F, causing moisture on the coil fins to freeze into a solid sheet of ice. When the system cycles off or the ice becomes heavy enough to shed, it melts rapidly and produces far more water than the drain pan can handle. A standard residential evaporator coil can accumulate 5–10 pounds of ice. Additionally, a dirty coil surface traps debris that wicks water sideways off the coil fins and over the edge of the drain pan instead of dripping cleanly into it.
- Cracked, rusted, or misaligned drain pan: The primary drain pan sits directly beneath the evaporator coil and is either stamped sheet metal or molded polymer. On systems older than 10–12 years, metal pans develop pinhole corrosion or cracked seams from years of wet-dry cycling. Even a hairline crack lets water bypass the drain connection and drip into the air handler cabinet or directly onto the floor. A secondary (auxiliary) pan underneath the unit catches overflow, but many installations lack a secondary pan or its drain is also clogged. Replacement pans cost $15–$80 for the part; the labor to access them in a tight attic can run $150–$300.
- Improper installation or disconnected drain fittings: Roughly 15–20 percent of leak calls trace back to installation errors — a drain line with insufficient slope (it needs at least 1/4 inch of drop per linear foot), a glued PVC joint that was never properly cemented, or a condensate pump that was never wired to the system controls. In some cases the installer ran the drain line uphill or used a trap configuration that creates an airlock. These problems often appear during the first full cooling season after installation but can also develop years later if a PVC joint creeps apart due to thermal expansion. Correcting a drain-line slope issue typically involves rerouting 5–15 feet of 3/4-inch PVC.
A 22-year HVAC veteran we consulted shared this: before you panic, find the PVC condensate drain line where it exits your house — usually near the outdoor unit or a utility-room wall — and check for a visible blockage or dry trap. In roughly 80% of his summer emergency calls, the fix was simply vacuuming the drain line from the outside termination point using a standard wet/dry shop-vac sealed against the pipe with a rag. Total fix cost: $0 if you own a vac. He also recommends installing a $12 condensate drain line safety float switch (available at any big-box store) on every system. This $12 part shuts the AC off automatically before water overflows the pan, preventing thousands in water damage. It takes about 15 minutes to install and is now code in Florida and several other states.
Step-by-Step Diagnosis
Work through these steps before calling a contractor. Each step tells you what to look for and what it means.
Turn off system and locate drain line
🔧 Headlamp, non-contact voltage testerSwitch the thermostat to OFF, then cut power at the breaker panel or the disconnect switch near the air handler — this prevents the system from cycling while you work and stops additional condensate production. Locate the indoor air handler; it may be in a closet, utility room, garage, or attic. Find the PVC condensate drain line exiting the unit — it is typically 3/4-inch white PVC pipe with a visible clean-out tee or cap near the unit. Also locate where the drain terminates outside: look for a PVC stub near your foundation, usually 6–12 inches above grade, or trace it to a laundry drain or floor drain inside. Confirm the line is PVC and not copper before proceeding. Safety note: if the unit is in the attic, use a stable ladder, wear a headlamp, and lay plywood across joists so you do not step through the ceiling.
Vacuum and flush the condensate drain line
🔧 Wet/dry shop vacuum (minimum 3 HP)Attach a wet/dry shop vacuum to the outdoor end of the drain line. Use your hand or a damp rag to create a tight seal around the PVC opening and the vacuum hose. Run the vacuum on maximum suction for 60–90 seconds. You should hear the clog break free — listen for a sudden rush of air and water entering the vacuum canister. Empty the canister and inspect: you will likely see a gelatinous algae plug, dark sludge, or debris. Next, go back to the indoor clean-out tee, remove the cap, and slowly pour one cup of distilled white vinegar into the line. Let it sit for 30 minutes to kill remaining algae, then flush with about one quart of warm water. Watch the outdoor termination point — water should flow freely within 10–15 seconds of pouring. If nothing flows, repeat the vacuum step or use a drain line brush.
Clean the drain pan and check for cracks
🔧 Flashlight, rags, waterproof HVAC sealantRemove the air handler access panel — typically held by screws or spring clips. Use a flashlight to inspect the primary drain pan beneath the evaporator coil. Soak up standing water with rags or a turkey baster, then wipe the pan clean with a rag dampened in a 50/50 water-vinegar solution. Run your fingers along all seams and corners, feeling for rough spots, corrosion pitting, or hairline cracks. Shine your flashlight from below while looking for pinpoints of light through the metal. If you find small cracks in a metal pan, you can temporarily seal them with waterproof HVAC-rated sealant (like RectorSeal or JB Weld WaterWeld), applied to a clean, dry surface and allowed to cure for 24 hours. This is a temporary fix — plan to have the pan replaced within the next 12 months. If the pan is polymer and cracked, replacement is the only reliable fix.
Inspect and replace the air filter
🔧 Replacement air filter (correct size)A dirty filter is the upstream cause of many leak problems because it leads to coil icing. Pull the filter from its slot — typically located at the return air grille or at the air handler inlet. Hold the filter up to a light source: if you cannot see light through the media, it is overdue for replacement. Standard 1-inch pleated filters (MERV 8–11) should be replaced every 30–60 days during cooling season; 4-inch media filters every 6–12 months. Install a new filter with the airflow arrow pointing toward the blower. While the panel is open, visually inspect the evaporator coil for ice. If you see a solid sheet of frost or ice on the coil, leave the system off with the blower fan set to ON at the thermostat for 2–4 hours to let it fully thaw. Place towels under the unit to catch melt water. Do not scrape ice off the coil — you will bend the delicate aluminum fins and create a recurring airflow problem.
Restore power and verify proper drainage
🔧 Condensate pan treatment tabletsAfter the drain line is clear, the pan is clean, and a new filter is installed, replace the access panel securely — an unsealed panel causes air leaks that reduce efficiency by 10–15 percent and can contribute to coil icing. Restore power at the breaker and set the thermostat to COOL at your normal set point. Let the system run for 30 minutes uninterrupted. Go outside and confirm water is dripping from the drain line termination — in moderate humidity you should see steady drips within 15–20 minutes. Check around the indoor unit base for any new water. Listen for gurgling; silence is success. As a preventive measure, pour 1/4 cup of distilled vinegar into the drain clean-out tee once per month during cooling season, or drop a condensate pan treatment tablet into the drain pan every 90 days. Set a calendar reminder so this does not slip.
When to Stop DIY and Call a Pro
Call a licensed HVAC technician immediately if you see ice covering the entire evaporator coil and the system is low on refrigerant — a DIY flush will not fix a refrigerant leak, and handling refrigerant requires EPA Section 608 certification. If the drain pan is severely corroded and integrated into the coil assembly (common on horizontal attic units), the repair involves pulling the coil — a job that takes 2–4 hours and requires recovering refrigerant, brazing copper lines, and pressure-testing the system. If water has been leaking into drywall or insulation for more than 48 hours, you face potential mold growth that may require professional remediation costing $500–$3,000 depending on spread. If the float switch repeatedly trips and you cannot identify a clog, the issue may be a failing condensate pump ($150–$350 installed) or a system design flaw requiring re-routing the drain. As a financial rule, if you have spent more than $150 in parts and two hours of your own time without resolving the leak, a professional service call ($89–$175 diagnostic fee plus $100–$400 in repairs) almost always makes more sense than continued trial and error — and protects you from the far more expensive water damage that results from a failed DIY attempt.
What Does This Repair Cost?
Costs vary by region, home age, and severity. These are national averages — always get 3 quotes.
| Repair Type | DIY Cost | Pro Cost | Emergency Premium |
|---|---|---|---|
| Clogged condensate drain line clearing | $0–$10 | $75–$200 | $150–$350 |
| Air filter replacement (frozen coil thaw) | $8–$25 | $75–$150 | $125–$250 |
| Cracked or rusted drain pan replacement | Not recommended | $150–$600 | $300–$850 |
| Refrigerant leak repair and recharge | Not recommended | $250–$1,500 | $500–$2,500 |
| After-hours / weekend emergency service call | N/A | $150–$300 | $250–$450 |
*Emergency rates (nights/weekends/holidays) run 40–60% above standard. Get 3 quotes before approving work.
Get quotes from licensed professionals in your area
Free, no obligation — compare 3+ contractors in minutesWhat Drives the Cost?
| Cost Factor | Estimated Impact | Why It Matters |
|---|---|---|
| Geographic region and humidity level | Adds $50–$300 | High-humidity markets (Houston, Miami, Atlanta) see higher demand premiums and more complex condensate issues during peak summer |
| System age (10+ years) | Adds $100–$800 | Older units often have corroded drain pans and obsolete R-22 refrigerant, which costs 3–5x more to recharge than modern R-410A |
| Attic-mounted vs. closet-mounted air handler | Adds $75–$250 | Attic units require more labor time and carry higher risk of ceiling damage if the leak isn't caught early |
| Scheduling during off-peak months (fall/spring) | Saves $50–$200 | HVAC companies offer lower diagnostic fees and faster availability when summer emergency volume drops |
In humid climates like the Gulf Coast, Southeast, and Mid-Atlantic, HVAC contractors report that oversized AC systems are a hidden cause of indoor leaks that most homeowners — and even some newer techs — overlook. An oversized unit short-cycles, cooling air too fast without properly dehumidifying it. The result is excess condensation that overwhelms the drain pan. If you've cleared the line, changed the filter, and still get recurrent leaks, ask your technician to perform a Manual J load calculation ($150–$300) to verify your system is properly sized. Contractors say roughly 30% of homes they inspect have oversized systems installed by the lowest bidder. Correcting the issue may mean adding a variable-speed blower ($800–$1,400 installed) or, in extreme cases, downsizing the unit — but it permanently solves the chronic leak and cuts energy bills 15–25%.
⚠️ Stop DIY — Call a Pro If You See These
- Water dripping through a ceiling light fixture or electrical outlet — Water in contact with live wiring creates a shock and fire hazard. This is an emergency — shut off the HVAC breaker and the circuit for that room immediately. Ignoring this can result in an electrical fire within hours and a remediation bill of $5,000–$15,000.
- Visible black or green mold around the air handler or on nearby surfaces — Active mold colonies indicate moisture has been present for at least 48–72 hours. Mold spreads rapidly in warm, humid conditions and can colonize drywall, framing, and ductwork within 7–10 days. Professional mold remediation averages $1,500–$3,500 for a contained area; whole-attic remediation can exceed $10,000.
- Sagging or soft ceiling drywall beneath the air handler — Standard 1/2-inch drywall can absorb roughly 1–2 gallons of water before it begins to structurally fail. A saturated 4×4-foot section weighs 40–60 pounds and can collapse without warning, causing injury and damaging flooring and furnishings below. Ceiling drywall replacement runs $300–$800 per section including texture matching and painting.
- Condensate pump running continuously or making grinding noises — A condensate pump that runs non-stop signals either a clogged discharge line or a failing pump motor. If the pump fails completely, the drain pan overflows within 2–4 hours of continuous cooling. Replacement pumps cost $60–$120 for the part and $100–$200 in labor — far cheaper than the water damage from a pump failure during an overnight cooling cycle.
Frequently Asked Questions
How much does it cost to fix Ac Leaking Water Inside?
The national average for fixing an AC water leak indoors runs $150–$450 for the most common repairs. A simple drain line flush costs $89–$175 as a standalone service call. Replacing a cracked drain pan ranges from $200–$600 depending on whether it is a standalone pan or integrated into the evaporator coil housing. Installing a new condensate pump runs $150–$350. The two biggest factors that move the price are unit location — attic installations add $50–$150 in labor because of access difficulty — and whether the leak has caused secondary water damage requiring drywall or insulation repair, which can push the total bill past $1,000.
Can I fix Ac Leaking Water Inside myself?
Yes, in about 60–70 percent of cases. If the root cause is a clogged condensate drain line, a homeowner with a wet/dry shop vacuum and a cup of vinegar can clear it in under an hour. Replacing a dirty air filter that caused coil icing is a five-minute job. However, you should not attempt DIY repair if the evaporator coil is frozen solid and you suspect low refrigerant, if the drain pan is integrated into the coil assembly, or if water has entered electrical components. These situations require licensed HVAC tools, EPA-certified refrigerant handling, and diagnostic equipment that costs thousands of dollars.
How urgent is Ac Leaking Water Inside?
Treat this as a same-day issue, not something you can put off for weeks. Every hour the system runs with an active leak produces roughly 0.5–1.5 gallons of condensate that has nowhere to go. Within 24 hours, you can saturate enough drywall or subfloor to create a mold-friendly environment. Within 48–72 hours, active mold colonies can begin forming in warm, humid conditions. If the water is near any electrical wiring or panel, shut the system off immediately — this elevates from urgent to emergency. Turn the system off, mop up standing water, and address the root cause within the same day.
What causes Ac Leaking Water Inside?
The most common cause — responsible for roughly 70–80 percent of cases — is a clogged condensate drain line. Algae, mold, and sludge accumulate in the 3/4-inch PVC drain pipe over time, blocking water flow and causing the drain pan to overflow. The second most common cause is a frozen evaporator coil due to a dirty air filter or low refrigerant charge; when the ice melts, it overwhelms the pan capacity. Third is a cracked or corroded drain pan, especially on systems older than 10–12 years, where metal fatigue and wet-dry cycling create small holes or seam failures that let water escape.
Will homeowners insurance cover Ac Leaking Water Inside?
Homeowners insurance typically does not cover the HVAC repair itself — the clogged drain, the broken pan, or the mechanical fix — because those fall under home maintenance. However, most standard HO-3 policies do cover resulting water damage (ruined drywall, flooring, personal property) if the leak was sudden and accidental, not the result of long-term neglect. If an adjuster determines you ignored visible signs for weeks and failed to maintain the system, the claim can be denied under the maintenance exclusion. Document the damage immediately with photos, file promptly, and keep all HVAC repair receipts. Deductibles typically run $500–$1,000, so claims make financial sense only when damage exceeds that threshold.
How do I find a licensed hvac technician for this?
First, verify the contractor holds a valid HVAC license in your state — check your state's contractor licensing board website using their license number. Second, confirm they carry general liability insurance (minimum $1 million) and workers' compensation; ask for a certificate of insurance and call the insurer to verify it is current. Third, get a written quote before any work begins — a reputable technician will charge a diagnostic fee of $89–$175 and then provide a written estimate for the repair before proceeding. Fourth, check references or online reviews on at least two platforms, looking specifically for reviews mentioning water leak or drain line repairs. Avoid any contractor who demands full payment upfront or refuses to provide a written warranty on parts and labor.
When your AC leaks water inside, three decisions matter most: First, shut the system off immediately to stop producing condensate and prevent further water damage — every hour of operation adds up to 1.5 gallons of water with nowhere to go. Second, determine whether the cause is something you can fix yourself (clogged drain line, dirty filter) or something that requires a licensed technician (frozen coil from low refrigerant, cracked integrated drain pan, failed condensate pump). Third, assess whether water has reached drywall, insulation, or electrical components, because that changes the urgency and scope from a simple HVAC repair to a potential water damage and mold remediation project.
Your recommended next step: Turn the system off now, grab a wet/dry shop vacuum, and attempt to clear the condensate drain line using the steps in this guide. If water flows freely from the outdoor termination point after flushing, replace your air filter, restart the system, and monitor for 30 minutes. If the line will not clear, if you see ice on the coil, or if water has been leaking for more than 24 hours, call a licensed HVAC technician for a diagnostic visit. A $100–$175 service call today prevents thousands in water damage and mold remediation tomorrow. Prevent future leaks by flushing the drain line with vinegar monthly and replacing your air filter every 30–60 days during cooling season.
Ready to Solve This for Good?
Get matched with pre-screened, licensed hvac technicians in your area. Free quotes, no obligation, no spam.
GET FREE QUOTES NOW