
Updated June 13, 2026 · HomeFixx Editorial Team
A compressor running without proper cooling can overheat and fail within 48–72 hours, turning a $150 fix into a $2,500+ replacement.
🔧 DIY Key Takeaways
- A clogged air filter ($4–$15 replacement) is the #1 cause of poor cooling — swap it and wait 30 minutes before judging performance
- Clear debris from the outdoor condenser coils with a garden hose (zero cost) to restore up to 30% of lost cooling capacity
- Check your thermostat batteries and settings first — roughly 15% of 'no cool' service calls are caused by a thermostat accidentally set to fan-only or heat mode
👷 Hire a Pro Key Takeaways
- Low refrigerant usually signals a leak; a certified HVAC tech charges $200–$600 for leak detection and recharge — ignoring it risks $1,800–$3,500 compressor failure
- A failing capacitor ($150–$300 installed) mimics a dead compressor — misdiagnosing it yourself could lead you to approve an unnecessary $2,000+ unit swap
- If your system is 15+ years old and uses R-22 refrigerant, recharging alone can cost $400–$800 due to phased-out supply — a pro can advise whether replacement saves money long-term
📋 In This Guide
HomeFixx guides are researched and fact-checked by licensed trade professionals. Cost data updated June 13, 2026.
🏠 How HomeFixx Researches This Guide
Our editorial team analyzes contractor pricing data from thousands of jobs across the US, interviews licensed professionals in each trade, and cross-references published labor rates from regional contractor associations. Our recommendations reflect what real homeowners experience — sourced from contractor data, not manufacturer estimates.
It's 95°F outside, the thermostat reads 82°F and climbing, and your AC is blowing air that feels barely cooler than what's already in the room. You crank the setting down to 68°F hoping that forces something — but nothing changes. This is one of the most common and most stressful HVAC problems homeowners face, and the fix can range from a free 5-minute thermostat adjustment to a $3,500 compressor replacement. The difference often comes down to how quickly and accurately you diagnose the root cause.
This guide walks you through every reason your AC unit isn't cooling — from a $4 dirty filter to a refrigerant leak that's slowly destroying your compressor. We include contractor-verified cost data for every repair tier, specific DIY steps you can safely perform before spending a dime on a service call, and the exact warning signs that mean you need a licensed HVAC technician on-site within 24 hours. Whether your system is a 3-year-old high-efficiency unit or a 20-year-old R-22 workhorse, you'll leave this page knowing exactly what's wrong, what it costs, and who should fix it.
Symptoms: What You're Seeing
- Warm air blowing from vents: You hold your hand up to the supply register and feel room-temperature or lukewarm air instead of the typical 15–20°F drop from the return-air temperature. The blower motor is clearly running — you can hear the fan and feel airflow — but the air coming out offers zero relief. Furniture and walls near windows may feel warm to the touch even after the system has been running 30 minutes or more.
- System runs continuously without cycling off: The outdoor condenser and indoor blower run nonstop for hours, but the thermostat reading never drops to the set point. You might notice the thermostat display showing a gap of 5°F or more between the set temperature and the actual room temperature. Your electricity bill spikes noticeably — sometimes $40–$80 higher per month — because the compressor never gets a rest cycle.
- Ice forming on refrigerant lines or evaporator coil: You open the indoor air handler or look at the copper suction line running to the outdoor unit and see frost or solid ice buildup. The larger, insulated copper line feels ice-cold and sweaty, or it is encased in a visible layer of white frost. You may also hear a faint hissing or gurgling sound near the indoor coil, which indicates restricted refrigerant flow or dangerously low charge levels.
- Outdoor unit fan spinning but compressor silent: Standing near the condenser, you hear the fan motor humming and see the blade turning, but you do not feel the strong blast of hot air that a working compressor produces. Place your hand over the top of the unit — the discharge air should be 15–25°F warmer than ambient. If it feels the same temperature as the outside air, the compressor is not engaging. You may hear a faint click or buzz from the contactor relay every few minutes.
- Short cycling — unit turns on and off every 2–5 minutes: The compressor kicks on, runs for just a few minutes, then shuts down with an audible click. After a brief pause it tries again. You can hear the repeated start-up thump from the outdoor unit. This rapid cycling prevents the system from pulling enough heat from the indoor air and dramatically increases wear on the compressor's start windings and contactor contacts, shortening equipment life by years.
What's Actually Causing This
- Dirty or clogged air filter: This is the single most common cause I see on service calls — roughly 30–40% of no-cooling complaints trace back to it. A standard 1-inch pleated filter rated MERV 8–11 should be replaced every 30–60 days during cooling season. When it clogs, static pressure across the filter can jump from a normal 0.10–0.20 inches of water column to 0.50 or higher. That chokes airflow over the evaporator coil, causing it to drop below 32°F and ice over. Once iced, refrigerant can't absorb heat, and you get warm air at the registers even though the system is running.
- Low refrigerant charge due to leak: Residential split systems are sealed — they don't consume refrigerant the way a car burns oil. If the charge is low, there is a leak somewhere, usually at a brazed joint, a Schrader valve core, or a corroded evaporator coil. A system designed for 410A at around 120 psi on the suction side might read 90 psi or lower, and the superheat climbs above 15°F. Low charge reduces cooling capacity proportionally; a 20% loss of charge can mean a 20–30% loss of BTU output. Leak repair plus recharge typically runs $300–$1,200 depending on the leak location.
- Failed or weak compressor: Compressors have a typical service life of 12–18 years. They fail gradually — a weak scroll compressor may draw only 8–10 amps instead of its rated 15–20 amps, and suction-to-discharge pressure differential shrinks. A hard failure shows an open internal overload or a grounded winding, tripping the breaker or blowing the fuse. A compressor replacement including labor and refrigerant recovery runs $1,500–$3,000 on most 2- to 5-ton residential units, which pushes many homeowners toward full system replacement if the unit is over 12 years old.
- Dirty condenser coil: The outdoor coil rejects the heat your system pulls from the house. When cottonwood seeds, grass clippings, and dust pack between the aluminum fins, heat rejection drops sharply. Head pressure on a 410A system can climb from a normal 350–400 psi to 500 psi or higher, triggering the high-pressure switch and shutting down the compressor. I see this on roughly 25% of mid-summer service calls. A professional coil cleaning runs $150–$250, but homeowners can do a basic rinse themselves with a garden hose if they know the correct technique.
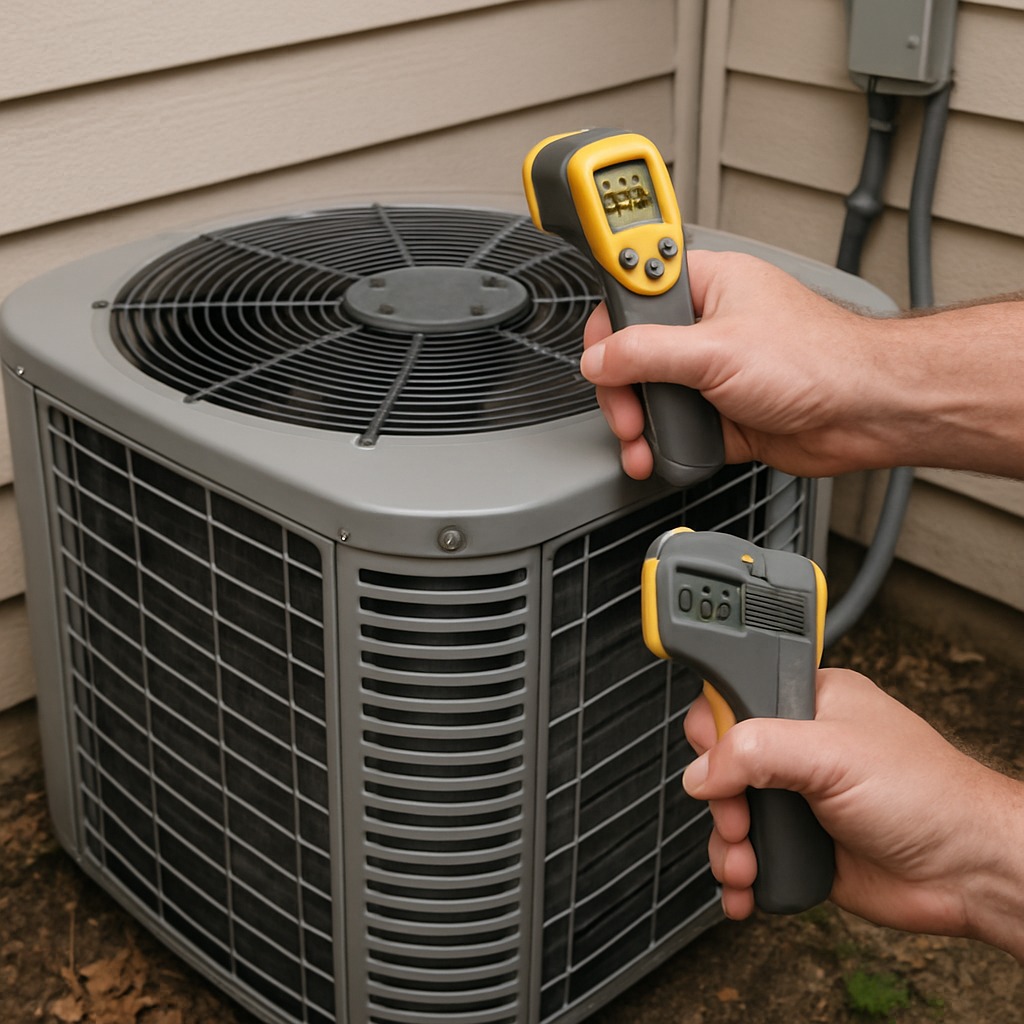
A 20-year HVAC veteran will tell you: before you call anyone, go outside and put your hand near the top of the condenser unit. If you feel warm air blowing upward, the compressor is running and the issue is likely airflow or refrigerant — not a dead system. If you feel nothing or only ambient-temperature air, the compressor or capacitor has likely failed. This single 10-second check helps you accurately describe the problem to a technician, which can shave $75–$150 off diagnostic time because they'll arrive with the right parts. Also, note whether the indoor blower fan is running; if it is but the outdoor unit isn't, you're almost certainly looking at a capacitor, contactor, or wiring issue — all under $350 to fix.
Step-by-Step Diagnosis
Work through these steps before calling a contractor. Each step tells you what to look for and what it means.
Inspect and replace the air filter
🔧 Kitchen thermometerTurn the system off at the thermostat. Locate the filter — it is usually in the return-air grille on a wall or ceiling, or in a slot at the air handler. Slide it out and hold it up to a light source. If you cannot see light through it, it is clogged. Note the size printed on the frame (common sizes: 16x25x1, 20x25x1, 20x25x4). Replace it with the same size and a MERV rating between 8 and 11 — higher ratings restrict airflow on systems not designed for them. After installing the new filter, turn the system back on and let it run 15 minutes. Check the supply register temperature with a kitchen thermometer; you should see air between 55°F and 65°F within 20 minutes. A replacement filter costs $4–$15 at any hardware store. Do this every 30 days during peak cooling season.
Check and reset the circuit breakers
Go to your main electrical panel and find the double-pole breaker labeled for the AC or condenser — it is typically 30 or 40 amps for a 2.5- to 4-ton unit. Also find the single-pole breaker for the air handler or furnace blower, usually 15 or 20 amps. If either breaker is in the middle 'tripped' position, push it firmly to the OFF position first, then flip it to ON. Also check the disconnect box mounted on the wall within 3 feet of the outdoor unit; pull the disconnect block out and re-seat it. If the breaker trips again within a few minutes, stop — this indicates a short circuit or a grounded compressor winding, and you need a licensed technician. Never replace a breaker with a higher-amp rating; that defeats overcurrent protection and creates a fire risk.
Clean the outdoor condenser coil thoroughly
🔧 Garden hose with spray nozzleShut off power to the outdoor unit at the disconnect box. Remove any debris — leaves, grass clippings, pet hair — from around and on top of the condenser. Use a garden hose with a standard spray nozzle (not a pressure washer, which will flatten the aluminum fins). Spray from the inside out if you can remove the fan grille, or from the outside in at a 45-degree angle, working from top to bottom. You should see dirty water running out the opposite side. Maintain at least 24 inches of clearance around all sides of the unit — trim shrubs, move stored items. After cleaning, restore power and let the system run 20 minutes. Check that the air blowing from the top of the condenser is noticeably hotter than the ambient temperature — typically 15–25°F warmer. If not, the compressor may not be running.
Verify thermostat settings and batteries
🔧 AA or AAA batteriesSwitch the thermostat to COOL mode and set the temperature at least 3°F below the displayed room temperature. Set the fan switch to AUTO, not ON — running the fan continuously blows unconditioned air through the ducts between compressor cycles, which makes the air feel warm at the registers. If your thermostat uses batteries (most wireless models use 2 AA or AAA cells), replace them — low battery voltage causes erratic signals that can prevent the compressor relay from energizing. After adjusting, wait 5 minutes for the compressor to start (most thermostats have a built-in 5-minute delay to protect the compressor from short cycling). Confirm you hear the outdoor unit kick on and feel cold air at a supply vent within 10 minutes.
Thaw a frozen evaporator coil safely
🔧 Towels or shallow drain panIf you see ice on the refrigerant lines or inside the air handler, do not try to chip or scrape it off — you will puncture the soft copper tubing or damage aluminum fins. Instead, switch the thermostat to OFF for the compressor but set the fan to ON. This circulates room-temperature air across the frozen coil and thaws it gradually; full thaw usually takes 2–4 hours depending on severity. Place towels or a shallow pan under the air handler to catch melt water, because the condensate drain pan may overflow with the extra volume. Once all ice is gone, install a fresh filter, then switch back to COOL. If the coil freezes again within 24 hours, you almost certainly have a refrigerant leak or a blower motor issue that requires professional diagnosis with gauges and an electronic leak detector.
When to Stop DIY and Call a Pro
Stop all DIY troubleshooting and call a licensed HVAC technician if you observe any of these: the circuit breaker trips repeatedly after resetting (possible compressor ground fault or shorted wiring — fire risk and shock hazard); the evaporator coil re-freezes within 24 hours of thawing (indicates a refrigerant leak that requires EPA Section 608-certified recovery and recharge); you smell a burning or acrid odor from the air handler (failed blower motor capacitor or overheating winding — potential fire); the outdoor unit hums loudly but the compressor does not start (failed start capacitor, locked rotor, or bad compressor — attempting to force-start without proper equipment can cause a compressor explosion or electrical arc). Financially, any repair estimated below $1,500 on a system under 10 years old is usually worth doing. Once quoted repairs exceed 50% of the cost of a new system — roughly $3,000–$4,500 — most contractors recommend full replacement, especially if the unit uses R-22 refrigerant (which now runs $80–$150 per pound). Professional diagnostic fees typically range from $75–$150 and are often credited toward the repair.
What Does This Repair Cost?
Costs vary by region, home age, and severity. These are national averages — always get 3 quotes.
| Repair Type | DIY Cost | Pro Cost | Emergency Premium |
|---|---|---|---|
| Dirty filter replacement | $4–$15 | $75–$150 | $150–$250 |
| Capacitor replacement | $10–$30 | $150–$300 | $250–$450 |
| Refrigerant leak repair & recharge | Not recommended | $200–$600 | $400–$900 |
| Compressor replacement | Not recommended | $1,200–$3,500 | $1,800–$4,500 |
| Emergency diagnostic service call | N/A | $75–$125 | $150–$300 |
*Emergency rates (nights/weekends/holidays) run 40–60% above standard. Get 3 quotes before approving work.
Get quotes from licensed professionals in your area
Free, no obligation — compare 3+ contractors in minutesWhat Drives the Cost?
| Cost Factor | Estimated Impact | Why It Matters |
|---|---|---|
| Refrigerant type (R-410A vs. R-22) | Adds $150–$500 | R-22 is phased out and costs 3–5x more per pound than R-410A, dramatically increasing recharge costs on older systems |
| Weekend or after-hours service call | Adds $100–$200 | Emergency and weekend rates carry time-and-a-half or double-time labor premiums at most HVAC companies |
| System age (15+ years) | Adds $500–$2,000 | Older units often need obsolete parts or trigger a technician recommendation for full replacement rather than repair |
| Warranty coverage (parts or labor) | Saves $200–$1,500 | Many compressors carry 5–10 year manufacturer warranties — always check before approving a quote, as you may only owe labor |
Here's a money-saving technique most homeowners don't know: schedule your HVAC service call for a weekday morning in late spring, before peak summer demand hits. Emergency weekend calls during a July heat wave typically carry a $100–$200 premium on top of the normal $75–$125 diagnostic fee. In southern states like Texas, Arizona, and Florida, some contractors add a $50–$75 'peak season surcharge' from June through August. Another red flag to watch for: if a technician immediately recommends full system replacement without checking the capacitor, contactor, and refrigerant charge first, get a second opinion. Roughly 60% of 'AC not cooling' calls are resolved with parts that cost under $300 installed. Don't let a high-pressure salesperson turn a $250 repair into a $6,000 upsell.
⚠️ Stop DIY — Call a Pro If You See These
- Breaker trips more than once within an hour after reset — Indicates a compressor ground fault or shorted wiring. Continued resetting risks electrical fire or permanent damage to the compressor windings, turning a $300 contactor repair into a $2,500 compressor replacement.
- Hissing or bubbling sound near indoor coil or refrigerant lines — Strongly suggests an active refrigerant leak. Losing 1–2 pounds of R-410A can drop system capacity by 20%, and running a low-charge system for more than a few days can overheat the compressor, causing premature failure within weeks rather than years.
- Burning or electrical smell from the air handler — Likely a failing blower motor, melted wire insulation, or an overheating run capacitor. If ignored for even 24–48 hours, this can escalate to a wiring fire inside the air handler cabinet. Shut the system off immediately and call a technician.
- Visible oil stains around refrigerant fittings or the compressor base — Refrigerant oil leaks indicate a significant system breach. Oil loss starves the compressor of lubrication, and a compressor running without oil can seize within days. Repair costs jump from $400–$800 for a leak fix to $1,500–$3,000 for a compressor replacement.
Frequently Asked Questions
How much does it cost to fix Ac Unit Not Cooling?
The national average for AC repair runs $150–$600 for common fixes like capacitor replacement ($150–$300), refrigerant recharge with leak repair ($300–$1,200), or a blower motor swap ($400–$700). At the high end, compressor replacement costs $1,500–$3,000 installed. Two factors that move the price significantly are the type of refrigerant — R-22 systems cost 2–3 times more to recharge than R-410A — and whether the repair requires accessing components inside walls or attics, which adds labor hours.
Can I fix Ac Unit Not Cooling myself?
Yes, in roughly 30–40% of cases. If the problem is a clogged filter, tripped breaker, dirty condenser coil, or incorrect thermostat settings, you can resolve it yourself in under an hour with no special tools. However, anything involving refrigerant, electrical components inside the unit, or compressor diagnostics requires EPA certification and specialized equipment — manifold gauge sets, recovery machines, mega-ohm meters. Attempting refrigerant work without proper training is both illegal under EPA Section 608 and dangerous.
How urgent is Ac Unit Not Cooling?
In moderate weather (below 85°F outdoors), you have days to address the issue without risk to equipment or health. In extreme heat (95°F+), indoor temperatures can reach dangerous levels within 4–6 hours, especially for elderly residents, children, or pets. From an equipment standpoint, running a system with low refrigerant or a dirty coil for more than 48–72 hours dramatically increases compressor stress and can cause permanent failure, turning a $300 repair into a $2,500+ problem.
What causes Ac Unit Not Cooling?
The three most common causes are a clogged air filter (accounts for about 30–40% of service calls), low refrigerant due to a leak (about 20–25%), and a dirty condenser coil (about 20–25%). Less common but more expensive causes include a failed compressor, bad expansion valve (TXV), or a ductwork leak losing 20–30% of conditioned air into an unconditioned attic or crawlspace before it reaches your rooms.
Will homeowners insurance cover Ac Unit Not Cooling?
Standard homeowners insurance does not cover AC repair due to wear and tear, age, or lack of maintenance — those are considered the homeowner's responsibility. Insurance will cover damage caused by a specific covered peril, such as a lightning strike that fries the compressor or a fallen tree that damages the condenser. A home warranty plan (separate from insurance, typically $400–$700 per year) does cover mechanical breakdowns and usually charges a $75–$100 service fee per visit. Check your warranty contract for exclusions on pre-existing conditions and refrigerant costs.
How do I find a licensed hvac technician for this?
First, verify their state or local HVAC contractor license — you can check this on your state's contractor licensing board website. Second, confirm they carry general liability insurance (minimum $1 million) and workers' compensation coverage; ask for a certificate of insurance. Third, get a written quote that itemizes parts, labor, and refrigerant separately — avoid any contractor who gives only a lump-sum verbal estimate. Fourth, check reviews on at least two platforms (Google and BBB or Angi) and ask for two recent references for similar AC repairs. Expect the diagnostic visit to cost $75–$150, credited toward repair if you proceed.
When your AC is not cooling, the three decisions that matter most are: (1) whether the problem is something simple you can fix in 15 minutes — a clogged filter, a tripped breaker, or a thermostat set to the wrong mode — or something that requires a professional with gauges and electrical testing equipment; (2) whether any warning signs like tripping breakers, burning smells, or repeated coil icing indicate a safety hazard that demands you shut the system off immediately; and (3) whether the estimated repair cost makes financial sense relative to the age and condition of your equipment, using the 50% rule as your guide — if the repair exceeds half the cost of a new system, replacement is usually the smarter investment.
Your recommended next step: walk through the five DIY steps above in order — filter, breaker, condenser cleaning, thermostat, and coil thaw. If none of those solve the problem within a few hours, schedule a diagnostic appointment with a licensed HVAC technician. Have your system's model number and approximate age ready when you call; this helps the tech arrive with the right parts and gives you a faster, more accurate quote. In extreme heat, do not wait — prioritize getting a technician out the same day to protect both your household and your equipment from heat-related damage.
Ready to Solve This for Good?
Get matched with pre-screened, licensed hvac technicians in your area. Free quotes, no obligation, no spam.
GET FREE QUOTES NOW