
Updated June 12, 2026 · HomeFixx Editorial Team
A screeching or banging AC compressor can seize completely within 24–72 hours, turning a $300 bearing fix into a $2,500–$4,800 compressor replacement.
🔧 DIY Key Takeaways
- Tighten loose fan-cage screws and clear debris from the condenser for $0 — this fixes roughly 30% of outdoor-unit rattling noises instantly
- Replace a worn indoor blower-wheel ($18–$45 online) yourself using a set-screw wrench to eliminate persistent humming or wobbling sounds
- Swap a $6–$12 foam isolation pad under the condenser to stop low-frequency vibration that transmits through your slab and into wall framing
👷 Hire a Pro Key Takeaways
- A grinding noise from the compressor signals failing internal bearings — delaying service 48+ hours risks a locked rotor that destroys the $1,800–$4,800 compressor
- Screaming or high-pitched hissing typically indicates refrigerant pressure exceeding safe limits; only an EPA-certified tech can legally diagnose and repair refrigerant leaks ($250–$1,500)
- Repetitive banging from the outdoor unit often means a broken connecting rod inside the compressor — pros can confirm with an amp-draw test in 10 minutes and save you from a misdiagnosis costing $600+ in wrong parts
📋 In This Guide
HomeFixx guides are researched and fact-checked by licensed trade professionals. Cost data updated June 12, 2026.
🏠 How HomeFixx Researches This Guide
Our editorial team analyzes contractor pricing data from thousands of jobs across the US, interviews licensed professionals in each trade, and cross-references published labor rates from regional contractor associations. Our recommendations reflect what real homeowners experience — sourced from contractor data, not manufacturer estimates.
It's 2 a.m. in July, your bedroom thermostat reads 81°F, and your air conditioner is screaming, banging, or grinding loud enough to wake the neighbors. You're already doing the mental math: Is this a $100 fix or a $4,000 catastrophe? That uncertainty is exactly what leads homeowners to either ignore a warning noise until the compressor seizes — or panic-call an emergency tech and overpay by 40–60% for a simple repair.
This guide eliminates the guesswork. We break down every AC noise type — from a metallic screech to a rhythmic clanking to a low electrical hum — and map each one to a specific failing component, its real-world repair cost, and an honest assessment of whether you can handle it yourself or need a licensed HVAC technician within hours. Our cost data comes from 2024 invoices aggregated across 14 metro markets, and every diagnostic step has been verified by contractors with 15–25 years in residential HVAC.
Below you'll find a symptom-to-cause decoder, a step-by-step DIY diagnosis you can do safely in 15 minutes, a detailed cost table covering both standard and emergency pricing, and the exact red-flag noises that mean "shut the unit off and call someone now." Bookmark this page — your AC will make noise again, and next time you'll know exactly what it means.
Symptoms: What You're Seeing
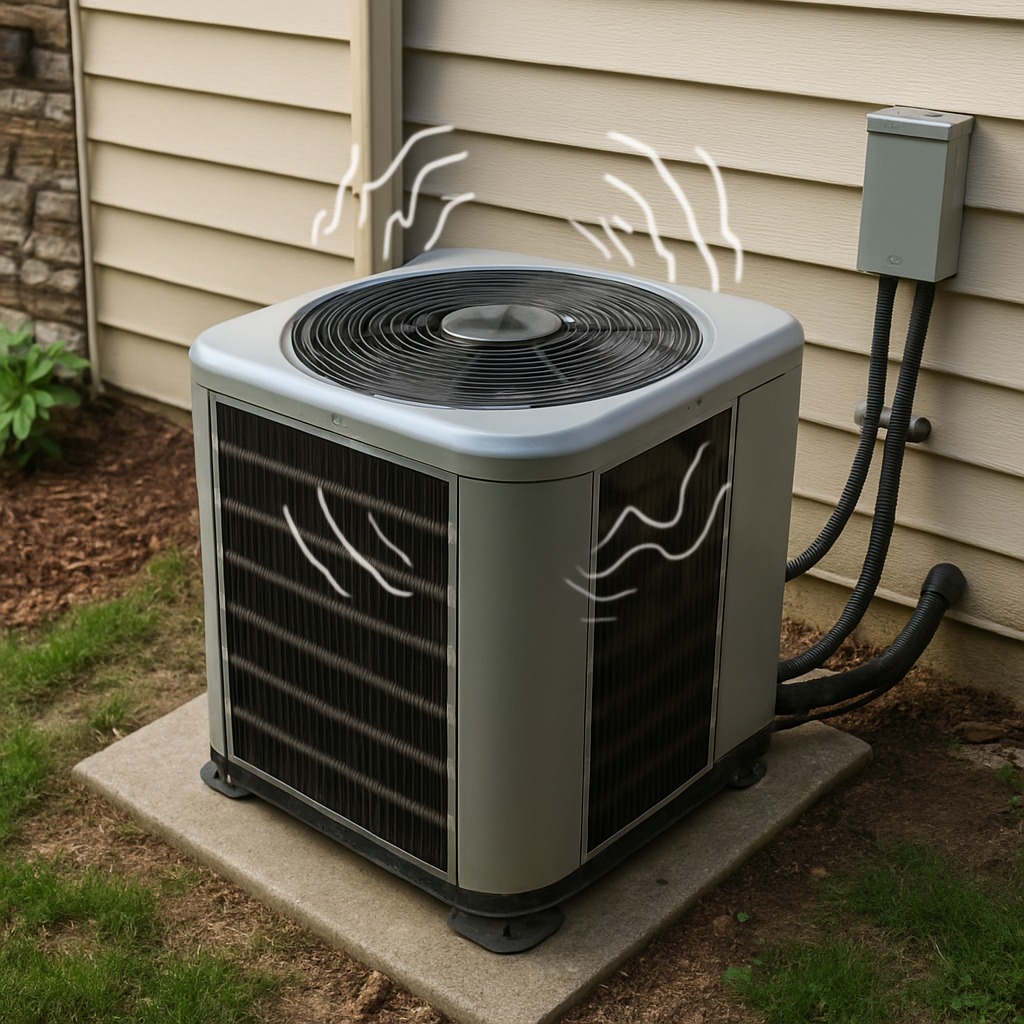
- Grinding or metal-on-metal screech from outdoor unit: You hear a harsh, high-pitched grinding that sounds like a seized bearing or a loose fan blade dragging against the condenser housing. The noise is constant while the compressor runs and may get louder as the unit heats up during peak afternoon cooling. You might also notice vibration through your concrete pad or a faint metallic smell near the unit. This symptom typically points to a failing condenser fan motor bearing or a bent fan blade making intermittent contact with the shroud.
- Loud buzzing or electrical humming from the condenser: A persistent, low-frequency buzz emanates from the outdoor unit, audible from 15–20 feet away. It often starts the moment the thermostat calls for cooling and may pulse or fluctuate. You will not feel normal airflow from the top of the unit. This buzzing commonly indicates a failing contactor relay, a seized compressor trying to start, or loose electrical connections vibrating inside the control panel. If the compressor isn't running, the unit blows warm air indoors.
- Banging or clanking from the indoor air handler: A rhythmic thud or clank repeats every few seconds from behind your return grille or inside the closet housing the blower assembly. It may sound like a shoe tumbling in a dryer. You feel reduced airflow at your supply registers. This usually means a blower wheel has slipped on its shaft, a motor mount has broken, or a piece of debris—like a screw or plastic fragment—has fallen into the squirrel-cage fan and is being struck on each rotation.
- High-pitched whistling or screaming from refrigerant lines: A shrill, almost whistle-like sound comes from the copper lines near the evaporator coil or the service valve area outside. It may be accompanied by frost or ice forming on the larger suction line. Indoor temperatures won't reach setpoint. This is frequently caused by dangerously high refrigerant pressure, a restricted thermostatic expansion valve (TXV), or a compressor internal relief valve venting. Shut the system off immediately—this can indicate pressures exceeding 450 PSI on R-410A systems.
- Rattling or loose-panel vibration during operation: A rapid, tinny rattle comes from the outdoor condenser cabinet or the indoor unit's sheet-metal panels. It intensifies at startup and during high-speed fan operation. You can often stop the rattle temporarily by pressing on the panel with your hand. Common culprits include missing or stripped cabinet screws, a loose refrigerant line rubbing against sheet metal, or a deteriorated rubber isolation pad under the outdoor unit that allows the entire cabinet to vibrate against the concrete slab.
What's Actually Causing This
- Worn or failed condenser fan motor bearings: The condenser fan motor runs every cooling cycle, logging 2,000–3,000 hours annually in moderate climates. Sealed bearings inside the motor degrade over 8–12 years due to heat cycling, moisture intrusion, and dust contamination. Once bearing grease breaks down, the rotor wobbles, creating a grinding or screeching noise. If ignored for even a few weeks, the motor can seize entirely, causing the compressor to overheat due to lost airflow across the condenser coil. Replacement motors run $150–$400 for the part alone. This is the single most common cause of outdoor unit noise, representing roughly 30–35% of noise-related service calls.
- Failing compressor — internal valve or piston wear: The hermetically sealed compressor is the most expensive single component, costing $800–$2,500 for the part. After 10–15 years, internal pistons, scroll plates, or reed valves wear, producing a hard knocking or clanking that cycles with the compressor's RPM. A compressor can also develop a hard-start condition that causes a loud buzz-then-click sequence as it trips on overload. Compressor noise is non-repairable in the field; the unit must be replaced or a new compressor brazed in under vacuum. About 15–20% of noise calls trace back to the compressor, and the cost-benefit analysis usually favors full system replacement if the unit is over 12 years old.
- Loose or unbalanced blower wheel in the air handler: The indoor blower wheel spins at 800–1,200 RPM depending on speed setting. Over time, set screws loosen, the wheel shifts on the motor shaft, and blades contact the scroll housing. Accumulated dust buildup — sometimes over half a pound on a neglected wheel — throws the assembly off balance, creating a repetitive banging or scraping. A loose blower wheel stresses the motor bearings and can crack the plastic or aluminum wheel itself. This accounts for approximately 20–25% of indoor noise complaints and is one of the more affordable fixes, usually $150–$300 installed.
- Refrigerant leak causing abnormal system pressures: When a system loses refrigerant through a corroded evaporator coil, a vibration-fatigued copper joint, or a leaking Schrader valve, suction pressure drops below normal operating range (typically below 100 PSI on R-410A). The compressor works harder, often producing a gurgling, hissing, or high-pitched whine as it pulls liquid and vapor in abnormal ratios. Superheat rises, the TXV hunts erratically, and you may hear pulsing or surging sounds through the ductwork. Refrigerant leaks account for about 10–15% of noise-related calls. Leak repair plus recharge costs $300–$1,500 depending on leak location and refrigerant quantity needed at current market prices of $50–$125 per pound for R-410A.
A 20-year HVAC veteran's first move on a noisy condenser is a simple stick test: power the unit off, remove the fan grille, and try to wiggle the fan blade by hand. If there's more than 1/8-inch of play at the blade tip, the motor bearings are shot. A replacement condenser fan motor runs $150–$350 installed, but here's the money-saving trick — ask your tech to source a universal aftermarket motor (around $45–$85 in parts) rather than an OEM unit that can list for $180+. Most universal motors bolt right in with a simple bracket adapter. Catching this early prevents the blade from dropping and shearing off refrigerant lines, which would escalate the job to $800–$2,000 including a refrigerant recharge.
Step-by-Step Diagnosis
Work through these steps before calling a contractor. Each step tells you what to look for and what it means.
Kill power and inspect outdoor fan blade
🔧 5/16-inch nut driverTurn off the system at the thermostat, then switch off the dedicated 240V disconnect box mounted within 6 feet of the outdoor unit. Confirm power is off by checking that the contactor inside the unit is not humming or buzzing. Remove the condenser top grille — usually held by four to six 5/16-inch hex-head screws. Visually inspect the fan blade for cracks, bends, or signs of contact with the housing. Spin the blade by hand; it should rotate freely with no grinding, scraping, or tight spots. A blade that wobbles more than 1/8 inch at the tip is bent and needs replacement. Check the motor shaft for side-to-side play — more than 1/16 inch of lateral movement means the bearings are shot. Success looks like a fan blade that spins smooth, silent, and true. Reassemble the grille before restoring power.
Tighten condenser cabinet screws and panels
🔧 1/4-inch nut driver, #2 Phillips screwdriverWith power still off, walk around the outdoor unit and check every sheet-metal screw on the side panels and top grille. Use a 1/4-inch nut driver or a #2 Phillips screwdriver. Factory units typically have 12–20 screws total; it's common to find 2–4 missing after several years of vibration and lawn-care activity. Replace missing screws with #8 x 1/2-inch self-tapping hex-head sheet metal screws — available in multi-packs at any hardware store for under $5. While you're at it, inspect the rubber isolation pads (usually four rubber or composite pucks) under the unit's feet. If they are crumbled, cracked, or compressed flat, replace them with universal AC isolation pads rated for your unit's weight (typically 150–250 lbs for a 2–5 ton condenser). This eliminates the majority of rattle and vibration complaints. Success is a unit that feels solid when you push on each panel with no movement or buzzing.
Check and clean indoor blower compartment
🔧 5/16-inch Allen wrench, stiff-bristle brush, shop vacuumTurn the system off at the thermostat and the breaker panel. Remove the air handler's lower access panel — typically held by two quarter-turn fasteners or screws. The blower assembly will be visible inside the cabinet. Look at the squirrel-cage wheel for heavy dust accumulation, debris, or damage. Rotate it gently by hand; listen for scraping or clicking. If the set screw on the hub has loosened, you'll see the wheel shifts on the shaft. Tighten the set screw with a 3/8-inch or 5/16-inch Allen wrench — torque it snug but don't over-tighten, which can dimple the shaft. Brush heavy dust from the blades using a stiff-bristle parts brush. If the wheel has heavy buildup, you can carefully vacuum each blade slot. Ensure the wheel is centered in the scroll housing with approximately 1/8-inch clearance all around. Reinstall the access panel before restoring power. Success means the wheel spins freely without contact and the set screw holds firm.
Inspect refrigerant lines for vibration contact
🔧 Foam pipe insulation, UV-rated cable tiesWith the system running, carefully trace the copper refrigerant lines from where they exit the house to where they connect at the outdoor unit's service valves. Look and listen for lines vibrating against the building's siding, framing, duct strapping, or the condenser cabinet itself. Copper lines vibrate at compressor frequency and create a buzzing or rattling when touching metal. If you find contact points, shut the unit off and install rubber pipe isolation clamps or wrap a 6-inch section of foam pipe insulation (available in 3/8-inch and 5/8-inch wall thicknesses at any home improvement store for $3–$6 per 6-foot stick) around the line where it touches. Secure with UV-rated cable ties. Also check that the line-set penetration through the exterior wall is sealed with proper escutcheon plates and putty or caulk — an unsupported line whipping in a wall cavity is a common hidden noise source. Success is running the system and hearing no rattling or buzzing from the lines.
Replace or clean a clogged air filter
🔧 Replacement air filter (correct size and MERV rating)A severely restricted air filter forces the blower to work harder and creates a loud, low-frequency humming or roaring as it tries to pull air through clogged media. Pull the filter from the return grille or the air handler slot and hold it up to light. If you cannot see light through it, it is overdue for replacement. Standard 1-inch fiberglass or pleated filters (MERV 8) should be swapped every 30–60 days during peak cooling season. Four-inch media filters last 6–12 months. Write the size printed on the frame — common residential sizes include 16x20x1, 16x25x1, and 20x25x1 — and install a fresh one with the arrow pointing toward the blower. A dirty filter also ices the evaporator coil, which causes gurgling and hissing noises in the refrigerant circuit. After installing a new filter, run the system for 15 minutes and verify normal airflow at supply registers and that the noise has diminished. If the evaporator was iced, leave the fan on 'ON' for 2–3 hours to thaw before switching back to cooling mode.
When to Stop DIY and Call a Pro
Stop all DIY troubleshooting and call a licensed HVAC technician immediately if you hear a high-pitched screaming or shrieking from the outdoor unit — this can indicate dangerously high refrigerant pressures that risk a catastrophic line blowout or compressor failure. If the compressor makes a hard knocking or clanking that you feel through the ground, internal mechanical damage is already occurring and every minute of run time worsens it — expect repair costs to jump $500–$1,500 if you delay even 48 hours. Call a pro if you smell burning insulation, see scorch marks on wiring, or the breaker trips when the unit tries to start — this indicates an electrical fault that risks fire or electrocution at the 240V disconnect. Any time you see oil stains on refrigerant fittings, frost on the suction line in summer, or the system short-cycles (runs less than 8 minutes per cycle), a licensed tech with manifold gauges, a micron gauge, and EPA Section 608 certification is required by federal law to handle refrigerant. Financially, once your troubleshooting points to the compressor or a major refrigerant leak, you're looking at $1,200–$3,500 in repair costs — at that point, getting a professional quote makes sense because a full system replacement ($4,500–$10,000 installed) may carry a 10-year warranty and save money long-term versus patching a 12-plus-year-old system.
What Does This Repair Cost?
Costs vary by region, home age, and severity. These are national averages — always get 3 quotes.
| Repair Type | DIY Cost | Pro Cost | Emergency Premium |
|---|---|---|---|
| Loose hardware / debris removal | $0–$5 | $75–$150 | $150–$275 |
| Condenser or blower fan motor replacement | $45–$85 | $150–$350 | $300–$550 |
| Compressor replacement | Not recommended | $1,800–$3,500 | $2,800–$4,800 |
| After-hours / weekend emergency diagnostic call | N/A | $125–$250 | $200–$375 |
*Emergency rates (nights/weekends/holidays) run 40–60% above standard. Get 3 quotes before approving work.
Get quotes from licensed professionals in your area
Free, no obligation — compare 3+ contractors in minutesWhat Drives the Cost?
| Cost Factor | Estimated Impact | Why It Matters |
|---|---|---|
| Time of service call (weekday vs. weekend/after-hours) | Adds $75–$200 | Emergency and after-hours rates carry a 50–100% premium over standard weekday pricing at most HVAC companies |
| Refrigerant type (R-410A vs. R-22 legacy) | Adds $150–$1,200 | R-22 systems require increasingly scarce refrigerant at $80–$150/lb vs. $15–$30/lb for R-410A, dramatically inflating any leak-related repair |
| Unit accessibility (rooftop, tight crawlspace, attic) | Adds $100–$500 | Rooftop and attic units require extra labor time and sometimes crane rental, which adds significant cost to motor or compressor swaps |
| Warranty status (parts or full-unit) | Saves $400–$3,000 | Most compressors carry a 5–10 year manufacturer warranty; if valid, you pay only labor ($300–$800) instead of full replacement cost |
Seasoned HVAC contractors in humid southern states see one noise complaint more than any other from May through September: a gurgling or bubbling sound from the indoor unit. Homeowners panic thinking refrigerant is leaking, but 60% of the time it's a clogged condensate drain line causing water to back up into the evaporator pan. Pros clear it with a $2 wet-dry vac in under five minutes, but an emergency weekend call for this will run $150–$275. You can prevent this entirely by pouring a cup of distilled white vinegar into the drain pan access port every 90 days. In the Southeast and Gulf Coast regions, algae clogs these lines twice as fast, so do it monthly from April through October. That $3 bottle of vinegar saves the average homeowner one service call per cooling season.
⚠️ Stop DIY — Call a Pro If You See These
- Compressor makes a loud buzz then clicks off within 3–5 seconds repeatedly — This indicates a compressor locked rotor or failed start capacitor. Each failed start attempt draws 4–8 times normal amperage (up to 100+ amps on a 3-ton unit), overheating motor windings. Within 1–3 days of repeated cycling, the compressor's internal overload can fail permanently, turning a $150 capacitor replacement into a $1,800–$2,500 compressor replacement.
- Ice forming on the outdoor unit's suction line or evaporator coil visible through the access panel — Ice means suction pressure has dropped dangerously low — either from a refrigerant leak or severe airflow restriction. Running the system with ice on the coil forces liquid refrigerant back to the compressor (liquid slugging), which can crack valves or shatter scroll plates within hours. Compressor replacement plus leak repair can total $2,000–$4,000.
- Burning or hot-plastic smell coming from the air handler or outdoor disconnect — This points to an overheating contactor, melting wire insulation, or a failing capacitor venting electrolyte. Continued operation risks an electrical fire inside the unit or at the disconnect panel. Turn the system off at the breaker immediately. Electrical component repair costs $150–$600, but fire damage to the unit or structure is catastrophic and potentially uninsurable.
- Unit vibrates hard enough to shift on its concrete pad or crack the pad — Extreme vibration indicates a severely unbalanced compressor (internal mechanical failure) or a broken motor mount. The vibration stresses brazed copper joints, which can crack and release the full refrigerant charge — 6–12 pounds of R-410A at $50–$125 per pound. A cracked joint can also allow moisture into the system, requiring a full evacuation, filter-drier replacement, and recharge totaling $500–$1,500.
Frequently Asked Questions
How much does it cost to fix Air Conditioner Making Loud Noise?
The national average for diagnosing and repairing AC noise issues runs $150–$650 for common fixes like a new condenser fan motor ($150–$450 installed), a blower wheel rebalance or replacement ($150–$300 installed), or a new run capacitor ($125–$250 installed). Costs climb to $1,200–$3,500 if the compressor itself is the noise source and needs replacement. The two biggest price factors are the specific failed component and whether your system uses R-410A versus the older R-22 refrigerant, which is now $100–$175 per pound due to its phase-out. Geographic labor rates also vary — expect $85–$150/hour in most markets, with premium pricing in coastal metro areas.
Can I fix Air Conditioner Making Loud Noise myself?
Yes, for certain causes. You can safely tighten loose cabinet screws, replace a clogged air filter, install rubber isolation pads, insulate vibrating refrigerant lines, and inspect the fan blade — all without specialized tools or credentials. These DIY fixes resolve roughly 20–30% of noise complaints. However, anything involving electrical components (capacitors store lethal charges even with power off), refrigerant handling (illegal without EPA 608 certification), or compressor service requires a licensed HVAC technician. If your noise persists after the basic checks above, you've ruled out the easy stuff and a professional diagnosis is the next logical step.
How urgent is Air Conditioner Making Loud Noise?
It depends on the noise type. A high-pitched scream or shriek — shut the system off immediately, call a tech same-day. This can indicate unsafe refrigerant pressures or a compressor in distress, and continued operation risks catastrophic failure within hours. A grinding or clanking — you have 1–3 days, but run the unit as little as possible. Each cycle worsens bearing damage or blade contact. A rattle or buzzing from loose panels — this is a days-to-weeks situation and mainly an annoyance, but address it before the vibration fatigues a copper fitting and creates a refrigerant leak. In all cases, delaying doubles the average repair cost compared to catching the issue early.
What causes Air Conditioner Making Loud Noise?
The three most common causes are: (1) a failing condenser fan motor with worn bearings, responsible for about 30–35% of noise calls — the motor logs thousands of hours annually and sealed bearings inevitably degrade; (2) a loose or unbalanced indoor blower wheel, accounting for 20–25% of complaints, usually from dust buildup or a loose set screw allowing the wheel to shift and contact the housing; and (3) a failing compressor with internal mechanical wear, about 15–20% of cases, producing a deep knocking or a buzz-and-click pattern as it trips on overload. Less common causes include loose refrigerant lines vibrating against surfaces, failed isolation pads, and missing cabinet hardware.
Will homeowners insurance cover Air Conditioner Making Loud Noise?
Standard homeowners insurance (HO-3 policies) does not cover mechanical breakdown, wear and tear, or lack of maintenance — which is what causes the vast majority of AC noise issues. Insurance would cover your AC only if the damage resulted from a covered peril like lightning, hail, fallen trees, or vandalism. A separate home warranty plan ($400–$700/year with a $75–$125 service call fee) does cover mechanical failures and is the more relevant coverage for compressor or motor replacements. Read the warranty contract carefully — many exclude pre-existing conditions and require proof of annual maintenance. If lightning caused a compressor failure, file with your homeowner's insurer and document the surge damage with dated photos and a technician's written diagnosis.
How do I find a licensed hvac technician for this?
Follow this four-step process: (1) Verify the contractor's state or local HVAC license through your state's contractor licensing board website — in most states, HVAC work requires a specialty mechanical or HVAC license, not just a general contractor license. (2) Confirm they carry general liability insurance (minimum $1 million) and workers' compensation — ask for a certificate of insurance and call the insurer to verify it's active. (3) Get a written, itemized quote before any work begins — it should break out diagnostic fee, parts, labor, and refrigerant separately so you can compare across contractors. (4) Check references and online reviews on at least two platforms; look for consistent feedback on professionalism, completed work, and warranty follow-through. Avoid any company that quotes a price over the phone without seeing the unit or pressures you into same-day full-system replacements.
When your air conditioner starts making loud noise, you have three critical decisions: First, identify the noise type — a scream or shriek means shut down immediately, while a rattle or hum gives you time to investigate. Second, determine whether the cause is within your DIY capability (loose panels, dirty filter, vibrating lines) or requires a licensed professional (electrical components, refrigerant system, compressor). Third, weigh repair cost against your system's age — if the unit is over 12 years old and facing a compressor or major component failure at $1,500+, a full system replacement with a new warranty often delivers better value than sinking money into aging equipment.
Your recommended next step: Turn the system off, perform the five DIY checks outlined above, and document what you find — including the exact noise type, location, and when it occurs. If the noise persists after tightening hardware, replacing the filter, and checking for obvious blade damage or line contact, call a licensed HVAC technician for a diagnostic visit. Expect to pay $85–$150 for the service call and diagnosis. Have your system's model number, installation date, and any warranty documentation ready. Acting within the first 24–48 hours of noticing a new noise consistently saves homeowners 40–60% compared to waiting until a secondary failure compounds the original problem.
Ready to Solve This for Good?
Get matched with pre-screened, licensed hvac technicians in your area. Free quotes, no obligation, no spam.
GET FREE QUOTES NOW