
Updated June 12, 2026 · HomeFixx Editorial Team
Unchecked basement floor cracks can allow water infiltration and accelerate foundation settling, leading to $8,000–$25,000 in structural repairs within 6–18 months.
🔧 DIY Key Takeaways
- Seal hairline shrinkage cracks (under 1/8 inch) yourself with a polyurethane or epoxy crack filler for $8–$25 per tube — clean the crack with a wire brush and vacuum before application for a lasting bond
- Monitor crack growth by placing a pencil mark at each end and measuring weekly; if a crack grows more than 1/16 inch in 30 days, skip DIY and call a structural contractor immediately
- Install a $30–$60 dehumidifier in your basement to slow moisture-driven deterioration around existing cracks and prevent efflorescence buildup that masks worsening damage
👷 Hire a Pro Key Takeaways
- Cracks wider than 1/4 inch, cracks with vertical displacement (one side higher than the other), or any crack actively leaking water require a structural engineer assessment ($300–$700) before repair — skipping this step risks covering a $12,000+ foundation failure with a $200 patch
- Professional epoxy injection for moderate cracks (1/8–1/4 inch) typically costs $250–$800 per crack and carries a 5–10 year warranty, compared to a DIY patch that may fail in under 12 months
- If multiple cracks form a pattern radiating from a center point or running parallel to foundation walls, hydrostatic pressure may be pushing up from below — a full interior drain tile and sump pump installation runs $3,500–$10,000 but prevents catastrophic water damage
📋 In This Guide
HomeFixx guides are researched and fact-checked by licensed trade professionals. Cost data updated June 12, 2026.
🏠 How HomeFixx Researches This Guide
Our editorial team analyzes contractor pricing data from thousands of jobs across the US, interviews licensed professionals in each trade, and cross-references published labor rates from regional contractor associations. Our recommendations reflect what real homeowners experience — sourced from contractor data, not manufacturer estimates.
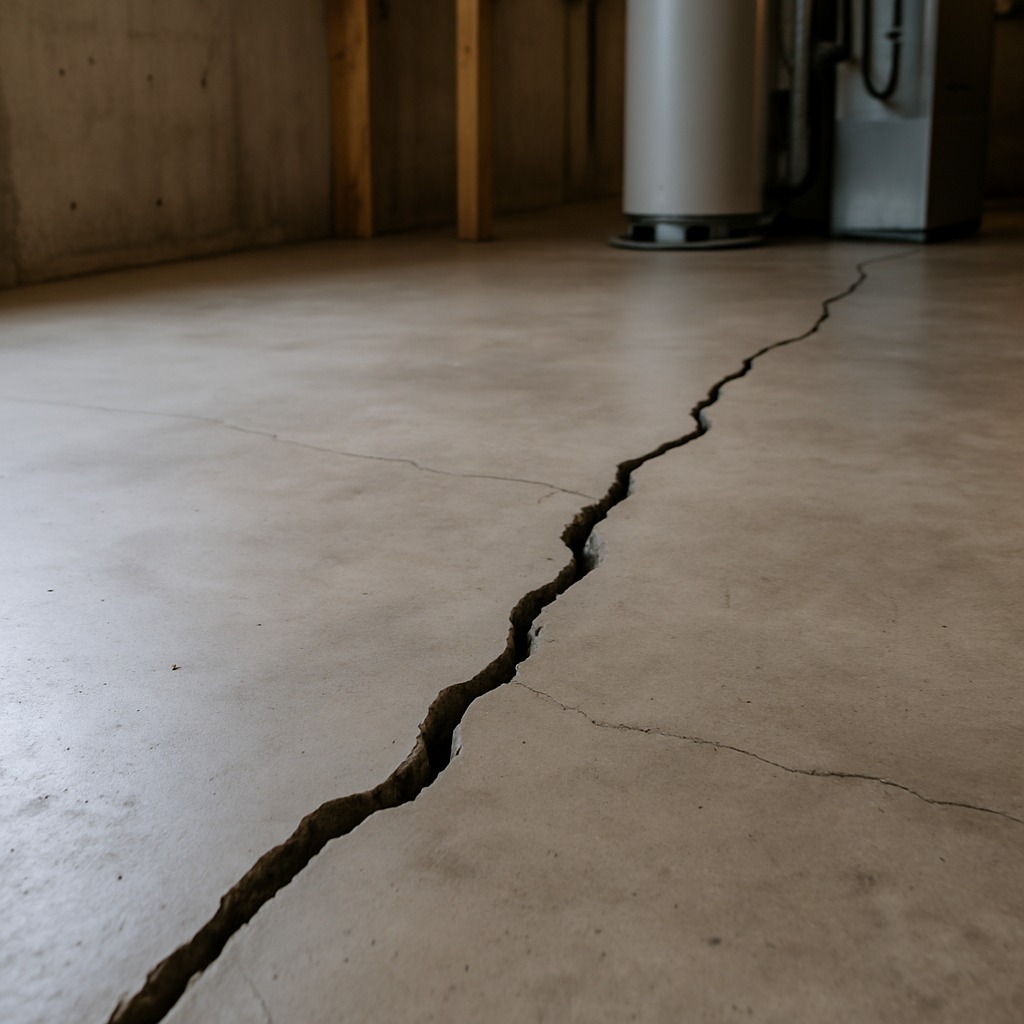
You walk down to your basement to grab holiday decorations and notice a thin crack running across the concrete floor. Maybe it's been there for months. Maybe it appeared after last week's heavy rain. Either way, that crack is asking you a question: is this a $20 fix or a $15,000 foundation emergency? The answer depends on factors most homeowner guides ignore — crack width, displacement, pattern, soil conditions, and whether water is actively migrating through.
At HomeFixx, we consulted licensed structural contractors and foundation engineers to build the most detailed basement floor cracking guide available online. You'll learn exactly how to measure and classify your crack, which types are cosmetic annoyances versus genuine structural red flags, and what each repair path actually costs — from a $8 tube of polyurethane filler to a $10,000 interior drain tile system. We include real-world price ranges verified against 2024 contractor bids from across the U.S.
This guide is urgency-rated because timing matters. A hairline shrinkage crack can wait months. A displaced crack with water seepage can undermine your foundation footings in a single season, compounding repair costs by 200–400%. Read the sections in order or jump straight to our cost tables to see where your situation falls.
Symptoms: What You're Seeing
- Hairline surface cracks: You notice thin, spider-web-like lines etched into the concrete surface, typically less than 1/16 inch wide. They often appear within the first year after the slab is poured and feel like shallow scratches when you run your fingernail across them. These cracks usually follow no particular pattern and are most visible when the floor is wet or when light hits at a low angle. They may collect dust and darken over time, making them increasingly noticeable against lighter-colored concrete.
- Wide structural cracks with vertical displacement: One side of the crack sits higher than the other, creating a noticeable lip or step you can feel underfoot — sometimes 1/8 inch or more of offset. Walking across the crack in socks or bare feet, you can feel the ridge. These cracks are often straight, running wall-to-wall or corner-to-corner, and they indicate the slab sections are settling at different rates. You may also hear a hollow sound when tapping near the crack with a hammer, suggesting a void has formed beneath the concrete.
- Damp or weeping cracks with mineral deposits: Cracks that stay wet or show white, chalky mineral buildup — called efflorescence — along their edges. You may smell a persistent musty, earthy odor near the floor, especially in humid months. The moisture wicks through the crack via hydrostatic pressure, and touching the area reveals dampness even when the rest of the slab feels dry. This efflorescence is dissolved calcium and salts leaching from the concrete, a clear sign water is actively migrating through the slab.
- Cracks radiating from floor penetrations: Cracks that originate at plumbing clean-outs, floor drains, or sump pit edges and radiate outward in a star or spoke pattern. These are stress concentration points where the concrete is weakest. You can see these cracks widen seasonally — opening in winter when the ground freezes and closing slightly in summer. Placing a piece of tape across the crack and checking it monthly reveals measurable movement, sometimes 1/32 to 1/16 inch of seasonal change.
- Crumbling or spalling crack edges: The edges of existing cracks begin to break apart, producing small chips and concrete dust on the floor. You can feel gritty debris when sweeping near the crack, and the edges crumble when you press them with a screwdriver. The concrete may have a powdery texture and a grayish-white color at the damaged zones. This indicates the concrete mix may have had too high a water-to-cement ratio or the surface was overworked during finishing, weakening the top layer.
What's Actually Causing This
- Plastic shrinkage during initial curing: Within the first 24 to 48 hours after a basement slab is poured, the surface moisture evaporates faster than bleed water can replace it — especially when air temperature exceeds 85°F, relative humidity drops below 40%, or fans and wind are present during finishing. This rapid surface drying causes the top layer to shrink while the concrete beneath remains expanded, creating tensile stress that exceeds concrete's low tensile strength (roughly 300–700 psi). The result is random pattern cracking or map cracking. This is the single most common cause of cosmetic basement floor cracks, affecting an estimated 60–70% of residential slabs to some degree. Proper curing compound application or wet curing with polyethylene sheeting prevents it, but many residential pours skip this step to save time.
- Subgrade settlement and poor soil compaction: When the gravel or soil base beneath the slab was not properly compacted before pouring — or when backfill contains organic material that decomposes over time — voids develop under the concrete. A 4-inch residential slab has very little structural capacity to bridge gaps; once a void exceeds roughly 12 to 18 inches in diameter, the unsupported concrete flexes under foot traffic, storage loads, or its own weight and cracks. This is especially common in new construction where builders backfill foundation walls with excavated soil and do not use a plate compactor to achieve 95% Standard Proctor density. Settlement cracks tend to be wider — 1/8 inch or more — and one side is often lower than the other. Roughly 20% of structural basement floor cracks trace back to poor subgrade preparation.
- Hydrostatic pressure from high water table: In regions with seasonal water tables that rise to within 2 to 4 feet of the slab bottom, water exerts upward pressure on the concrete. A standard 4-inch basement slab weighs about 48 pounds per square foot, but hydrostatic pressure can exceed 60 psi at just a few feet of head. This pressure forces water through the slab's weakest points — construction joints, cold joints, and existing hairline cracks — widening them over time. The cracks often weep or show efflorescence, and the problem worsens every spring or after heavy rainfall events. Homes without functioning perimeter drain tile or an underslab drainage mat are most vulnerable, and this cause accounts for a large share of wet-basement callbacks contractors handle.
- Frost heave and freeze-thaw cycling: In climate zones 5 through 7, frost penetration can reach 36 to 60 inches below grade. If the basement slab sits near or above the frost line — or if exterior insulation and drainage are inadequate — soil beneath the slab can freeze, expand up to 9% by volume, and lift sections of the floor. When the soil thaws, it consolidates, leaving the cracked slab unsupported. Repeated freeze-thaw cycles widen cracks incrementally each season. This is most common in unheated or partially heated basements, walkout basements near grade-level walls, and in areas where downspouts discharge water close to the foundation. Cracks caused by frost heave tend to follow the perimeter of the slab within 2 to 3 feet of the foundation wall.
After 22 years in foundation work, the single biggest mistake I see homeowners make is confusing harmless shrinkage cracks with structural settlement cracks. Here's the fast test every contractor uses: place a straightedge across the crack. If both sides are perfectly flush, it's almost always a shrinkage crack from the original concrete cure — common in slabs poured less than 4 inches thick. These cost $150–$400 to professionally seal. But if one side is even 1/16 inch higher than the other, you're looking at differential settlement, and that can mean pier underpinning at $1,200–$1,800 per pier, with most homes needing 6–12 piers. That $150 crack just became a $10,000+ project. Always check for vertical displacement before deciding your repair path.
Step-by-Step Diagnosis
Work through these steps before calling a contractor. Each step tells you what to look for and what it means.
Map and measure every crack thoroughly
🔧 Crack comparator cardBefore you touch a single tube of sealant, document every crack. Use a permanent marker to draw short hash marks across each crack at 12-inch intervals, then measure the crack width at each mark with a crack comparator card (available for under $10 at masonry supply stores). Record widths, locations, and whether one side is higher than the other. Take dated photos. This baseline tells you whether cracks are active and growing or dormant. Tape a piece of glass microscope slide or a simple crack monitor across two or three of the widest cracks and check monthly for three months. If any crack is wider than 1/4 inch or shows vertical displacement exceeding 1/8 inch, stop here — that is a professional-grade repair. This documentation also matters if you later file an insurance claim or sell the home.
Clean and prepare crack surfaces properly
🔧 Cold chisel, 3-lb hand sledge, shop vacuumUse a cold chisel and 3-pound hand sledge to undercut the crack edges slightly, creating a small inverted-V groove roughly 1/4 inch wide and 1/4 inch deep. This keying gives the filler material mechanical grip. Wear ANSI Z87-rated safety glasses and leather gloves — concrete chips are razor-sharp. After chiseling, vacuum the crack thoroughly with a shop vacuum using a crevice attachment. Remove every particle of dust, loose concrete, and debris. If the crack has been wet, use a heat gun on low setting to dry it completely — most epoxy and polyurethane fillers will not bond to damp concrete. For weeping cracks, use hydraulic cement as a temporary plug first, then proceed. A clean, dry, properly shaped crack is 90% of a successful repair; skip this step and the filler will pop out within a year.
Fill dormant cracks with rigid epoxy
🔧 Two-part structural epoxy paste, putty knifeFor dormant cracks (those that have not changed width in three months of monitoring) that are 1/16 to 1/4 inch wide, use a two-part structural epoxy paste rated for concrete — products with a tensile strength of 5,000+ psi are ideal. Mix per manufacturer's instructions on a disposable surface using a putty knife. Overfill the crack slightly, leaving material about 1/16 inch above the slab surface. Work in 3-to-4-foot sections so the epoxy does not begin to set before you finish. Curing time is typically 4 to 6 hours at 70°F; do not walk on the repair for 24 hours. In basements below 50°F, use a space heater to maintain temperature — epoxy cures too slowly in cold conditions and will remain tacky. Once cured, grind the excess flush using a diamond cup wheel on a 4.5-inch angle grinder, wearing an N95 respirator for silica dust protection.
Seal active cracks with flexible polyurethane
🔧 Self-leveling polyurethane sealant, backer rod, caulk gunActive cracks — those still moving seasonally — need a flexible sealant, not a rigid one. Use a self-leveling polyurethane sealant designed for concrete joints (look for ASTM C920 compliance on the label). Insert a closed-cell backer rod into the crack to control sealant depth; the sealant should be twice as wide as it is deep for maximum flexibility. Cut the sealant tube nozzle at a 45-degree angle to match the crack width, then apply in a steady bead using a standard caulk gun. Tool the surface smooth with a plastic spoon dipped in soapy water within 10 minutes of application. Allow 24 to 48 hours of cure time before foot traffic. This sealant remains flexible and can accommodate seasonal movement of 25% of the joint width without tearing. It prevents water infiltration and radon entry while accommodating the ongoing movement that rigid fillers cannot handle.
Apply concrete resurfacer for cosmetic finish
🔧 Polymer-modified concrete resurfacer, 1/2-inch drill with mixing paddle, long-handled squeegeeAfter all structural and flexible repairs have fully cured (wait at least 72 hours), you can restore a uniform floor appearance with a polymer-modified concrete resurfacer. Dampen the slab surface with a garden sprayer — the concrete should be saturated surface-dry, meaning damp but without standing water. Mix the resurfacer to a pourable consistency per label directions using a 1/2-inch drill and mixing paddle. Pour it onto the floor and spread with a long-handled squeegee in overlapping passes, targeting a thickness of 1/16 to 1/8 inch. Work in 30-to-40-square-foot sections to avoid lap marks. The resurfacer sets in 4 to 6 hours and is walkable in 24 hours at 70°F. One 40-pound bag covers approximately 15 to 35 square feet depending on thickness. This step is cosmetic only — it does not add structural strength. Do not apply if the basement has ongoing moisture issues, as trapped moisture will delaminate the resurfacer within months.
When to Stop DIY and Call a Pro
Stop all DIY work and call a licensed general contractor or structural engineer when any crack exceeds 1/4 inch in width, when one side of a crack is higher than the other by more than 1/8 inch, when cracks are actively growing wider month-to-month, or when multiple cracks form a pattern that suggests the entire slab is heaving or settling. Horizontal cracks in the foundation wall near the slab intersection, sticking doors in the basement, or visible bowing in walls are emergency-level symptoms that indicate foundation movement — not just slab issues. Water actively flowing through cracks under pressure (not just seeping) signals hydrostatic conditions that require a professional drainage system, typically costing $3,000 to $8,000 for interior perimeter drain tile and sump pump installation. Any time the total repair estimate approaches or exceeds $1,500, hiring a professional becomes the smarter financial decision because they carry liability insurance, offer warranties (typically 5 to 10 years), and their work does not jeopardize your homeowner's insurance coverage. Structural slab repairs involving mudjacking or polyurethane foam injection run $500 to $2,500 per slab section and require specialized equipment no homeowner should attempt to operate. If you plan to finish the basement into living space, get a structural engineer's written assessment first — it costs $300 to $800 and can save you from covering up a $15,000 problem with $10,000 of drywall and flooring.
What Does This Repair Cost?
Costs vary by region, home age, and severity. These are national averages — always get 3 quotes.
| Repair Type | DIY Cost | Pro Cost | Emergency Premium |
|---|---|---|---|
| Hairline shrinkage crack sealing (under 1/8 in) | $8–$25 | $150–$400 | $250–$600 |
| Epoxy/polyurethane injection (1/8–1/4 in cracks) | $30–$75 | $250–$800 | $500–$1,200 |
| Structural slab repair with pier underpinning | Not recommended | $5,000–$15,000 | $8,000–$20,000 |
| Emergency water intrusion / crack blowout call | N/A | $300–$750 | $500–$1,500 |
*Emergency rates (nights/weekends/holidays) run 40–60% above standard. Get 3 quotes before approving work.
Get quotes from licensed professionals in your area
Free, no obligation — compare 3+ contractors in minutesWhat Drives the Cost?
| Cost Factor | Estimated Impact | Why It Matters |
|---|---|---|
| Crack width and displacement severity | Adds $0–$12,000 | Hairline cosmetic cracks cost under $400 to seal; displaced structural cracks require underpinning that starts at $5,000 |
| Hydrostatic water pressure present | Adds $3,500–$10,000 | Active water through cracks means a drain tile and sump system is needed in addition to crack repair |
| Regional soil type (expansive clay vs. sandy) | Adds/saves $1,000–$5,000 | Expansive soils cause recurring movement requiring deeper engineering solutions; stable soils often mean a one-time fix |
| Accessibility and slab thickness | Adds $500–$3,000 | Slabs under 4 inches or obstructed by finished flooring require more labor for excavation, removal, and re-pour |
Regional soil type changes everything about basement crack urgency. In the Midwest and parts of Texas where expansive clay soils dominate, a crack that appears during dry summer months can triple in width during spring rains as the soil swells — I've seen 1/8-inch cracks blow out to 1/2 inch in a single wet season. Homeowners in these regions should budget $75–$150 annually for a soils-related inspection if they see any cracking at all. Conversely, in the Northeast on sandy or gravelly soils, shrinkage cracks often stay stable for decades with a simple $20 DIY sealant application. Knowing your soil report (often available free from your county extension office) can save you $2,000–$5,000 in unnecessary structural repairs by giving your contractor the context they need to recommend the right fix the first time.
⚠️ Stop DIY — Call a Pro If You See These
- Crack width increasing more than 1/16 inch over 3 months — Active settlement or heave is ongoing. Within 12 to 24 months, the slab can displace enough to crack plumbing lines routed beneath it, leading to sewage backups or water damage costing $3,000 to $10,000 to excavate and repair.
- Standing water or persistent dampness along crack lines — Hydrostatic pressure is actively pushing groundwater through the slab. Left unaddressed, this promotes mold colonization within 48 to 72 hours of sustained moisture, creates health hazards, and damages stored belongings. Mold remediation alone averages $1,500 to $4,000 for a basement.
- Cracks accompanied by foundation wall cracks at the same elevation — This pattern indicates the footing or entire foundation is shifting — not just the slab. Ignoring it risks wall failure and potential structural compromise of the home above. Foundation underpinning to correct this runs $5,000 to $25,000 depending on scope and can become more expensive the longer you wait as additional soil erodes.
- Slab sections rocking or feeling hollow when walked on — A void has formed beneath the concrete. The slab will eventually collapse under concentrated loads like a water heater (500+ lbs when full), washer, or heavy shelving. Void filling with polyurethane foam costs $500 to $2,000 per area now, versus $4,000 to $8,000 for full slab removal and replacement if the slab fractures into multiple pieces.
Frequently Asked Questions
How much does it cost to fix Basement Floor Cracking?
For DIY cosmetic crack filling, expect $50 to $200 in materials for a typical basement. Professional crack injection runs $300 to $800 per crack. Full slab leveling via mudjacking costs $500 to $1,500, while polyurethane foam leveling runs $800 to $2,500. Complete slab tear-out and replacement — the nuclear option — ranges from $5,000 to $12,000 for a 1,000-square-foot basement at $5 to $12 per square foot. The two biggest cost drivers are whether the problem is cosmetic versus structural and whether active water management (drain tile, sump pump) is required alongside the slab repair.
Can I fix Basement Floor Cracking myself?
Yes, if the cracks are hairline to 1/4 inch wide, dormant (not actively growing), have no vertical displacement, and no active water infiltration. DIY epoxy and polyurethane crack filling is straightforward with basic tools and costs under $100 in most cases. However, you should not attempt to self-repair structural cracks showing displacement, cracks associated with wall movement, or any situation involving active water flow. Those require professional assessment. A misdiagnosed structural crack covered with cosmetic filler creates a false sense of security and can void warranties on finished basement systems installed later.
How urgent is Basement Floor Cracking?
Hairline shrinkage cracks are not urgent — they can wait weeks or months and are largely cosmetic. Cracks that are weeping water should be addressed within days to prevent mold growth, which begins colonizing damp surfaces in 48 to 72 hours. Structural cracks with visible displacement or associated wall cracking should be evaluated by a professional within one to two weeks; every freeze-thaw cycle or heavy rain event can worsen the underlying cause. If you notice a sudden new crack wider than 1/4 inch that appeared quickly, treat it as urgent — it may indicate a broken water or sewer line beneath the slab, which can undermine the subgrade rapidly.
What causes Basement Floor Cracking?
The three most common causes are: (1) Shrinkage during concrete curing, which accounts for the majority of hairline basement floor cracks and occurs because the surface dries faster than the concrete mass below — these cracks typically appear within the first 12 months. (2) Poor subgrade compaction, where the gravel or soil base beneath the slab was not adequately compacted before the pour, leading to voids and differential settlement over time. (3) Hydrostatic water pressure pushing up from a high water table, which forces moisture through the path of least resistance and widens cracks progressively. Less common but serious causes include frost heave in cold climates and tree root pressure from large trees within 15 to 20 feet of the foundation.
Will homeowners insurance cover Basement Floor Cracking?
In most cases, no. Standard homeowner's insurance policies explicitly exclude damage caused by settling, earth movement, poor construction, and normal wear and tear — which covers the vast majority of basement floor cracking scenarios. However, if a covered peril caused the cracking — such as a sudden plumbing failure that eroded the subgrade and caused the slab to collapse — the resulting damage may be covered under your policy. Flood-related damage requires a separate flood insurance policy (NFIP or private). Always document the damage with photos and get a written diagnosis from a licensed contractor or structural engineer before filing a claim, as the burden of proving a covered peril caused the damage falls on the homeowner.
How do I find a licensed general contractor for this?
First, verify the contractor holds a current state or local general contractor license — check your state's contractor licensing board website directly rather than relying on the contractor's claim. Second, confirm they carry both general liability insurance (minimum $1 million) and workers' compensation coverage; ask for a certificate of insurance and call the insurer to verify it is active. Third, get a written, itemized quote — not a verbal estimate — that specifies the repair method, materials, timeline, warranty terms, and total cost. Fourth, request and actually call three recent references for basement or foundation work specifically, asking each reference whether the job was completed on time, on budget, and whether any callbacks were needed. Contractors who specialize in foundation and concrete work will have stronger relevant experience than a general handyman.
Fixing basement floor cracks comes down to three critical decisions: correctly identifying whether a crack is cosmetic or structural, choosing the right filler material (rigid epoxy for dormant cracks, flexible polyurethane for active ones), and knowing when the problem exceeds DIY scope and requires a licensed professional. Misdiagnosing a structural crack as cosmetic is the most expensive mistake homeowners make — it delays proper repair and allows underlying soil or water problems to worsen, sometimes doubling or tripling the eventual cost.
Your recommended next step: grab a crack comparator card and a marker, map every crack in your basement today, and monitor them for 90 days before you commit to any repair method. If any crack is wider than 1/4 inch, shows vertical offset, or is actively wet, skip the monitoring period and call a licensed general contractor or structural engineer for an in-person evaluation this week. A $300 to $800 professional assessment now can save you from a $10,000+ surprise later. Do not cover basement floor cracks with carpet, tile, or laminate until you are certain the underlying cause has been resolved — burying the evidence is not a repair.
Ready to Solve This for Good?
Get matched with pre-screened, licensed general contractors in your area. Free quotes, no obligation, no spam.
GET FREE QUOTES NOW