
Updated June 12, 2026 · HomeFixx Editorial Team
Bubbling drywall signals active moisture intrusion that can spawn toxic mold growth within 24–48 hours and compromise structural framing if not addressed.
🔧 DIY Key Takeaways
- Use a $5 utility knife to carefully puncture the lowest point of each bubble over a bucket—releasing trapped water prevents the damaged area from spreading across the entire ceiling or wall panel.
- A $30 moisture meter from any hardware store lets you map the full wet zone behind the drywall; readings above 17% mean the substrate is actively absorbing water and drying alone won't work.
- Small patches under 2 sq ft can be cut out, dried, and replaced with a $12 drywall patch kit plus $8 of joint compound—total material cost under $25 if no mold or structural damage is present.
👷 Hire a Pro Key Takeaways
- If bubbling spans more than 4 square feet or appears on a ceiling, hire a contractor immediately—sagging ceiling drywall can collapse suddenly, causing injury and $1,500–$4,000 in secondary damage to flooring and furniture.
- A professional moisture and mold assessment costs $250–$600 but can save you $3,000–$10,000 by identifying hidden leaks in plumbing or roof flashing before full-wall demolition becomes necessary.
- Insurance adjusters look for documented timelines; a contractor's written moisture report filed within 48 hours of discovery increases the likelihood of claim approval for water damage repairs averaging $1,200–$2,500.
📋 In This Guide
HomeFixx guides are researched and fact-checked by licensed trade professionals. Cost data updated June 12, 2026.
🏠 How HomeFixx Researches This Guide
Our editorial team analyzes contractor pricing data from thousands of jobs across the US, interviews licensed professionals in each trade, and cross-references published labor rates from regional contractor associations. Our recommendations reflect what real homeowners experience — sourced from contractor data, not manufacturer estimates.
You walk into the spare bedroom and notice the paint on the ceiling is raised in soft, spongy blisters. Press one with your thumb and water beads out. That bubbling drywall isn't a cosmetic nuisance—it's your home telling you there's active water where it shouldn't be, and every hour you wait increases the risk of mold colonization, structural rot, and repair bills that can climb from a simple $150 patch job to a $2,500+ ceiling replacement.
Unlike generic advice that tells you to "let it dry and repaint," this guide is contractor-verified and built around real 2024 cost data from restoration professionals across the U.S. We'll walk you through exactly how to identify the water source, measure the damage zone with a $30 tool, and decide—with confidence—whether this is a Saturday-afternoon DIY fix or a call-the-pro-right-now situation. We also break down what insurance typically covers and the documentation mistakes that get claims denied.
Whether the bubbling is on a ceiling below an upstairs bathroom, on an exterior wall after heavy rain, or in a basement prone to humidity, this guide gives you the specific next steps ranked by urgency, cost, and long-term protection for your home.
Symptoms: What You're Seeing
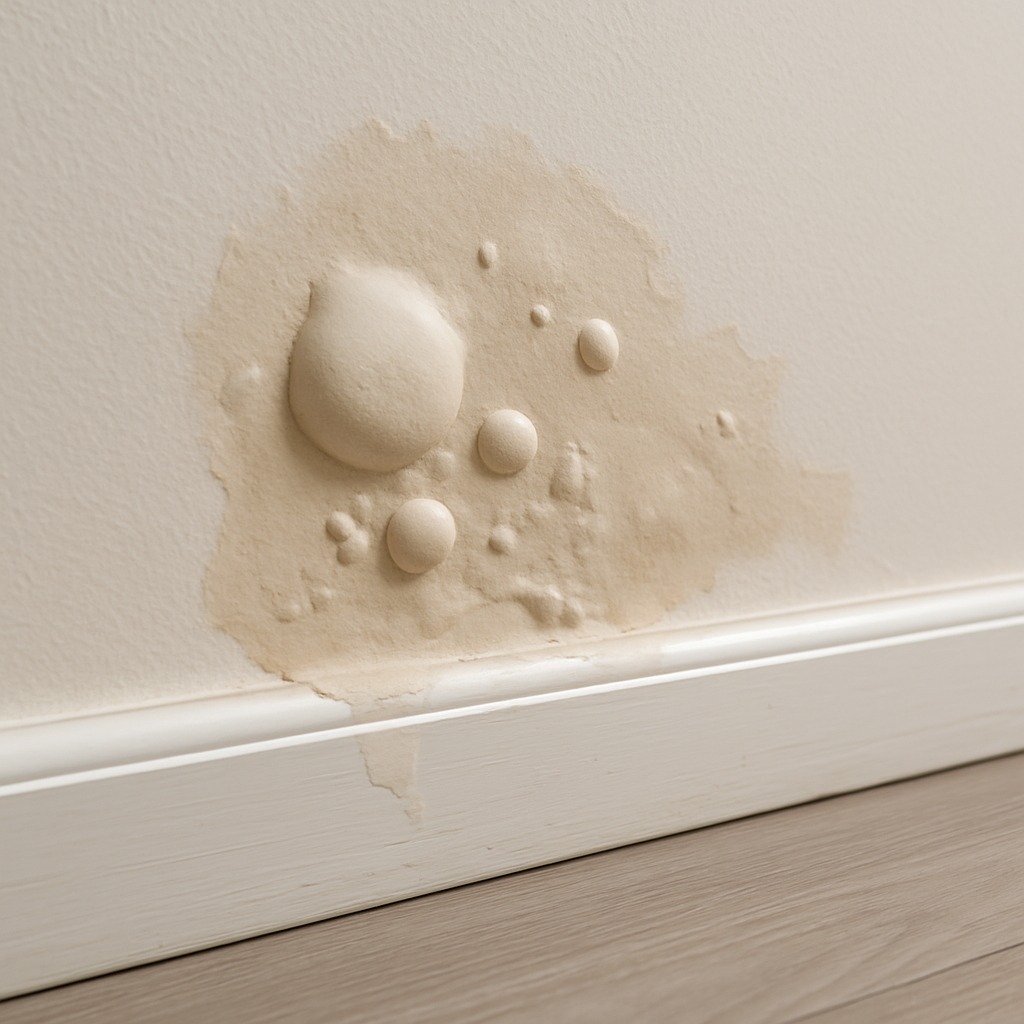
- Bubbling or blistering paint: You'll notice dome-shaped bubbles ranging from dime-sized to 6 inches or larger forming under the paint film on your ceiling or wall. The paint lifts away from the drywall surface, creating soft, pillowy pockets. When you press one gently with your finger, it may feel spongy, shift slightly, or even rupture and release trapped moisture. These bubbles often cluster near ceiling corners, around light fixtures, or directly below bathrooms and rooflines where water pathways exist.
- Brown or yellowish staining: Water rings with distinct tan, brown, or dark yellow borders appear on the drywall surface, often concentric like a coffee ring. These stains indicate minerals and sediment deposited as water saturates the gypsum core and evaporates repeatedly. The discoloration bleeds through latex paint and will telegraph through new coats if not sealed with a shellac-based primer like Zinsser BIN before repainting. Stains larger than 12 inches suggest sustained or repeated leaking.
- Soft or spongy drywall to the touch: When you push on the affected area with your thumb, the drywall yields under light pressure — healthy drywall feels rigid and gives zero flex. Saturated gypsum board loses its structural integrity, and a moisture meter reading above 1% in the panel confirms active moisture intrusion. The surface may feel cool or damp compared to surrounding dry areas, and you may notice the paper face peeling or delaminating under slight friction.
- Musty mildew smell near the damaged area: Within 24 to 48 hours of sustained moisture, mold colonies begin growing on the paper face and inside the gypsum core. You'll detect a stale, earthy, basement-like odor that intensifies in humid conditions or when HVAC runs. This smell is strongest when you stand within 2 feet of the damaged section and place your nose near the wall. If the odor persists after the surface dries, mold has likely colonized behind the panel.
- Sagging or warped drywall panels: Ceiling drywall that has absorbed significant water — typically more than a pint per square foot — will begin to bow downward visibly. You may hear faint creaking as fasteners strain under the added weight. Wall panels may develop a visible wave or warp along the seam lines. In extreme cases, a saturated 4×8 sheet of half-inch drywall can gain 30 to 50 pounds of water weight and pull free from the joists entirely, posing a collapse risk.
What's Actually Causing This
- Roof leak or failed flashing: Damaged or missing shingles, cracked pipe boots, and deteriorated step flashing at roof-to-wall transitions allow rainwater to migrate down rafters and pool on the top side of ceiling drywall. Wind-driven rain exploits gaps as small as 1/16 inch. According to insurance industry data, roof leaks account for roughly 30% of all residential water damage claims. The leak may travel several feet laterally along a rafter or truss bottom chord before dripping onto drywall, making the entry point far from the visible damage. Seasonal freeze-thaw cycles and ice dams in cold climates accelerate flashing failure.
- Plumbing leak above or inside the wall: Supply lines, drain pipes, and fixture connections inside wall and ceiling cavities develop pinhole leaks, joint failures, or slow drips that saturate drywall from behind. Copper supply lines corrode from the inside after 20 to 30 years, and CPVC fittings become brittle and crack with age. A supply-side pinhole leak at 40 to 60 psi can release 1 to 5 gallons per day without triggering an obvious drip. Toilet wax ring failures and shower pan leaks are among the most common culprits in second-floor bathrooms, often going unnoticed for weeks.
- Condensation from HVAC or poor ventilation: When warm humid air contacts a cooler drywall surface — common around poorly insulated HVAC ducts, uninsulated exterior walls, or bath exhaust fans venting into the attic instead of outside — condensation forms on or behind the panel. Attic temperatures can swing 40°F+ between day and night, creating cyclical condensation on ceiling drywall. The CDC notes that indoor relative humidity consistently above 60% promotes mold growth. This cause is frequently misdiagnosed as a roof leak because the bubbling pattern looks identical.
- Exterior wall water intrusion: Failed caulk joints around windows, cracks in stucco or brick mortar, damaged housewrap seams, and improperly kicked-out flashing allow wind-driven rain to penetrate behind the cladding and wick into drywall. Even a 1/32-inch gap in window flange sealant can admit water during a driving rain event. This is especially common on south- and west-facing walls that take the brunt of storms. The water may sit in the wall cavity for days before visible bubbling appears on the interior, by which time studs and insulation are also compromised.
After 22 years of water-damage repairs, here's what I tell every homeowner: never just scrape, repaint, and call it done. Bubbling is a symptom, not the problem. Before you touch the drywall, trace the water path. Get above the damage in the attic or open a small inspection hole 12 inches above the bubble. Nine times out of ten, the actual leak source is 3–6 feet away from where the bubble appears because water travels along joists, pipes, and vapor barriers before pooling. Skipping this step means you'll be paying for the same drywall repair twice—roughly $300–$700 wasted—when the bubble returns in 60 days.
Step-by-Step Diagnosis
Work through these steps before calling a contractor. Each step tells you what to look for and what it means.
Identify and stop the water source first
🔧 Pin-type moisture meterBefore touching the drywall, you must find and stop the active leak. Turn off the water main if you suspect plumbing — the shutoff is typically near the meter at the street or where the main enters the house. If you suspect a roof leak, place a bucket and tarp over the area from inside the attic if safely accessible. Use a moisture meter (pin-type, inserted 1/4 inch into the drywall) to map the wet area: readings above 1% indicate active moisture. Mark the perimeter of the wet zone with painter's tape. Do not proceed with drywall repair until readings drop below 1% after drying, which typically takes 48 to 72 hours with fans and a dehumidifier running. Skipping this step guarantees the repair fails.
Dry the cavity with forced air flow
🔧 Dehumidifier (50-pint capacity), high-velocity fanSet up at least one high-velocity fan aimed directly at the damaged area and run a dehumidifier rated for 50 pints per day or more in the room. If the affected area exceeds 4 square feet, cut a 6-inch inspection hole using a drywall jab saw to allow airflow into the wall or ceiling cavity — choose a spot within the damaged zone you'll be patching anyway. Monitor moisture readings every 12 hours. Target a moisture content below 0.5% in the drywall and below 15% in any exposed wood framing. Drying typically takes 3 to 5 days depending on ambient humidity. Running the HVAC system with the fan set to 'on' rather than 'auto' improves air circulation. Do not seal or paint over damp drywall under any circumstances.
Cut out and remove damaged drywall sections
🔧 Utility knife, drywall jab saw, stud finder, N95 respiratorUsing a utility knife and a drywall jab saw, cut out the damaged section in a rectangular shape, extending at least 6 inches beyond the last visible stain or soft spot on all sides. Cut edges should land on the center of a stud or joist so the new patch has solid backing for fastening — use a stud finder to locate framing. Wear an N95 respirator and safety glasses; if you see any black, green, or fuzzy growth on the backside of the removed piece, bag it in 6-mil poly sheeting immediately. Inspect exposed framing: any wood with visible mold or moisture readings above 19% needs to be treated with a borate-based fungicide like Tim-Bor before you close the cavity. Pull any wet fiberglass insulation and discard it.
Install new drywall patch and tape seams
🔧 6-inch, 8-inch, 10-inch taping knives, 120-grit sanding screenCut a new piece of drywall matching the original thickness — typically 1/2 inch for walls, 5/8 inch for ceilings. Fasten to exposed studs or joists with 1-1/4-inch coarse-thread drywall screws spaced every 8 inches, sinking each screw just below flush without breaking the paper face. Apply self-adhesive fiberglass mesh tape over all seams. Spread a first coat of lightweight all-purpose joint compound (such as USG Plus 3) with a 6-inch taping knife, embedding the tape fully. Let dry 24 hours, then apply a second coat with an 8-inch knife, feathering 2 inches beyond the first coat. Apply a third skim coat with a 10 or 12-inch knife for a smooth finish. Sand between coats with 120-grit sanding screen. A proper tape job has no visible seam edges and feathers smoothly into the existing wall plane.
Prime with stain-blocker and repaint the surface
🔧 Zinsser BIN shellac primer, 3/8-inch nap roller, work lightApply one full coat of shellac-based stain-blocking primer — Zinsser BIN is the industry standard — over the entire patched area and at least 4 inches onto the surrounding original drywall. This is non-negotiable: latex primers will not block water stains and the discoloration will bleed through your finish paint within weeks. Allow 45 minutes of dry time in a ventilated room. Then apply two coats of your finish paint, matching the existing wall color and sheen. Use a 3/8-inch nap roller for smooth walls, 1/2-inch nap for textured surfaces. If the original wall has knockdown or orange-peel texture, you will need to replicate it with a hopper gun or spray can texture product before priming. Step back at an angle with a work light raking across the surface to check for visible seam lines or texture mismatches before calling it done.
When to Stop DIY and Call a Pro
Stop DIY and call a licensed general contractor if the bubbling or water damage covers more than 10 square feet — that is the EPA threshold above which mold remediation requires professional containment and air filtration. If you see any black or dark green mold growth on framing or the backside of removed drywall, a licensed mold remediation contractor must handle the cleanup; inhaling Stachybotrys spores causes serious respiratory harm. Call a pro immediately if the ceiling drywall is actively sagging or feels heavy to the touch — a saturated 4×8 sheet can weigh 80+ pounds and collapse without warning, risking head and neck injury. If you cannot identify the water source after 30 minutes of investigation, a contractor with thermal imaging can pinpoint it in one visit for $150 to $300, saving you from tearing open walls unnecessarily. Financially, professional repair for a typical 4×8 section including leak diagnosis, drywall replacement, texture match, and paint runs $400 to $900 in most markets. When the total scope reaches $1,200 or more — usually involving multiple rooms, structural framing repair, or mold remediation — professional work is not only safer but often more cost-effective than compounding DIY mistakes.
What Does This Repair Cost?
Costs vary by region, home age, and severity. These are national averages — always get 3 quotes.
| Repair Type | DIY Cost | Pro Cost | Emergency Premium |
|---|---|---|---|
| Small patch repair (under 2 sq ft) | $20–$45 | $150–$350 | $250–$500 |
| Medium section replacement (2–8 sq ft) | $40–$90 | $350–$800 | $550–$1,200 |
| Full ceiling or wall panel replacement (8+ sq ft with mold remediation) | Not recommended | $800–$2,500 | $1,500–$3,500 |
| Emergency water extraction & same-day service call | N/A | $150–$400 | $300–$600 |
*Emergency rates (nights/weekends/holidays) run 40–60% above standard. Get 3 quotes before approving work.
Get quotes from licensed professionals in your area
Free, no obligation — compare 3+ contractors in minutesWhat Drives the Cost?
| Cost Factor | Estimated Impact | Why It Matters |
|---|---|---|
| Mold presence behind drywall | Adds $500–$3,000 | Professional mold remediation is required by code in most states; DIY removal risks spreading spores and voiding insurance coverage. |
| Source leak repair (plumbing vs. roof) | Adds $200–$1,500 | A pinhole pipe leak runs $200–$400 to fix, while a roof flashing failure can cost $800–$1,500—both must be resolved before drywall is replaced. |
| Ceiling vs. wall location | Adds $150–$600 | Ceiling work requires scaffolding or lifts, overhead joint finishing, and carries higher labor rates due to difficulty and safety concerns. |
| Insurance deductible & documentation | Saves $500–$2,000 | Homeowner policies typically cover sudden water damage; filing within 48 hours with contractor photos and moisture readings dramatically improves payout odds. |
In humid climates like the Gulf Coast or Pacific Northwest, I see homeowners mistake condensation-driven bubbling for an active leak and panic-call a plumber at $150–$250 for a service visit that finds nothing. Here's the test: tape a 12-inch square of plastic sheeting over the bubbled area with painter's tape and wait 24 hours. If moisture collects on the wall side of the plastic, you have a vapor-drive or internal moisture issue—often solved with a $200 dehumidifier and improved bathroom ventilation, not a $1,500 plumbing tearout. This single diagnostic step saves my clients an average of $400–$800 in unnecessary professional fees every year.
⚠️ Stop DIY — Call a Pro If You See These
- Ceiling drywall is visibly bowing downward more than 1/2 inch — The panel has absorbed enough water to weigh 50+ pounds and is pulling free of its fasteners. Within hours it can detach and collapse, causing injury and damaging flooring. Emergency repair with structural drying runs $1,500 to $3,000 if framing is also damaged.
- Black or dark green fuzzy growth visible on drywall or framing — Active mold colonization is underway and will spread to adjacent cavities within 7 to 14 days. Professional remediation for a single room averages $1,500 to $3,500. Delaying allows spores to enter the HVAC system and contaminate the entire home.
- Bubbling has returned within 30 days of a previous repair — The original water source was never resolved. Each wet-dry cycle further degrades framing, promotes mold, and can rot structural members. A second failure doubles repair costs and may void any warranty from the first fix.
- Electrical outlets or light fixtures near the damage feel warm, spark, or trip breakers — Water has reached electrical wiring inside the wall or ceiling cavity, creating a shock and fire hazard. GFCI protection may not exist on older circuits. Shut off the breaker immediately and call a licensed electrician before any drywall work. Water plus live wiring can be fatal.
Frequently Asked Questions
How much does it cost to fix Drywall Water Damage Bubbling?
For a straightforward patch — leak already resolved, no mold, less than 10 square feet of drywall — expect to pay $300 to $600 for a handyman or $500 to $900 for a licensed general contractor including materials, texture matching, and paint. The national average for a single-room drywall water damage repair sits around $650. If mold remediation is required, add $1,500 to $3,500. The two biggest cost drivers are the size of the affected area and whether the water source requires its own repair (a roof patch adds $250 to $600, a plumbing repair adds $200 to $800). Ceiling work costs roughly 20% more than wall work due to scaffolding and gravity.
Can I fix Drywall Water Damage Bubbling myself?
Yes, if three conditions are met: the water source is already stopped, the damaged area is under 10 square feet, and there is zero visible mold on the backside of the drywall or on framing. A competent homeowner with basic tools and a moisture meter can complete the repair in a weekend for $50 to $150 in materials. However, texture matching on ceilings — especially popcorn or knockdown — is a skill that takes practice. If you cannot match the texture, the patch will be visible. If any of the three conditions above are not met, hire a professional.
How urgent is Drywall Water Damage Bubbling?
Moderately to highly urgent, depending on whether the water source is active. If water is still flowing, this is a same-day emergency — shut off water supply or contain the leak immediately. Once the source is stopped, you have a 24- to 48-hour window before mold colonization begins on wet drywall and framing. If the drywall has been wet for more than 72 hours, assume mold is present inside the cavity even if you cannot see it. Every additional day of delay increases remediation scope and cost by roughly 10% to 15%, according to restoration industry benchmarks.
What causes Drywall Water Damage Bubbling?
The three most common causes are: (1) plumbing leaks inside walls or above ceilings, including failed supply line connections, corroded pipes, and toilet wax ring failures — these account for about 40% of cases we see; (2) roof leaks from damaged shingles, cracked pipe boots, or failed flashing, responsible for roughly 30%; and (3) condensation from HVAC ducts running through unconditioned spaces or bath fans venting into the attic rather than outside, making up about 20%. The remaining 10% comes from exterior wall intrusion through failed caulk, cracked mortar, or damaged housewrap.
Will homeowners insurance cover Drywall Water Damage Bubbling?
It depends on the cause. Most HO-3 policies cover sudden and accidental water damage — a burst pipe, a failed washing machine hose, or a sudden roof breach from a storm. In these cases, the insurer typically covers demolition, drying, drywall replacement, and painting after your deductible (commonly $1,000 to $2,500). What is NOT covered: gradual leaks, long-term seepage, condensation damage, and deferred maintenance. If the adjuster finds evidence the leak existed for weeks or months — layered water stains, established mold growth — the claim is likely denied. Document damage with dated photos immediately and file the claim within 48 hours for the best outcome.
How do I find a licensed general contractor for this?
Follow four steps: (1) Verify the contractor holds an active general contractor or home improvement license in your state — check your state's contractor licensing board website directly, not the contractor's word. (2) Confirm they carry general liability insurance ($1 million minimum) and workers' compensation; ask for a certificate of insurance and call the carrier to verify it is current. (3) Get a written, itemized quote — not a verbal estimate — that specifies leak diagnosis, drywall removal scope, mold testing if applicable, replacement materials, texture matching, priming, and painting. Compare at least three quotes. (4) Check references: ask for three completed water damage repairs in the last 12 months and call each homeowner. Online reviews are helpful but not sufficient. A reputable contractor will not pressure you to sign same-day.
Three decisions determine whether this repair goes well or becomes a money pit. First, stop the water source before you touch the drywall — every hour of active leaking expands the damage zone and your repair bill. Second, dry the cavity completely and verify moisture levels with a meter before closing the wall; trapping moisture behind a fresh patch guarantees mold and a redo within months. Third, know your limits: if the damage exceeds 10 square feet, mold is present, or the ceiling is sagging, call a licensed contractor instead of pushing a DIY repair into territory that risks your health and your home's structural integrity.
Your recommended next step is straightforward. If the leak is active right now, shut off the water main or contain the leak with a bucket and tarp, then call a licensed general contractor or plumber for same-day service. If the area is already dry and under 10 square feet with no mold, gather your materials — moisture meter, drywall, joint compound, Zinsser BIN primer — and follow the repair steps this weekend. Either way, do not paint over bubbling drywall and hope for the best. The water came from somewhere, and it will come back until the source is fixed.
Ready to Solve This for Good?
Get matched with pre-screened, licensed general contractors in your area. Free quotes, no obligation, no spam.
GET FREE QUOTES NOW