
Updated June 12, 2026 · HomeFixx Editorial Team
An actively leaking or widening foundation crack can escalate to $15,000+ in structural and water damage within weeks if left unaddressed.
🔧 DIY Key Takeaways
- Monitor hairline cracks (<1/16 inch) by marking endpoints with pencil and dating them — a $0 tracking method that tells you if a crack is active before you spend on repairs
- Seal non-structural hairline cracks yourself using polyurethane or epoxy injection kits ($30–$80 per crack) available at any big-box store — this stops minor water seepage and buys you time
- Install a $25 crack gauge (also called a tell-tale) across a suspect crack to measure movement down to 1mm — if it moves more than 1/16 inch in 60 days, skip DIY and call a structural engineer
👷 Hire a Pro Key Takeaways
- Horizontal cracks wider than 1/4 inch signal lateral soil pressure failure — carbon fiber strap reinforcement runs $400–$800 per strap installed, and delaying repair risks a $20,000+ wall rebuild
- A licensed structural engineer's assessment ($300–$700) is non-negotiable for stair-step cracks in block foundations or any crack showing vertical displacement — this report also protects you during home resale
- Exterior waterproofing with foundation excavation and membrane application costs $5,000–$15,000 but is the only permanent fix for recurring water infiltration through structural cracks — interior sealants alone will fail within 2–5 years
📋 In This Guide
HomeFixx guides are researched and fact-checked by licensed trade professionals. Cost data updated June 12, 2026.
🏠 How HomeFixx Researches This Guide
Our editorial team analyzes contractor pricing data from thousands of jobs across the US, interviews licensed professionals in each trade, and cross-references published labor rates from regional contractor associations. Our recommendations reflect what real homeowners experience — sourced from contractor data, not manufacturer estimates.
You head downstairs to grab something from storage and spot it: a crack running across your basement wall, maybe with a faint water stain spreading from one end. Your stomach drops. Is this a cosmetic nuisance or the start of a catastrophic structural failure? The answer depends on exactly what type of crack you're looking at — and most online guides lump them all together, costing homeowners thousands in unnecessary repairs or, worse, leaving dangerous cracks unaddressed until a $3,000 fix becomes a $15,000 emergency.
This HomeFixx guide changes that. We break down every crack pattern — vertical, horizontal, stair-step, and diagonal — with urgency ratings verified by structural engineers and foundation contractors with 15+ years of field experience. You'll learn which cracks you can safely seal yourself for under $80, which ones demand a $300–$700 structural engineering report, and exactly how repair costs break down from DIY epoxy injection to full exterior excavation and waterproofing. We also reveal the single drainage fix under $600 that eliminates the root cause of nearly half of all basement water intrusion — a step most contractors won't mention because it doesn't generate a big invoice.
Whether your crack appeared last night after heavy rain or has been slowly growing for years, this guide gives you a clear, cost-conscious action plan so you protect both your home's structure and your bank account.
Symptoms: What You're Seeing
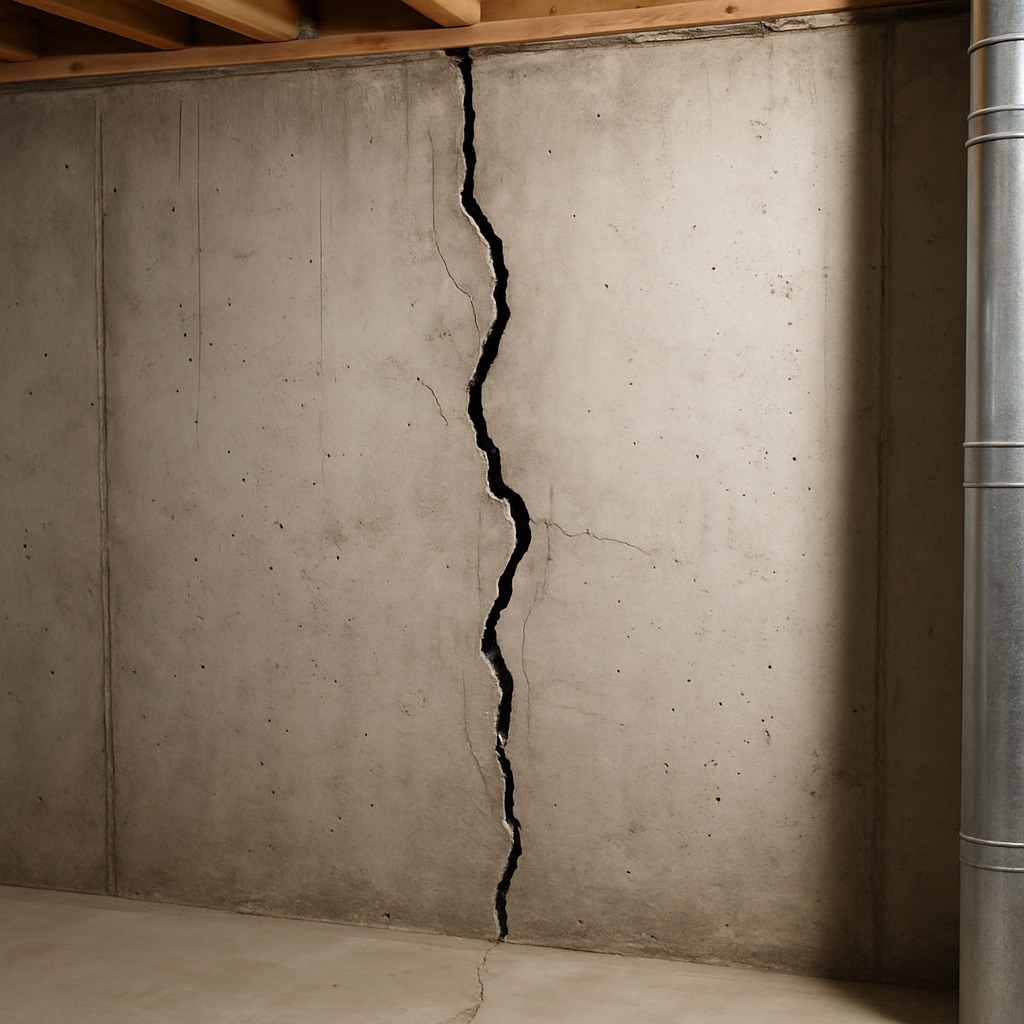
- Visible hairline or wide cracks in poured concrete or block walls: You notice thin lines — sometimes as narrow as 1/64 inch, sometimes as wide as a pencil — running vertically, horizontally, or in a stair-step pattern along mortar joints. Fresh cracks expose lighter-colored concrete underneath. You may see mineral deposits (white efflorescence) crusted along the edges, which is dissolved calcium leaching out of the concrete as water passes through.
- Water seepage or damp streaks along crack lines: After rain or snowmelt you see dark wet streaks tracing the crack, sometimes with active dripping. The wall feels cold and damp to the touch within six inches of the crack. You may notice a musty, earthy smell — that is moisture trapped behind finished walls feeding mold colonies. Humidity readings near the crack often exceed 60% even when the rest of the basement sits at 45%.
- Sticking doors and misaligned window frames in basement: Interior doors in the basement — or on the floor directly above — suddenly drag on the frame or refuse to latch. Window frames look visibly racked, with a gap wider at the top than the bottom by 1/4 inch or more. This indicates differential settlement is shifting the structure. Running your finger along the top of a door frame, you feel the gap change from one side to the other.
- Bowing or bulging of basement wall inward: Standing at one end of the wall and sighting down its length, you see a visible inward bow — sometimes 1/2 inch to 2 inches at the midpoint. The wall may feel warm from exterior soil pressure. In block walls, horizontal cracks appear at roughly the mid-height course. A four-foot level placed against the wall rocks noticeably, confirming deflection that a flat wall would not produce.
- Gaps between basement floor slab and wall: You notice a separation where the floor meets the wall, sometimes 1/8 inch to 1/2 inch wide. Inserting a putty knife into the gap, it slides in easily. During heavy rain, water wells up through this joint. The gap may widen seasonally — larger in late winter when frost pushes the wall outward and smaller in dry summer months — confirming ongoing soil movement beneath the footing.
What's Actually Causing This
- Hydrostatic pressure from saturated soil: When the soil surrounding your foundation becomes saturated — from poor grading, clogged gutters, or a high water table — hydrostatic pressure builds against the wall. Poured concrete can handle roughly 3,000–4,000 PSI in compression but is weak in tension. Water-saturated clay soils can exert 500+ pounds per square foot of lateral pressure. Over time this pressure exceeds the wall's tensile strength and cracks form, typically horizontal at mid-height on poured walls or in stair-step patterns along block mortar joints. This is the single most common cause of structural basement cracks, responsible for roughly 60% of cases contractors see.
- Concrete shrinkage during initial curing: Portland cement concrete shrinks as it cures — typically 0.04% to 0.06% of its length, which works out to roughly 1/2 inch over a 40-foot wall. If control joints were not saw-cut within 6–12 hours of placement, the concrete chooses its own stress-relief points and cracks randomly. These shrinkage cracks are almost always vertical or slightly diagonal, hairline thin (under 1/16 inch), and non-structural. They account for roughly 20% of all basement cracks. They are cosmetic but can still admit water if not sealed, so they should not be completely ignored.
- Differential settlement beneath footings: When part of the foundation sits on fill soil, expansive clay, or poorly compacted backfill, one section of the footing can settle 1/4 inch to 1 inch more than the adjacent section. This creates shear stress in the wall and produces diagonal cracks that typically angle from a corner of a window or door toward the footing at roughly 45 degrees. Homes built on cut-and-fill lots or near buried stream beds see this most often. Structural engineers report differential settlement as the cause in roughly 15% of significant foundation crack cases, and it almost always requires professional remediation such as helical piers or push piers to stabilize.
- Frost heave and freeze-thaw cycling: In cold climates (USDA zones 3–6), the frost line can reach 36–60 inches deep. If footings were poured above the frost line or if saturated backfill freezes against the wall, expansion forces of roughly 50,000 pounds per square foot can push concrete inward or upward. Each freeze-thaw cycle widens existing micro-cracks. Over 10–20 winters, a hairline crack can grow to 1/4 inch or more. Contractors in the northern U.S. and Canada see frost-related cracking in roughly 25% of homes built before modern code depths were enforced.
After 22 years of foundation work across the Midwest, here's something most guides won't tell you: the direction a crack runs matters more than its width. Vertical cracks in poured concrete are usually shrinkage-related and non-structural — a $60 epoxy kit handles them fine. But a horizontal crack at mid-wall height, even a narrow one, tells me hydrostatic soil pressure is bowing the wall inward. I've seen homeowners ignore a 1/8-inch horizontal crack for two seasons, then face a $12,000–$18,000 wall stabilization job with steel I-beams. My rule: vertical and narrow often means monitor, horizontal at any width means call a structural engineer this week. That $300–$700 engineering report can save you five figures.
Step-by-Step Diagnosis
Work through these steps before calling a contractor. Each step tells you what to look for and what it means.
Map, measure, and monitor every crack
🔧 Crack comparator card or feeler gaugesBefore you touch anything, document the problem. Use a pencil to mark both ends of every visible crack and write the date next to each mark. Measure the width at the widest point with a crack comparator card (available for under $10) or a set of feeler gauges. Record measurements to the nearest 1/64 inch. Take clear, well-lit photos with a ruler held alongside the crack for scale. Repeat this measurement every 30 days for at least 90 days. If a crack grows more than 1/16 inch in 90 days, stop DIY work and call a structural engineer. This monitoring step is critical — it tells you whether you are dealing with a dormant shrinkage crack safe to seal yourself or an active structural movement that demands professional intervention. Do not skip it.
Clean and prepare the crack surface
🔧 Cold chisel, 3-lb hand sledge, shop vacuumUse a cold chisel and a 3-pound hand sledge to open the crack into a V-shaped groove roughly 1/4 inch wide and 1/2 inch deep along its full length. This is called chasing the crack, and it gives the repair material a mechanical bond instead of relying on surface adhesion alone. Wear ANSI-rated safety glasses and leather work gloves — concrete chips are razor-sharp. After chiseling, vacuum the groove thoroughly with a shop vacuum fitted with a crevice nozzle. Then wipe the groove with a damp sponge and let it dry for 30 minutes. Any dust, loose aggregate, or standing water left in the groove will prevent the sealant from bonding. A properly prepared crack looks like a clean, uniform channel with rough-textured sides and no powder residue.
Inject or fill crack with correct material
🔧 Polyurethane injection kit or hydraulic cementFor non-structural cracks under 1/4 inch wide, use a low-pressure polyurethane injection kit. These kits include surface-mount injection ports spaced every 6–8 inches along the crack and a two-part polyurethane resin that expands to fill voids and remains flexible after curing — important because it accommodates slight seasonal movement. Attach the ports with the provided epoxy paste and let it cure for 6–8 hours. Then inject resin starting at the lowest port, moving upward, capping each port as resin appears at the next one. For wider dormant cracks (1/4 to 1/2 inch) that are not actively leaking, hydraulic cement works well — mix it to a putty consistency and press it firmly into the groove with a margin trowel. It sets in 3–5 minutes and resists up to 30 PSI of water pressure. Do not use standard caulk — it has zero structural value and peels within one season.
Manage exterior water away from foundation
🔧 Round-point shovel, tamper, downspout extensionsEighty percent of basement water problems are caused by surface water, not a rising water table. Walk the exterior perimeter and verify that soil grade slopes away from the foundation at a minimum of 6 inches of fall over the first 10 feet — this is the International Residential Code (IRC) requirement. If grade is flat or sloping toward the house, add compacted fill dirt (not topsoil, which settles) to rebuild the slope. Next, check every downspout. Each one should discharge into an extension or splash block that moves water at least 4 feet from the wall — 6 feet is better. A single 1,000-square-foot roof section can dump 600 gallons during a one-inch rainfall; that water hitting the foundation is your enemy. Clean gutters of debris so they do not overflow against the fascia and cascade down the wall. These exterior corrections often stop crack leakage completely without any interior work at all.
Apply interior waterproof coating for backup protection
🔧 Stiff-bristle masonry brush, cementitious waterproof coatingAfter the crack repair has cured at least 24 hours, apply a cementitious waterproof coating to the interior wall as a secondary moisture barrier. Products like Drylok Extreme or Xypex are designed for negative-side (interior) waterproofing on bare concrete or block. Dampen the wall with a spray bottle first — these coatings bond chemically through crystalline growth and need moisture to activate. Apply the first coat with a stiff-bristle masonry brush, working the material into pores and pinholes. Coverage is roughly 75–100 square feet per gallon on the first coat. Wait 24 hours, then apply a second coat perpendicular to the first. The finished wall should show zero pinholes; hold a flashlight at a low angle to check. This coating can resist up to 10 PSI of hydrostatic pressure and provides an extra line of defense if the crack repair ever weakens. Always work in a ventilated space and wear an N95 respirator to avoid inhaling cite cement dust.
When to Stop DIY and Call a Pro
Stop all DIY work and call a licensed structural engineer or foundation contractor immediately if you see any of the following: horizontal cracks in poured concrete or block walls, any crack wider than 1/4 inch, any crack that grows more than 1/16 inch in a 90-day monitoring period, a wall bowing inward more than 1/2 inch measured with a straight edge, stair-step cracks spanning more than 4 feet in block walls, or active water flowing (not just seeping) through a crack during dry weather. A bowing wall can collapse inward without warning, creating a life-safety hazard and potentially causing the entire structure above to shift. Financially, a single crack injection by a pro runs $300–$800. But if you ignore structural movement and the wall fails, full wall reconstruction costs $15,000–$30,000 and pier installation adds $800–$1,500 per pier with most homes needing 6–12 piers. The break-even point is clear: once total DIY material costs exceed $500 or the problem is structural, hiring a professional saves money long-term. Always get a written structural assessment before signing any repair contract — many engineers charge $300–$500 for a report that protects you from unnecessary upselling by repair companies.
What Does This Repair Cost?
Costs vary by region, home age, and severity. These are national averages — always get 3 quotes.
| Repair Type | DIY Cost | Pro Cost | Emergency Premium |
|---|---|---|---|
| Hairline crack epoxy/polyurethane injection | $30–$80 | $250–$500 | $400–$750 |
| Carbon fiber strap reinforcement (per strap) | Not recommended | $400–$800 | $600–$1,200 |
| Interior drain tile and sump pump system | Not recommended | $3,000–$7,000 | $5,000–$10,000 |
| Exterior excavation, membrane & waterproofing | Not recommended | $5,000–$15,000 | $8,000–$20,000 |
| Steel I-beam or pier wall stabilization | Not recommended | $7,000–$18,000 | $10,000–$25,000 |
| Emergency structural assessment call | N/A | $300–$700 | $500–$1,000 |
*Emergency rates (nights/weekends/holidays) run 40–60% above standard. Get 3 quotes before approving work.
Get quotes from licensed professionals in your area
Free, no obligation — compare 3+ contractors in minutesWhat Drives the Cost?
| Cost Factor | Estimated Impact | Why It Matters |
|---|---|---|
| Crack type (vertical vs. horizontal) | Saves $2,000–$10,000 | Vertical shrinkage cracks rarely need structural repair; horizontal cracks nearly always do — correct diagnosis prevents overspending |
| Exterior vs. interior access | Adds $3,000–$8,000 | Exterior excavation requires heavy equipment, landscaping restoration, and 2–5 days of labor compared to interior-only methods |
| Soil type and regional conditions | Adds $1,000–$5,000 | Expansive clay soils in TX, OH, and Carolinas require deeper drainage solutions and sometimes helical piers that sandy-soil regions don't |
| Permit and engineering report requirements | Adds $300–$1,500 | Many municipalities require a stamped engineer's report and permit for structural foundation work — skipping this can void insurance and kill resale |
Here's a money-saving technique I share with every homeowner: before you hire any foundation contractor, get your grading and gutters fixed first. I estimate 40% of the basement crack water-intrusion calls I respond to are caused by poor surface drainage, not a failing foundation. Re-grading soil so it slopes 6 inches over the first 10 feet away from your house costs $500–$1,500 with a landscaper, and adding downspout extensions is a $10-per-piece DIY job. I've had clients cancel $8,000 interior drain tile quotes after a $600 grading fix stopped all moisture. Also, in clay-heavy soils common across Texas, Ohio, and the Carolinas, seasonal soil expansion and contraction cause more cosmetic cracks than actual structural failure — know your soil type before you panic-hire.
⚠️ Stop DIY — Call a Pro If You See These
- Horizontal crack at mid-height of poured wall with measurable inward bow — This indicates lateral soil pressure exceeding the wall's capacity. Without bracing or wall anchors installed within 6–12 months, the wall can deflect past 2 inches and risk sudden collapse. Repair cost escalates from $3,000–$5,000 for carbon fiber straps to $20,000+ for full wall replacement if ignored.
- Crack actively widening — measurable growth over 60–90 days — An actively growing crack means ongoing foundation movement from settlement, heave, or lateral pressure. Waiting one more year can increase pier installation costs by 30–50% because more piers are needed as settlement worsens. Structural damage to framing, plumbing, and HVAC above can add $5,000–$15,000 in secondary repairs.
- Water flowing through crack under pressure during dry weather — This typically means a broken underground drain line, a rising water table, or failed exterior waterproofing membrane. Left unaddressed, sustained water intrusion promotes mold growth within 24–48 hours, which can spread behind finished walls and cost $3,000–$10,000 for professional mold remediation. Structural steel and wood framing in contact with the moisture will corrode or rot within 1–3 years.
- Multiple diagonal cracks radiating from window or door corners — Radiating diagonal cracks strongly indicate differential settlement — one section of the footing is sinking faster than the rest. This pattern is progressive: each season of wet-dry cycling drives additional movement. Within 2–5 years doors and windows become inoperable, slab floors crack, and plumbing lines embedded in the slab can shear, causing sewage backups that cost $5,000–$12,000 to repair.
Frequently Asked Questions
How much does it cost to fix Foundation Crack In Basement?
For a simple hairline shrinkage crack sealed with polyurethane injection, expect $150–$400 DIY or $300–$800 professionally. Structural crack repair — involving carbon fiber straps, wall anchors, or epoxy injection by a licensed contractor — ranges from $2,000 to $7,000 per wall nationally. If piers are needed, costs run $800–$1,500 per pier, with most homes requiring 6–12 piers, putting the total at $5,000–$18,000. The two biggest price movers are crack type (cosmetic vs. structural) and access difficulty (finished basement walls add $1,000–$3,000 for demolition and rebuild of finishes).
Can I fix Foundation Crack In Basement myself?
Yes — but only if the crack is non-structural. That means vertical or slightly diagonal, less than 1/4 inch wide, stable (not growing over 90 days of monitoring), and in a wall with no visible bowing. A DIY polyurethane injection kit costs $30–$80 and works well on these cracks. If the crack is horizontal, wider than 1/4 inch, actively growing, or accompanied by wall deflection, you must hire a structural engineer or licensed foundation contractor. Attempting structural repair yourself risks personal injury and voiding your homeowner's insurance coverage.
How urgent is Foundation Crack In Basement?
A dry, hairline shrinkage crack is low urgency — you have weeks to months to address it. A leaking crack during rain should be managed within days to prevent mold growth, which begins colonizing within 24–48 hours of sustained moisture. A horizontal crack with wall bowing or an actively widening crack is a structural emergency — contact a professional within 24–48 hours. Every freeze-thaw cycle or heavy rain event accelerates damage once the concrete is compromised. Waiting one full season typically increases repair costs by 20–40%.
What causes Foundation Crack In Basement?
The three most common causes are hydrostatic pressure from saturated soil pushing against the wall (responsible for roughly 60% of structural cracks), concrete shrinkage during initial curing (responsible for roughly 20% of all cracks and almost always cosmetic), and differential settlement where part of the footing sinks on poorly compacted or expansive soil. In cold climates, freeze-thaw cycling is a significant contributing factor that widens existing cracks over successive winters. Poor exterior drainage — flat grading, clogged gutters, short downspouts — is a contributing factor in nearly every case.
Will homeowners insurance cover Foundation Crack In Basement?
Standard homeowner's insurance policies (HO-3) do not cover foundation cracks caused by settling, shrinkage, hydrostatic pressure, or normal wear and tear — these are specifically excluded. Insurance may cover foundation damage caused by a sudden, covered peril such as a vehicle impact, explosion, or in some policies, sudden plumbing failure that erodes soil beneath the footing. Flood damage to foundations is covered only if you carry a separate FEMA-backed flood policy. Always file a claim before beginning any repairs so the adjuster can inspect. If a contractor tells you insurance will definitely cover foundation repair, get a second opinion — it rarely does.
How do I find a licensed general contractor for this?
Step one: verify the contractor holds an active license in your state by searching your state's contractor licensing board website — in most states this is a free online lookup. Step two: confirm they carry general liability insurance (minimum $1 million) and workers' compensation; ask for a certificate of insurance and call the carrier to verify it is current. Step three: get at least three written quotes that specify the repair method, materials, warranty terms, and timeline — avoid any contractor who quotes over the phone without an on-site inspection. Step four: check references by calling at least two past clients who had similar foundation work done in the last 12 months, and verify the contractor's rating on the Better Business Bureau website. A reputable foundation contractor will also offer a transferable warranty of 10–25 years on structural repairs.
Foundation cracks in your basement come down to three critical decisions: first, determining whether the crack is cosmetic or structural by monitoring width, direction, and growth over at least 90 days; second, choosing the correct repair method — polyurethane injection for stable, non-structural cracks under 1/4 inch, and professional structural repair for anything horizontal, bowing, actively growing, or wider than 1/4 inch; and third, correcting the exterior water management that caused or worsened the problem in the first place, because even the best interior repair will fail if thousands of gallons of roof runoff continue to saturate the soil against your foundation wall every year.
Your recommended next step is straightforward: go to the basement right now with a flashlight, a pencil, and a ruler. Mark and measure every crack you can find. Take dated photos. If everything is vertical, hairline, and dry, you can confidently tackle a DIY injection repair this weekend for under $100. If you see any horizontal cracking, wall bowing, cracks wider than 1/4 inch, or active water, skip the DIY aisle and call a licensed structural engineer for an assessment — the $300–$500 inspection fee is the cheapest insurance you will ever buy against a $15,000–$30,000 wall failure. Do not let a foundation crack sit through another wet season without action.
Ready to Solve This for Good?
Get matched with pre-screened, licensed general contractors in your area. Free quotes, no obligation, no spam.
GET FREE QUOTES NOW