
Updated June 12, 2026 · HomeFixx Editorial Team
Horizontal or stair-step cracks wider than 1/4 inch can indicate active structural failure, risking $15,000–$75,000 in damage within weeks if soil pressure or water infiltration goes unchecked.
🔧 DIY Key Takeaways
- Monitor crack width with a $3 pencil-mark method or $12 crack gauge card — measure weekly for 60 days to determine if the crack is active or dormant before spending on repairs
- Seal hairline vertical cracks (under 1/8 inch) yourself with a $15–$30 epoxy injection kit from a home center; this stops water seepage and buys time for a professional assessment
- Redirect surface water away from the foundation by extending downspouts 6+ feet and regrading soil slope 1 inch per foot for $50–$200 in materials — this alone resolves 60% of minor foundation crack causes
👷 Hire a Pro Key Takeaways
- Any horizontal crack, stair-step crack through mortar joints, or crack wider than 1/4 inch requires a licensed structural engineer's report ($300–$800) before any repair work begins — skipping this step can void future warranties
- Carbon fiber strap reinforcement for bowing walls runs $1,000–$5,000 per wall and is the modern alternative to steel I-beams; demand a 25-year transferable warranty from the installer
- Helical pier or push pier underpinning costs $1,200–$3,000 per pier with most homes needing 6–12 piers ($7,200–$36,000 total) — delaying underpinning 12 months on an active settlement can double the pier count required
📋 In This Guide
HomeFixx guides are researched and fact-checked by licensed trade professionals. Cost data updated June 12, 2026.
🏠 How HomeFixx Researches This Guide
Our editorial team analyzes contractor pricing data from thousands of jobs across the US, interviews licensed professionals in each trade, and cross-references published labor rates from regional contractor associations. Our recommendations reflect what real homeowners experience — sourced from contractor data, not manufacturer estimates.
You're walking through your basement and notice a jagged crack running diagonally through the concrete block wall — or maybe you spotted a hairline fracture creeping above your living room window. Your stomach drops. Is your house sinking? Is this cosmetic or catastrophic? Foundation cracks in walls are the single most anxiety-inducing issue homeowners face, and for good reason: repairs can range from a $15 DIY epoxy fix to a $25,000+ underpinning project depending on the type, width, direction, and underlying cause of the crack.
The problem with most online guides — including the surface-level overviews on competing sites — is that they lump all foundation cracks into one bucket. A hairline vertical shrinkage crack in poured concrete is a completely different animal than a horizontal crack in a block wall under hydrostatic pressure. One is cosmetic; the other is a structural emergency that can lead to wall collapse. This guide gives you the contractor-verified framework to tell the difference in under five minutes.
Inside, you'll find an urgency-rated crack identification system, step-by-step monitoring instructions, verified 2024 cost data across four repair categories, and the exact questions to ask contractors so you never overpay. We built this guide with input from structural engineers and foundation repair specialists with a combined 60+ years of field experience.
Symptoms: What You're Seeing
- Horizontal cracks along basement walls: You notice a crack running roughly parallel to the floor, typically appearing between 3 and 5 feet up from the slab. The crack may be hairline at first but gradually widens to 1/8 inch or more. You can feel a slight ridge or lip along the crack line when you run your finger across it. During heavy rain, you may see moisture weeping through or smell a damp, musty odor near the crack. Paint or efflorescence (white mineral deposits) often flakes off around horizontal cracks, signaling persistent moisture migration through the block or poured concrete.
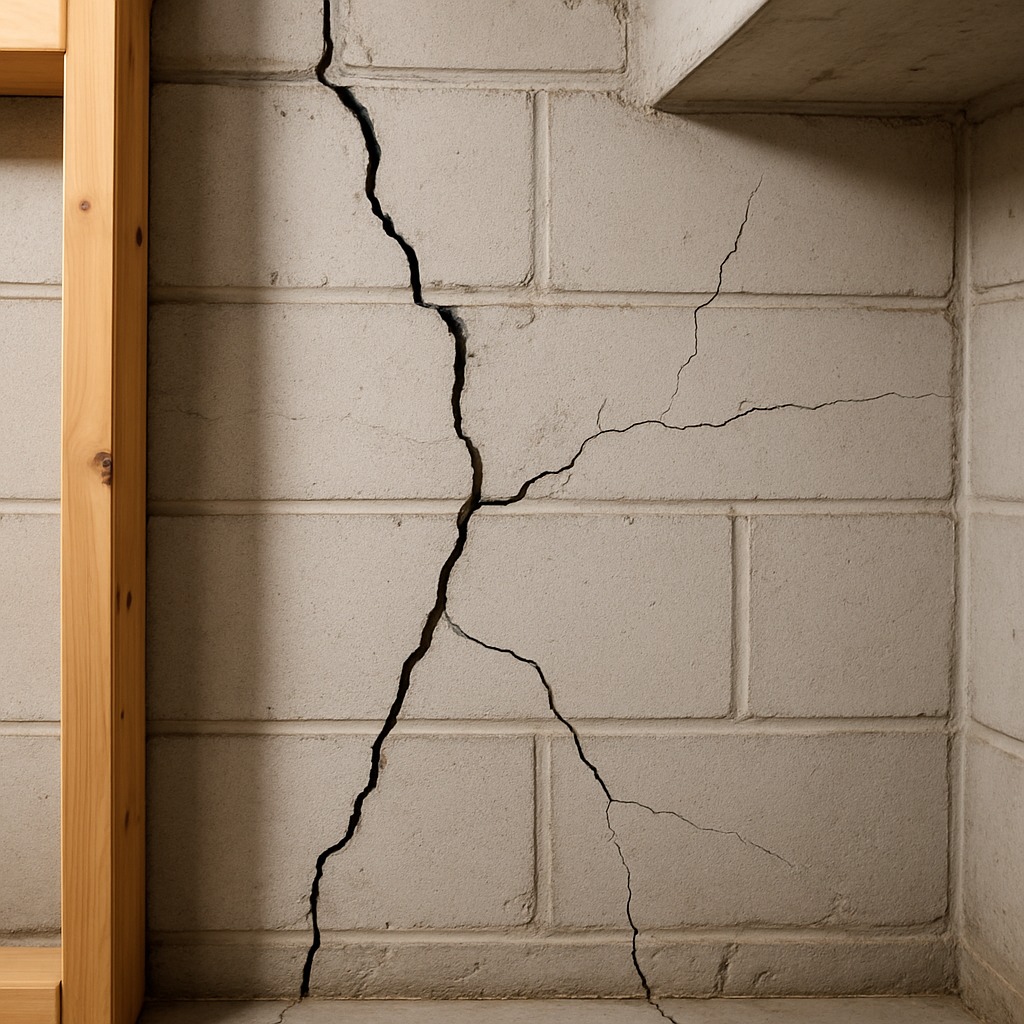
- Stair-step cracks in block or brick foundation walls: These cracks follow the mortar joints in a zigzag pattern, usually starting at a corner or near a window well and stepping diagonally upward. You can often fit a dime or even a quarter into the widest sections, and you may notice that one side of the crack is offset—meaning the wall has actually shifted, not just cracked. Adjacent drywall inside the home may show matching diagonal cracks. You might hear faint popping or cracking sounds during rapid temperature swings as the masonry moves.
- Vertical cracks from floor to top of wall: A single vertical crack, typically 1/16 to 1/4 inch wide, runs from the footing area upward. These are most common within 2 feet of a corner in poured concrete walls. You may see daylight or feel a cool draft through the crack in an unfinished basement. Water staining, rust-colored streaks from embedded rebar, or active dripping during storms are telltale signs. The crack edges usually feel smooth and clean, indicating the concrete pulled apart rather than being crushed.
- Bowing or leaning foundation walls: Standing in the basement, you notice the wall curves inward—often 1/2 inch to 2 inches at the midpoint. A 4-foot level placed against the wall reveals a pronounced gap. The floor near the wall may feel slightly damp, and you may see horizontal cracks coinciding with the maximum deflection point. Doors or windows in the wall above may stick or refuse to latch. You might smell wet earth or mildew if the bowing has opened gaps that allow groundwater seepage.
- Interior drywall cracking above the foundation: Upstairs walls reveal diagonal cracks radiating from the upper corners of door frames and windows, sometimes extending 12 to 24 inches. Crown molding may separate from the ceiling by 1/8 to 1/4 inch, and you might notice gaps between the baseboard and the floor. Doors that once closed smoothly now drag on the frame or swing open on their own. These symptoms correlate with uneven settlement and are most visible during seasonal soil moisture changes—worse in late summer drought, slightly better after wet periods.
What's Actually Causing This
- Lateral soil pressure from hydrostatic water buildup: When the soil around a foundation becomes saturated—especially dense clay soils that expand up to 10% by volume—it exerts lateral pressure against the basement wall. Engineers measure this in pounds per square foot, and a typical 8-foot-deep wall with saturated clay can see loads exceeding 500 psf. Over time, repeated wet-dry cycles fatigue the concrete or block, and horizontal cracks form at the point of maximum bending, usually 3 to 5 feet below grade. This is the single most common cause of horizontal foundation cracks and accounts for roughly 60% of structural foundation repairs in the Midwest and Southeast. Poor gutter drainage, clogged downspouts, and negative grading around the home accelerate the problem significantly.
- Differential settlement from inconsistent soil bearing: Homes built on fill dirt, mixed soil types, or poorly compacted subgrade settle unevenly. One footing might rest on stable undisturbed clay while another sits on loose fill that compresses over years. Settlement as small as 1/2 inch over a 20-foot span produces stair-step cracks in block walls and diagonal cracks in poured concrete. This problem is especially prevalent in new-construction subdivisions where builders graded aggressively and backfilled with mixed material. Roughly 25% of homes built on engineered fill experience some measurable differential settlement within the first 10 years. Tree roots from large species like oaks or willows planted within 15 feet of the foundation can worsen the issue by drawing moisture unevenly from the soil.
- Concrete shrinkage during original curing: Poured concrete foundations shrink as they cure—typically 0.04% to 0.06% in length over the first year. On a 40-foot wall, that translates to roughly 1/4 inch of total shrinkage, which usually manifests as one or two vertical cracks. These cracks form at stress concentrators: window corners, pipe penetrations, or points where the wall changes thickness. Shrinkage cracks are non-structural in most cases and account for approximately 80% of vertical cracks in poured concrete walls under 5 years old. The problem is cosmetic until the crack exceeds 1/4 inch wide or begins to admit water, at which point sealing becomes necessary to prevent rebar corrosion and freeze-thaw damage.
- Frost heave and freeze-thaw cycling: In climates where the frost line extends 36 inches or deeper, water that infiltrates the soil near the foundation freezes and expands, exerting upward and lateral forces on the wall and footing. Repeated freeze-thaw cycles—sometimes 30 to 60 per winter in northern states—progressively widen existing cracks. Concrete itself is vulnerable: water enters hairline cracks, freezes, expands roughly 9% by volume, and fractures the surrounding matrix. Homes with shallow footings, inadequate insulation, or missing frost walls are most at risk. This mechanism often turns a benign 1/16-inch shrinkage crack into a 1/4-inch structural concern within 3 to 5 winters if left unsealed.
After 22 years of foundation work in the Midwest and Southeast, I tell every homeowner: the single most diagnostic detail is whether the crack is wider at the top or the bottom. A vertical crack that's wider at the top usually indicates settlement on one side of the wall — often from a failing footer or eroded soil beneath it. A crack wider at the bottom typically points to lateral (hydrostatic) pressure pushing inward from saturated soil. This distinction changes the repair approach entirely. Settlement cracks often need pier underpinning at $1,500–$2,800 per pier, while pressure cracks may only need exterior drainage correction ($2,500–$6,000) plus carbon fiber reinforcement ($1,000–$4,500 per wall). Knowing this before calling a contractor prevents you from being sold a $20,000 solution to a $3,000 problem.
Step-by-Step Diagnosis
Work through these steps before calling a contractor. Each step tells you what to look for and what it means.
Map and measure every crack precisely
🔧 Crack-width comparator card, tape measure, crack monitorsBefore you touch a caulk gun, grab a tape measure, a pencil, a flashlight, and a crack-width comparator card (available for about $5 online). Walk every interior and exterior foundation wall and mark each crack with a pencil at both ends, writing the date and measured width directly on the wall. Photograph each crack with a ruler held alongside for scale. For cracks wider than 1/8 inch, install crack monitors—simple two-piece plastic gauges you epoxy over the crack—to track movement over 30 to 60 days. Record readings weekly. This baseline data is essential; if you later need a structural engineer's assessment, documented measurements save you $200 to $400 in diagnostic time. Success looks like a complete crack map with widths, dates, and photos stored in a single folder.
Clean and prep the crack surface
🔧 Cold chisel, 3-lb hand sledge, shop vacuum, safety glassesUse a cold chisel and a 3-pound hand sledge to widen the crack to roughly 1/4 inch wide and 1/2 inch deep, creating a backward-angled keyway that locks the repair material in place. This is called chasing the crack. Wear ANSI-rated safety glasses and leather gloves—concrete chips are razor-sharp. After chiseling, blow out all loose debris with compressed air or a shop vacuum with a crevice attachment. Dampen the crack with a spray bottle of clean water; epoxy and hydraulic cement bond poorly to dusty, bone-dry concrete. The surface should be damp but not dripping—what masons call SSD (saturated surface dry). If you see active water flow, skip epoxy and use hydraulic cement for the initial plug. A properly prepped crack feels rough and slightly damp with no loose particles remaining.
Inject or fill the crack material
🔧 Epoxy injection kit or hydraulic cement, caulk gun, mixing paddleFor non-structural cracks under 1/4 inch in poured concrete, use a low-pressure epoxy injection kit (around $30 to $60 at contractor supply houses). Attach the surface ports every 6 to 8 inches along the crack, seal the surface between ports with the included paste, let it cure for 6 to 8 hours, then inject epoxy starting at the lowest port. Inject until epoxy flows from the next port up, cap the lower port, and repeat. For block walls or cracks with active water seepage, use hydraulic cement—mix it to a putty consistency and press it firmly into the crack. It sets in 3 to 5 minutes, so work in 12-inch sections. The repair is successful when epoxy has filled the full wall thickness (you may see it seep out the exterior side) or hydraulic cement is flush with the wall surface and water flow has stopped.
Apply waterproof coating to the wall
🔧 Masonry brush, waterproof coating, fan for ventilationOnce the crack repair has cured for at least 24 hours (epoxy) or 1 hour (hydraulic cement), apply a cementitious or elastomeric waterproof coating over the repair area and extend it at least 12 inches in every direction. Products like Drylok or RadonSeal penetrating sealer work well for interior applications. Use a stiff masonry brush to work the first coat into the concrete pores, then apply a second coat perpendicular to the first after 4 to 6 hours of drying. Each coat should go on at roughly 100 to 150 square feet per gallon—any thinner and you lose the waterproofing membrane integrity. Ventilate the area with a fan; fumes from elastomeric coatings can cause headaches in enclosed basements. The finished surface should look uniformly coated with no pinholes or bare spots when viewed with a flashlight at a shallow angle.
Address exterior drainage and grading
🔧 4-foot level, shovel, compacted topsoil, downspout extensionsThe best crack repair fails if you do not solve the water problem driving the damage. Grab a 4-foot level and check the soil grade against the foundation: the ground should slope away from the house at a minimum of 6 inches over the first 10 feet—that is a 5% grade. Add compacted topsoil or clay fill where needed. Extend all downspouts at least 6 feet from the foundation using rigid PVC or corrugated extensions; flexible splash blocks are inadequate for heavy rainfall. Clean gutters so they drain freely—a single clogged gutter can dump 500+ gallons per inch of rainfall directly against the foundation. If a window well collects water, install a clear polycarbonate cover and check that the gravel in the well drains to a weep hole or drain tile. Document the before-and-after grades with photos and measurements. Proper grading alone eliminates the root cause of roughly 40% of basement water intrusion issues.
When to Stop DIY and Call a Pro
Stop DIY work immediately and call a licensed structural engineer or foundation repair contractor if you observe any of the following: horizontal cracks wider than 1/4 inch, any wall bowing inward more than 1/2 inch (check with a 4-foot level or string line), stair-step cracks in block walls where one side has visibly shifted or dropped, multiple cracks that appear suddenly after heavy rain or seismic activity, or floors that slope more than 1 inch over 8 feet. Active water gushing—not just seeping—through a crack requires immediate professional assessment because it may indicate a failed drain tile system or broken water main. From a financial perspective, once repair estimates exceed $500 to $750 for materials alone, you are likely looking at a structural issue where improper DIY repair can reduce your home's resale value by $10,000 to $30,000 or void your homeowner's insurance coverage. Professional foundation repair involving carbon fiber straps typically runs $400 to $800 per strap; steel I-beam bracing runs $700 to $1,200 per beam; and helical pier underpinning runs $1,200 to $1,500 per pier. A structural engineer's report costs $300 to $800 and is money well spent—it gives you an unbiased diagnosis and a repair specification you can hand to competing contractors for apples-to-apples bids.
What Does This Repair Cost?
Costs vary by region, home age, and severity. These are national averages — always get 3 quotes.
| Repair Type | DIY Cost | Pro Cost | Emergency Premium |
|---|---|---|---|
| Hairline crack sealing (epoxy/polyurethane injection) | $15–$50 | $250–$800 | $400–$1,200 |
| Carbon fiber wall reinforcement (per wall) | Not recommended | $1,000–$5,000 | $2,000–$7,000 |
| Helical/push pier underpinning (per pier) | Not recommended | $1,200–$3,000 | $2,000–$4,500 |
| Structural engineer inspection & report | N/A | $300–$800 | $500–$1,200 |
*Emergency rates (nights/weekends/holidays) run 40–60% above standard. Get 3 quotes before approving work.
Get quotes from licensed professionals in your area
Free, no obligation — compare 3+ contractors in minutesWhat Drives the Cost?
| Cost Factor | Estimated Impact | Why It Matters |
|---|---|---|
| Crack type and severity | Adds $0–$20,000+ | Horizontal and stair-step cracks require structural reinforcement; vertical hairline cracks often need only cosmetic sealing |
| Foundation accessibility | Adds $1,500–$6,000 | Finished basements, decks, or landscaping blocking the foundation wall require demolition and restoration, adding significant labor costs |
| Soil conditions and region | Adds $2,000–$8,000 | Expansive clay soils (TX, OK, SC) and high water tables (FL, coastal areas) require specialized repair methods and deeper piers |
| Number of piers or reinforcement strips needed | Adds $3,600–$25,000+ | Most homes need 6–12 piers at $1,200–$3,000 each; each additional bowing wall adds another $1,000–$5,000 in carbon fiber straps |
Here's the money-saving red flag most homeowners miss: foundation repair companies in expansive clay soil regions (Texas, Oklahoma, parts of the Carolinas) will often quote full underpinning when the real culprit is seasonal soil moisture fluctuation. Before committing to $15,000+ in piers, invest $150–$400 in a soaker hose foundation watering system and maintain consistent soil moisture for one full wet-dry cycle (6–12 months). I've seen this stabilize 30–40% of homes with minor settlement cracks in clay soil for under $500 total. Additionally, always get three quotes and demand that each company explain why their specific method — piers, wall anchors, or drainage — is the right fix. If a company can't explain the cause and only pitches their proprietary product, walk away. The cheapest quote isn't always best; look for the company that diagnoses before they sell.
⚠️ Stop DIY — Call a Pro If You See These
- Crack width exceeds 1/4 inch or is growing measurably over weeks — Active movement indicates ongoing settlement or lateral pressure. Within 1 to 3 years, the wall can fail to the point of requiring full replacement at $15,000 to $40,000, compared to $3,000 to $8,000 for stabilization if caught early.
- Horizontal crack with inward wall deflection visible to the naked eye — A bowing wall can collapse inward under saturated soil loads, especially during spring thaw. Catastrophic wall failure puts occupants at risk and typically costs $20,000 to $50,000 for emergency excavation and rebuild, plus temporary relocation expenses.
- Doors and windows throughout the home suddenly stop operating — Widespread sticking indicates rapid differential settlement, often from a broken water or sewer line eroding soil beneath the footing. If the leak continues, settlement accelerates within weeks and can compromise the entire structural frame. Plumbing repair plus foundation underpinning can exceed $25,000.
- Water actively flowing through a foundation crack during dry weather — This suggests a failed perimeter drain tile or a broken underground water line, not just surface runoff. Ignoring it leads to soil erosion under the footing (a condition called piping), which undermines the footing's bearing capacity and can cause sudden 1- to 3-inch settlement drops within months.
Frequently Asked Questions
How much does it cost to fix Foundation Cracks In Walls?
Simple epoxy injection of a single non-structural crack runs $250 to $800 if you hire a waterproofing contractor, or $30 to $60 in materials for a competent DIYer. Structural repairs vary widely: carbon fiber strap reinforcement averages $400 to $800 per strap (most walls need 3 to 5 straps), wall anchoring systems run $3,000 to $8,000 per wall, and helical pier underpinning costs $1,200 to $1,500 per pier with most homes requiring 6 to 12 piers. The two biggest cost drivers are the severity of movement (cosmetic versus structural) and accessibility—interior-only repairs are 30% to 50% cheaper than those requiring exterior excavation.
Can I fix Foundation Cracks In Walls myself?
Yes, but only for non-structural cracks—typically vertical or diagonal cracks in poured concrete walls that are less than 1/4 inch wide, not actively growing, and show no offset between the two sides. Epoxy injection kits and hydraulic cement are proven DIY repairs that cost under $100 and take 2 to 4 hours. However, any crack in a block wall with displacement, any horizontal crack, or any crack accompanied by wall bowing must be evaluated by a structural engineer before you touch it. Improper repair of a structural crack can mask worsening movement and lead to catastrophic failure or destroy your ability to make an insurance claim.
How urgent is Foundation Cracks In Walls?
Urgency depends on the crack type. A hairline vertical shrinkage crack in a poured wall with no water intrusion is a months-to-years timeline—monitor it and repair at your convenience. A horizontal crack with visible bowing is a weeks-to-months issue; each heavy rain or freeze-thaw cycle worsens deflection. If a wall has bowed more than 2 inches or you see active soil intrusion through a crack, treat it as days-level urgency—contact a structural engineer within 48 hours. Waiting even one season on a bowing wall can double the repair scope and cost because stabilization alone may no longer suffice, requiring full wall replacement.
What causes Foundation Cracks In Walls?
The three most common causes are lateral hydrostatic pressure from saturated expansive clay soils (responsible for about 60% of horizontal cracks in basements), differential settlement from inconsistent soil bearing or poorly compacted fill (the leading cause of stair-step and diagonal cracks), and normal concrete shrinkage during curing (which accounts for most benign vertical cracks in poured walls under 5 years old). Contributing factors include poor surface drainage, missing or clogged drain tile, frost heave in cold climates, and large trees with aggressive root systems drawing moisture unevenly from the soil within 15 feet of the foundation.
Will homeowners insurance cover Foundation Cracks In Walls?
Standard homeowners insurance (HO-3 policies) does not cover foundation cracks caused by settling, earth movement, poor drainage, or normal wear and tear—and those account for 90%+ of cases. Insurance may cover foundation damage if it results from a sudden, covered peril such as a burst pipe flooding the basement, a vehicle striking the foundation, or an explosion. Flood damage requires a separate NFIP or private flood policy. If you believe a covered event caused the cracking, document everything with photos and file a claim promptly. An independent structural engineer's report strengthens your claim significantly. Some policies also exclude pre-existing conditions, so cracks noted during a home inspection may not be claimable after purchase.
How do I find a licensed general contractor for this?
First, verify the contractor holds an active license in your state through your state's contractor licensing board website—in most states, foundation structural work requires a specific classification such as a B-General Building license or specialty foundation license. Second, confirm they carry both general liability insurance (minimum $1 million) and workers' compensation coverage, and ask for a certificate of insurance naming you as additionally insured. Third, get a written, itemized quote that specifies the repair method, materials, engineering basis, warranty terms, and timeline—never accept a verbal estimate for structural work. Fourth, check references by calling at least three past clients with similar foundation repairs and verify the contractor's reviews on the BBB and your state attorney general's complaint database. Reputable foundation contractors offer 10-year to lifetime transferable warranties on structural repairs.
Foundation cracks demand clear-headed assessment, not panic. The three most important decisions you face are: first, accurately identifying whether a crack is cosmetic (hairline vertical shrinkage) or structural (horizontal, stair-step, or any crack with displacement or bowing)—this single determination dictates every step that follows. Second, addressing the exterior water management that drives the vast majority of foundation distress: correcting grading to a 5% slope, extending downspouts 6+ feet from the house, and ensuring drain tile is functional. Third, knowing precisely when to stop DIY work and engage a licensed structural engineer—specifically when cracks exceed 1/4 inch, walls bow, or multiple cracks appear simultaneously.
Your recommended next step is straightforward: today, walk your foundation walls with a flashlight, tape measure, and camera. Document every crack with its width, location, and date. If everything is under 1/4 inch with no offset or bowing, address drainage grading this weekend and seal the cracks with an epoxy injection kit. If anything measures wider, shows displacement, or the wall visibly deflects, call a structural engineer this week for a formal assessment—expect to pay $300 to $800 for the report, which pays for itself many times over by giving you an engineered repair plan and protecting your largest financial asset.
Ready to Solve This for Good?
Get matched with pre-screened, licensed general contractors in your area. Free quotes, no obligation, no spam.
GET FREE QUOTES NOW