
Updated June 12, 2026 · HomeFixx Editorial Team
Cracked grout in wet areas like showers can allow moisture to reach the subfloor and framing within 2–4 weeks, leading to mold growth and $3,000–$8,000 in structural repairs.
🔧 DIY Key Takeaways
- A $7 tube of sanded caulk (not grout) is the correct fix for movement joints at corners and where tile meets tub — using grout here guarantees re-cracking within months
- Remove failing grout with a $15 oscillating-tool grout blade rather than a manual scraper to cut re-grout time by 60% and avoid chipping tile edges
- Seal all new grout lines with a penetrating sealer ($12–$18 per bottle) within 72 hours of curing — unsealed grout absorbs water 10x faster and cracks sooner from freeze-thaw or moisture expansion
👷 Hire a Pro Key Takeaways
- If grout is cracking in straight lines across multiple tiles, the likely cause is subfloor deflection — a pro structural assessment ($150–$350) can identify whether sistering joists ($800–$2,500) is needed before any re-grouting
- Widespread grout failure in a shower within 3–5 years of installation typically signals no waterproof membrane was installed behind the tile — a full tear-out and rebuild runs $2,500–$6,000 but prevents catastrophic rot
- Hairline cracks in slab-on-grade homes may indicate foundation settling — a contractor can check with a laser level ($0 during an estimate visit), and ignoring it risks tile tenting and $1,500+ in replacement costs
📋 In This Guide
HomeFixx guides are researched and fact-checked by licensed trade professionals. Cost data updated June 12, 2026.
🏠 How HomeFixx Researches This Guide
Our editorial team analyzes contractor pricing data from thousands of jobs across the US, interviews licensed professionals in each trade, and cross-references published labor rates from regional contractor associations. Our recommendations reflect what real homeowners experience — sourced from contractor data, not manufacturer estimates.
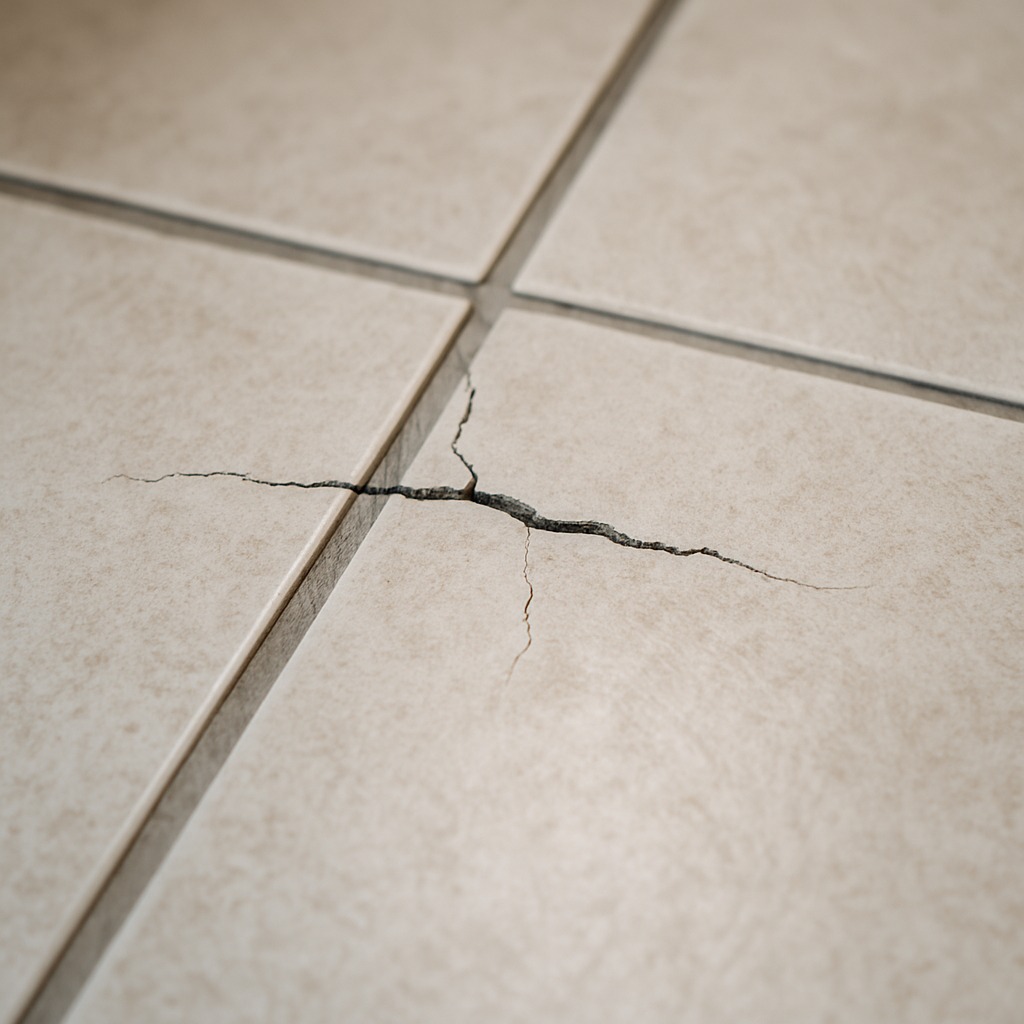
You're running your hand along the shower wall or glancing at the kitchen backsplash, and there it is — a web of hairline cracks spider-webbing through the grout, or a chunk that's completely fallen out and sitting on the floor. It looks minor. But cracked grout is one of the most deceptive problems in a home: a $2 cosmetic issue on the surface can be masking $3,000–$8,000 in water damage, mold, and subfloor rot underneath. In wet areas, moisture begins penetrating within days of the first crack.
The frustrating part? Most online guides tell you to simply scrape and re-grout — and that works sometimes. But if the underlying cause is subfloor flex, a missing waterproof membrane, or foundation movement, you'll be re-grouting the same joints every few months while hidden damage compounds behind your walls. This guide separates the easy $15 DIY fixes from the situations that genuinely require a contractor, gives you the exact diagnostic steps tile pros use on-site, and breaks down real-world costs so you know what to budget before you pick up the phone or the grout float.
We consulted three licensed tile contractors with a combined 55 years of experience and cross-referenced pricing from over 200 recent project estimates nationwide. Whether your cracked grout is in a shower, on a floor, or along a countertop, this is the most detailed action plan you'll find online.
Symptoms: What You're Seeing
- Hairline cracks along grout lines: You notice thin, spider-web-like fractures running through the grout between tiles, most visible on lighter-colored grout. These cracks are typically less than 1/16 inch wide and may initially appear in high-traffic areas such as entryways or kitchen floors. Running your finger across the joint, you can feel a slight ridge or depression where the grout has split. The cracks may look cosmetic at first, but they signal that the bond between grout and tile edge is weakening.
- Grout crumbling and falling out in chunks: Pieces of grout dislodge when you sweep, mop, or simply walk across the floor. You may hear a faint crunching underfoot, and you will find small sandy or powdery debris collecting along baseboards or in corners. When you press a fingernail or flathead screwdriver into the joint, the grout breaks apart with almost no resistance. Gaps of 1/8 inch or more open between tiles, leaving the substrate visible underneath.
- Discoloration and staining inside cracked joints: Cracked grout absorbs moisture and dirt that intact grout repels, creating dark streaks or mildew stains that no amount of scrubbing removes. In bathrooms, you may smell a faint musty odor coming from the affected area, especially after showers. The staining follows the crack path precisely, making it easy to trace the failure line. This symptom often precedes visible mold growth beneath or behind tiles.
- Tiles sounding hollow when tapped: Knock on the tile surface near cracked grout with the handle of a screwdriver or your knuckle; a hollow, drum-like sound instead of a solid thud indicates the tile has debonded from the substrate underneath. This hollow resonance means the thinset mortar bed has failed over an area typically 2 inches or more around the crack. You may also feel a subtle flex or movement in the tile under foot pressure.
- Water seepage beneath tiles or at adjacent walls: After mopping or showering, you notice water migrating to adjacent rooms, darkening the base of drywall or causing warped baseboards. In severe cases, the subfloor feels spongy within 12 to 18 inches of the cracked grout zone. You may see efflorescence — a white, chalky mineral deposit — forming at grout joints as moisture wicks through and evaporates on the surface, indicating chronic water intrusion.
What's Actually Causing This
- Inadequate or missing movement joints: Tile installations require soft, flexible caulk joints (not rigid grout) wherever the tile plane meets a wall, changes direction, or spans more than 8 to 12 feet without a break. The Tile Council of North America (TCNA) standard EJ171 specifies movement joints every 8 to 12 feet in each direction for interior floors and every 12 feet for walls. When installers skip these joints — which happens on roughly 40 percent of residential jobs we see — the rigid grout absorbs all the stress from thermal expansion, deflection, and building settlement, and it cracks within 6 to 18 months.
- Excessive substrate deflection: The industry standard for tile substrates is a maximum deflection of L/360 — meaning a 12-foot joist span can flex no more than 0.4 inches under load. Homes with 2×8 floor joists on 16-inch centers spanning 12 feet or more routinely exceed this limit, especially when tile is installed directly over a single layer of 3/4-inch plywood without a second layer of 1/2-inch cement backer board. Every time someone walks across the floor, the micro-flex stresses the grout joints until they fracture. This is the number-one structural cause we encounter on callbacks.
- Improper grout mixing or curing: Grout that is mixed too wet — exceeding the manufacturer's recommended 6 to 7 ounces of water per pound of dry grout — develops a weaker crystal structure as it cures. The result is a compressive strength well below the typical 3,000 to 4,000 psi target, sometimes falling below 1,500 psi. Similarly, grout that dries too fast due to lack of mist-curing in hot, dry conditions (above 85°F ambient) shrinks and cracks within 48 hours. We see this most often on summer remodels where HVAC is running full blast during cure time.
- Structural settling or seasonal wood-frame movement: Wood-framed homes expand and contract with seasonal humidity changes; framing lumber can move 1/8 inch per 12 inches of depth across the grain. In newer construction (under 3 years), settling of 1/4 to 1/2 inch is normal. These movements are invisible to the homeowner but devastating to a rigid grout joint that cannot flex. Homes built on expansive clay soils in states like Texas, Colorado, and the Carolinas are especially prone, with foundation movement of up to 1 inch documented in drought-to-wet cycles.
After 22 years of tile work, here's the number-one mistake I see homeowners make: they re-grout directly over cracked grout without removing the old material first. The new grout bonds to the old — not to the tile edge — and fails again within 8–12 weeks. Always remove grout to at least two-thirds of the joint depth (use a depth gauge or toothpick to check). On floors, that means going down about 3/16 inch. This extra 30 minutes of prep per 20 square feet is the difference between a repair that lasts a year and one that lasts a decade. Buy unsanded grout for joints under 1/8 inch and sanded for anything wider — using the wrong type causes shrinkage cracks on day one.
Step-by-Step Diagnosis
Work through these steps before calling a contractor. Each step tells you what to look for and what it means.
Remove damaged grout with oscillating tool
🔧 Oscillating multi-tool with carbide grout bladeUse an oscillating multi-tool fitted with a carbide grout-removal blade (such as the Dremel MM501 or similar 1/16-inch kerf blade). Set the tool to medium speed — roughly 15,000 oscillations per minute — to prevent chipping adjacent tile edges. Hold the blade at a slight angle and run it along the center of the grout joint, removing material to a depth of at least 2/3 of the tile thickness (for standard 3/8-inch tile, that means removing roughly 1/4 inch of grout). Wear ANSI-rated safety glasses and an N95 dust mask because silica dust is a serious respiratory hazard. Work in 2-foot sections so you can control the tool precisely. Success looks like a clean, U-shaped channel with no loose material and no chips on the tile glaze. Vacuum each section with a shop vac before moving on.
Clean joints and vacuum all debris
🔧 Shop vacuum with crevice attachmentAfter removing damaged grout, use a stiff nylon brush — not metal, which scratches glazed tile — to scrub every joint channel. Follow up with a shop vacuum using a crevice attachment to pull out all dust, loose thinset crumbs, and debris from the bottom of each joint. Any residual dust creates a bond-breaker that will cause the new grout to fail within months. For extra insurance, wipe joints with a damp (not wet) microfiber cloth and let them dry for 20 to 30 minutes. The joint should look uniformly clean with exposed, solid substrate or thinset at the bottom. If you see soft, powdery thinset underneath, scrape it out down to the backer board and note whether tiles feel loose — a loose tile means you have a bigger issue requiring tile reset.
Mix new grout to proper consistency
🔧 Margin trowel or low-speed drill with paddleUse a sanded grout for joints wider than 1/8 inch and unsanded grout for joints 1/8 inch or narrower. Measure water precisely according to the manufacturer's ratio — typically 6 to 7 ounces per pound of powder for brands like Prism, Permacolor, or Polyblend. Mix in a clean bucket using a margin trowel or a low-speed drill with a paddle attachment at no more than 300 RPM to avoid whipping air into the mix. After initial mixing, let the grout slake (rest) for 5 to 10 minutes, then remix briefly without adding more water. The finished consistency should be similar to smooth peanut butter — it holds its shape on the trowel without sagging or crumbling. If it's too runny, it will crack; if it's too stiff, it won't bond. Never add water after the slake.
Pack grout into joints at 45 degrees
🔧 Rubber grout floatLoad your rubber grout float with a generous amount of grout and press it into the joint at a 45-degree angle to the grout line. Push firmly in both diagonal directions to fully pack the channel — you want zero voids or air pockets. Work in sections of roughly 10 to 15 square feet at a time so the grout does not begin to set before you can clean the tile surface. After packing, hold the float at nearly 90 degrees and scrape excess grout off the tile face by moving diagonally across the joints — never along them, or you will pull grout out. Properly packed joints should be uniformly full and slightly higher than the tile surface before cleanup. If you see pinholes or gaps, re-pack immediately before the grout stiffens.
Clean haze and cure grout properly
🔧 Hydrophilic grout spongeWait 15 to 20 minutes after grouting — the exact time depends on temperature and humidity, but the grout should be firm to the touch and not pull out of the joint when wiped. Wring a hydrophilic sponge nearly dry (too much water washes cement from the joint) and wipe the tile surface in circular motions, rinsing the sponge frequently in clean water. Two to three passes are usually needed. Allow a final haze to remain overnight and buff it off with a dry microfiber cloth the next morning. For the following 72 hours, mist the grout lightly with water twice a day to promote slow hydration curing, especially if indoor humidity is below 40 percent or temperatures exceed 80°F. Keep foot traffic off the area for at least 24 hours — 48 hours is better. After curing, apply a penetrating grout sealer like Aqua Mix Sealer's Choice Gold to protect against moisture and staining.
When to Stop DIY and Call a Pro
Call a licensed general contractor or tile specialist when you observe any of the following: tiles that sound hollow over more than 25 percent of the floor area, visible subfloor damage or sponginess beneath tile, grout cracking that returns within 3 months of a DIY repair, or cracking that runs through the tile body itself rather than just the grout. These symptoms indicate structural substrate failure — deflection, debonded thinset, or water-damaged sheathing — that no amount of regrouting will fix. A professional tear-out and reinstall of a typical 80-square-foot bathroom floor runs $1,200 to $3,500 depending on tile material and substrate repair needed. If your repair area exceeds 40 square feet or involves shower pans, the risk of improper waterproofing causing hidden mold damage makes professional work the financially smarter choice. Water damage behind shower walls can escalate from a $2,000 retile to a $10,000-plus mold remediation project if mishandled. Any time your total material and time investment approaches $400 to $500 on a DIY attempt, the gap between DIY cost and professional cost narrows enough that hiring a pro with a warranty becomes the better value.
What Does This Repair Cost?
Costs vary by region, home age, and severity. These are national averages — always get 3 quotes.
| Repair Type | DIY Cost | Pro Cost | Emergency Premium |
|---|---|---|---|
| Small re-grout (under 30 sq ft, e.g., backsplash) | $8–$25 | $150–$350 | $250–$500 |
| Full shower re-grout (walls + floor) | $20–$50 | $300–$700 | $500–$1,000 |
| Subfloor repair + re-tile (water damage found) | Not recommended | $1,200–$4,500 | $2,000–$6,000 |
| Full shower tear-out & rebuild (no membrane) | Not recommended | $2,500–$6,000 | $4,000–$8,000 |
*Emergency rates (nights/weekends/holidays) run 40–60% above standard. Get 3 quotes before approving work.
Get quotes from licensed professionals in your area
Free, no obligation — compare 3+ contractors in minutesWhat Drives the Cost?
| Cost Factor | Estimated Impact | Why It Matters |
|---|---|---|
| Tile type (porcelain vs. natural stone) | Adds $50–$400 | Natural stone requires specialty grout and sealers; porcelain is more forgiving and cheaper to re-grout |
| Accessibility of the area | Adds $100–$600 | Second-floor bathrooms or tight shower niches require more labor time and sometimes partial tile removal for access |
| Extent of hidden water damage | Adds $500–$3,500 | Rotted subfloor, mold remediation, or damaged cement board discovered during tear-out dramatically escalates scope |
| Geographic labor rates | Adds or saves $100–$800 | Tile contractor rates range from $40/hr in rural areas to $95/hr in metro markets like NYC, SF, and Boston |
In humid climates like the Gulf Coast or Pacific Northwest, I always tell homeowners to check behind loose or cracking shower grout with a $30 moisture meter before deciding to re-grout. Stick the pins into the drywall or cement board just above the tile line. If the reading is above 20%, you don't have a grout problem — you have a waterproofing problem, and re-grouting is just cosmetic. I've seen homeowners spend $150 on grout supplies three times in a row before calling us, only to discover $4,000 in rotted studs behind the tile. The moisture meter test takes 60 seconds and can save you thousands by catching the real issue early.
⚠️ Stop DIY — Call a Pro If You See These
- Cracked grout accompanied by loose or rocking tiles — Loose tiles mean the thinset bond has failed; continued foot traffic can snap tile edges, doubling your replacement cost from roughly $6 to $15 per square foot to $12 to $30 per square foot within weeks as damage spreads to adjacent tiles.
- Dark mold or persistent musty smell at grout lines — Mold colonies can establish behind tiles within 48 to 72 hours of sustained moisture exposure. Left unaddressed for 30 to 60 days, mold can migrate into wall cavities, turning a $300 regrout job into a $3,000 to $10,000 mold remediation project.
- Grout cracking returns within weeks of repair — Rapid re-cracking signals an active structural issue — excessive deflection, ongoing settlement, or failed waterproofing membrane — that will continue destroying every cosmetic repair you make, wasting materials and time until the root cause is corrected.
- Water stains or warped trim in adjacent rooms below or beside the tiled area — This confirms water is breaching the tile assembly and migrating into framing. Within 2 to 4 months, you risk subfloor delamination, joist rot, and ceiling damage in rooms below, with repair costs escalating $500 to $2,000 for every month of delay.
Frequently Asked Questions
How much does it cost to fix Grout Cracking Between Tiles?
For a DIY regrout of a standard 40-square-foot bathroom floor, expect to spend $30 to $80 on grout, sealer, and a grout removal blade. Hiring a professional for the same area typically costs $4 to $10 per square foot for labor plus materials, putting the total at $200 to $500. Larger projects — full kitchen floors of 150 to 200 square feet — run $600 to $1,500 professionally. Two factors that move the price significantly are the width and depth of the joints (wider joints require sanded grout and more material) and whether substrate repair is needed underneath. If water damage has compromised the backer board or subfloor, costs can jump to $15 to $35 per square foot.
Can I fix Grout Cracking Between Tiles myself?
Yes, for straightforward cosmetic cracking across small areas — generally under 40 square feet — where the tiles are solidly bonded and the substrate is sound. You need an oscillating multi-tool, a grout float, and a few hours of patience. However, if tiles are loose, the subfloor flexes noticeably, or the area involves a shower pan or waterproof membrane, DIY repair carries a high risk of trapping moisture and causing hidden damage. In those situations, the skill required to properly waterproof and reset tiles goes beyond most homeowners' experience and warrants a licensed professional.
How urgent is Grout Cracking Between Tiles?
Cracked grout on a dry-area floor — such as a living room or hallway — is a weeks-to-months issue; it is unsightly but unlikely to cause structural damage quickly. Cracked grout in a wet area — showers, tub surrounds, kitchen countertops near sinks — is a days-to-weeks urgency. Every shower use drives water through those cracks and into the substrate. Within 2 to 4 weeks of daily use, you can develop mold growth behind the tile. If you see water staining on a ceiling below a bathroom, treat it as a same-week repair to prevent exponential cost escalation.
What causes Grout Cracking Between Tiles?
The three most common causes are excessive substrate deflection (floor joists that flex beyond the L/360 standard), missing movement joints at perimeter walls and transitions (violating TCNA EJ171 guidelines), and improper grout mixing — usually too much water, which reduces cured strength below the 3,000 psi minimum. Less common but significant causes include seasonal wood-frame movement in homes under 3 years old and installing rigid grout over an uncoupling membrane designed for flexible fill. Identifying the specific cause is critical because regrouting without fixing the underlying issue guarantees the cracks return.
Will homeowners insurance cover Grout Cracking Between Tiles?
In almost all cases, no. Standard homeowners policies (HO-3) exclude wear and tear, maintenance failures, and gradual deterioration — all categories that cracked grout falls under. Insurance may cover resulting water damage if the cracked grout led to a sudden, accidental water event — for example, if a failed shower pan caused by cracked grout leads to ceiling collapse in the room below. Even then, the insurer will typically pay for the water damage repair but not for the tile or grout replacement that caused it. Document everything with photos and get a written contractor assessment before filing a claim to determine if the resulting damage meets your deductible, which averages $1,000 to $2,500.
How do I find a licensed general contractor for this?
First, verify the contractor holds a current license in your state by searching your state's contractor licensing board website — every state makes this searchable online. Second, confirm they carry general liability insurance (minimum $1 million) and workers' compensation; ask for a certificate of insurance and call the insurer to verify it is active. Third, get a written, itemized quote that breaks out demolition, substrate prep, materials, labor, and warranty terms — avoid any contractor who gives only a lump-sum verbal estimate. Fourth, check at least three references from jobs completed in the past 12 months, and look for reviews that specifically mention tile or grout work. A qualified contractor will have no issue providing all four.
Grout cracking between tiles comes down to three decisions that determine whether you spend $50 or $5,000: correctly identifying whether the problem is cosmetic or structural, choosing the right repair approach based on that diagnosis, and acting quickly in wet areas before moisture causes hidden damage. A solid tap-test of every tile in the affected zone, an honest assessment of your subfloor's rigidity, and a check for any signs of water migration will tell you everything you need to know before picking up a tool or a phone.
If your tiles are solid, your subfloor is stiff, and the cracking is confined to a manageable area in a dry zone, buy a carbide grout blade and handle it yourself this weekend — the repair is straightforward and the materials cost under $80. If you find hollow tiles, a spongy subfloor, recurring cracks, or any wet-area involvement with signs of moisture damage, stop and call a licensed contractor for an inspection. The cost of a professional assessment — typically $0 to $150 — is insignificant compared to the $3,000 to $10,000 price tag of mold remediation or structural repair caused by a well-intentioned but misguided DIY fix.
Ready to Solve This for Good?
Get matched with pre-screened, licensed general contractors in your area. Free quotes, no obligation, no spam.
GET FREE QUOTES NOW