
Updated June 12, 2026 · HomeFixx Editorial Team
Squeaks rarely signal emergencies, but ignoring them for 6–12 months can mask subfloor deterioration or joist separation that escalates repair costs from $200 to $3,000+.
🔧 DIY Key Takeaways
- A $9 kit of Counter-Snap breakaway screws from the top side can silence 90% of single-board squeaks in under 20 minutes without visible fastener heads
- Sprinkling talcum powder or powdered graphite ($4–$6) into squeaky board seams is a zero-risk temporary fix that can quiet friction-based squeaks for 3–6 months
- Accessing the subfloor from below and driving 1¼-inch wood screws upward through the subfloor into the hardwood plank ($12 in materials) permanently eliminates squeaks without touching the finished surface
👷 Hire a Pro Key Takeaways
- If squeaking spans more than a 4×4-foot area or multiple rooms, a contractor should assess subfloor integrity — replacing a rotted or delaminated subfloor section runs $600–$2,200 including re-laying the hardwood
- A flooring contractor can inject construction adhesive between the subfloor and joists using specialized access points for $200–$500, a permanent fix impossible for most DIYers without basement ceiling access
- Persistent squeaks under carpet-to-hardwood transitions or near load-bearing walls may indicate joist deflection or inadequate bridging — ignoring this risks $1,500–$3,500 in structural joist repair within 2–3 years
📋 In This Guide
HomeFixx guides are researched and fact-checked by licensed trade professionals. Cost data updated June 12, 2026.
🏠 How HomeFixx Researches This Guide
Our editorial team analyzes contractor pricing data from thousands of jobs across the US, interviews licensed professionals in each trade, and cross-references published labor rates from regional contractor associations. Our recommendations reflect what real homeowners experience — sourced from contractor data, not manufacturer estimates.
You're lying in bed at 2 a.m. and hear it — that sharp creak from the hallway every time someone shifts weight on the hardwood. Or maybe it's a persistent chirp in your living room that visitors politely ignore. Hardwood floor squeaking is one of the most common complaints among homeowners, affecting an estimated 90% of homes with wood flooring at some point. The good news: most squeaks cost between $5 and $50 to fix yourself. The bad news: the same symptom can hide subfloor delamination, joist separation, or moisture damage that pushes professional repair costs to $1,500–$3,500 if left unchecked.
This guide goes far beyond the generic advice you'll find elsewhere. We break down the five specific mechanical causes of squeaking, walk you through a room-by-room diagnostic process any homeowner can perform in 15 minutes, and give you contractor-verified cost data for every level of repair — from a $4 bottle of graphite powder to a $3,000+ subfloor replacement. Whether your squeak is a seasonal nuisance or an early warning sign, you'll know exactly what to do and what it should cost before you call anyone.
Symptoms: What You're Seeing
- Localized squeaking under foot traffic: You hear a sharp, repetitive creak or chirp directly under your foot as you step on a specific board or small area of the floor. The sound is high-pitched, often compared to a bird chirp, and it reproduces consistently when weight is applied and released in the same spot. You may feel a very slight vertical give — as little as 1/32 of an inch — beneath your foot as the board deflects. The squeak is usually louder in socks or bare feet than in shoes because softer soles allow the board to flex more fully.
- Widespread creaking across a hallway or room: Instead of one isolated spot, you notice creaking sounds across a broad swath of flooring, especially in high-traffic corridors, doorway thresholds, or the center span of a room. The noise shifts in pitch and intensity depending on where you step, and it often worsens during dry winter months when indoor humidity drops below 35 percent. Walking the perimeter near walls is usually silent, but moving toward the center — where joists span their longest unsupported distance — produces a chorus of groans.
- Seasonal squeaking that appears and disappears: The floor is silent during humid summer months but begins creaking noticeably once the heating season starts and indoor relative humidity falls below 30–35 percent. You may see hairline gaps between boards — typically 1/32 to 1/16 inch — that were not visible in summer. The squeaking diminishes or stops entirely once humidity rises again in spring, confirming the noise is linked to wood shrinkage and the resulting loose fit between boards and fasteners.
- Bouncy or spongy feel underfoot without visible damage: When you walk across the floor, certain sections feel soft or springy, almost like walking on a trampoline. There is no visible crack, stain, or surface damage, but the subfloor beneath flexes noticeably. You might see picture frames vibrate on a nearby wall or feel dishes rattle in a cabinet when someone walks past. This bounce often accompanies a low-pitched groan rather than a sharp squeak and points to subfloor deflection over the joist span.
- Popping or snapping sound on first morning walk: The first time you cross the floor each morning — or after the room has been unoccupied for several hours — you hear distinct pops or snaps that fade after a few passes. The sound originates from wood fibers and nail shanks that have settled into a static position overnight and break free under load. It can be startling, sounding almost like knuckles cracking, and it typically occurs in clusters of two to five pops along a single joist line before the floor quiets down for the rest of the day.
What's Actually Causing This
- Subfloor detachment from joists: Over time, the nails or screws holding the plywood or OSB subfloor to the floor joists work loose. Every loading cycle — someone walking, furniture being moved — causes the subfloor panel to lift slightly off the joist and then snap back down. Ring-shank nails resist this better than smooth-shank nails, but even ring-shanks lose grip after 15–20 years of cyclical loading. The gap between the subfloor and the joist crown can be as small as 1/64 inch and still produce an audible squeak. This is the single most common cause of floor squeaks, accounting for roughly 60–70 percent of service calls related to creaking hardwood floors.
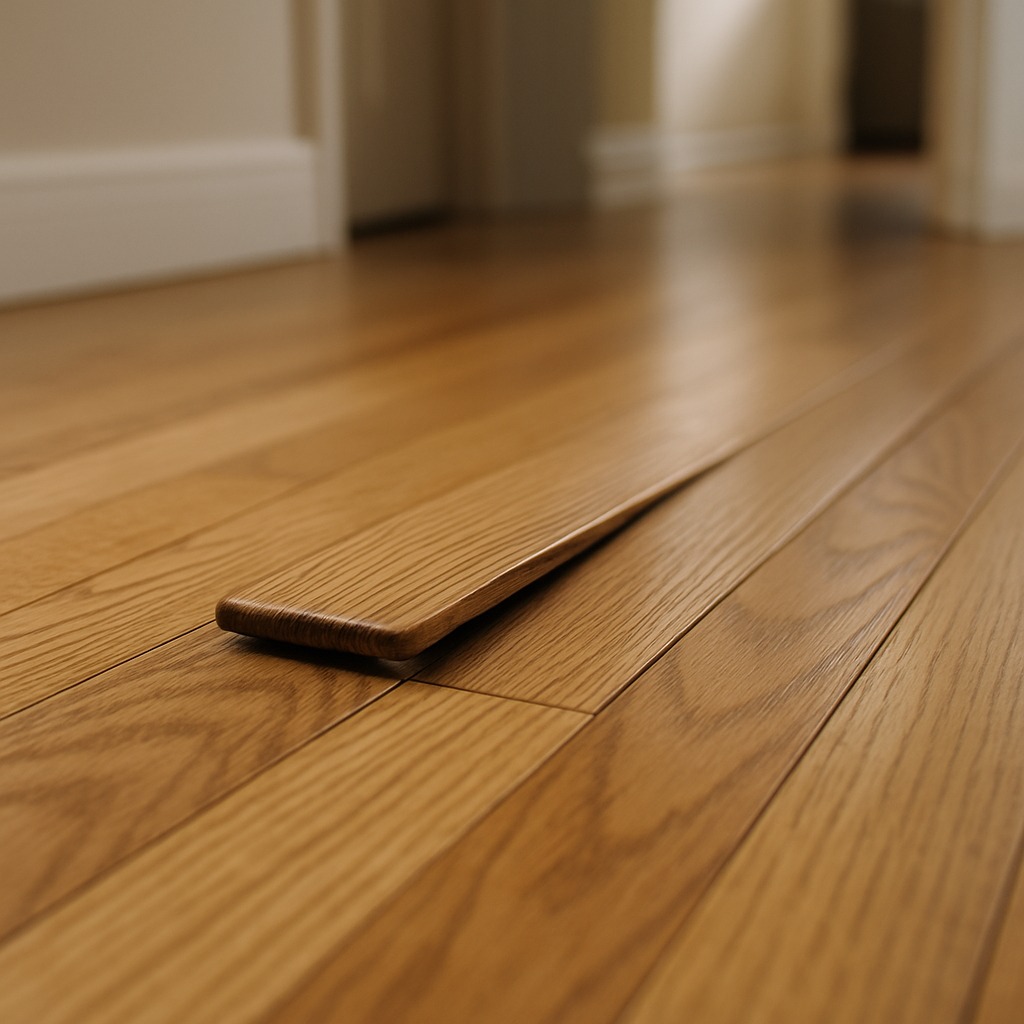
- Hardwood boards rubbing against each other or against fasteners: Tongue-and-groove hardwood planks are milled to fit tightly, but seasonal humidity swings cause the wood to expand and contract. When boards shrink in low humidity, the tongue can move inside the groove, and the friction between the two wood surfaces produces a high-pitched squeak. Similarly, a finish nail driven through the hardwood face or tongue can become a pivot point — the wood moves up and down on the nail shank, and the metal-on-wood friction creates noise. Floors installed with cleats instead of staples tend to squeak less because cleats have a barbed profile that grips better, but no fastener is immune if the humidity differential exceeds 4 percent moisture content swing.
- Inadequate or missing joist bridging and blocking: Building codes typically require solid blocking or cross-bridging between joists spanning more than 8 feet. When bridging is absent or has come loose — a common finding in homes built before 1980 — adjacent joists can twist and deflect independently. This differential movement causes the subfloor to flex between joists, opening micro-gaps that produce squeaks. Inspecting from below, you will often see bridging nails backed out or bridging pieces that have fallen entirely, especially in older balloon-framed homes. Adding bridging alone can reduce perceived floor bounce by 40–50 percent and often eliminates the associated noise.
- Joist or subfloor moisture damage and uneven drying: A past plumbing leak, crawlspace moisture intrusion, or slab vapor transmission can cause joists or subfloor panels to swell, cup, or crown unevenly. Once the moisture source is removed, the wood dries but does not return to its original flat profile, leaving high and low spots that create voids between layers. These voids allow movement under load and produce squeaks. OSB subfloor is particularly vulnerable — once it swells more than 5 percent in thickness, it rarely recovers. Moisture-related squeaks are most common in kitchens, bathrooms, and rooms above crawlspaces with inadequate vapor barriers, and they account for roughly 10–15 percent of persistent floor noise complaints.
After 20 years of flooring work, the number-one mistake I see homeowners make is nailing down squeaky boards from above with finish nails. It almost never works long-term because the nail shanks are too smooth to grip the subfloor. What does work is a screw-based system like Squeeeeek No More or Counter-Snap, which uses a scored-shaft screw designed to snap off below the wood surface. Cost is about $9 per kit and each one handles roughly 50 square feet. Before you drive anything, use a stud finder — you need to anchor into the joist, not just the subfloor plywood. Missing the joist is the reason 60% of DIY squeak fixes fail within the first winter heating cycle.
Step-by-Step Diagnosis
Work through these steps before calling a contractor. Each step tells you what to look for and what it means.
Locate each squeak point precisely from above
🔧 Stud finder (deep-scan mode)Have a helper walk slowly across the floor while you listen and watch. Mark every squeak location with blue painter's tape — place a small X directly on the board that moves. Pay attention to whether the squeak is on a joist line or between joists; you can find joist locations using a stud finder set to deep scan or by tapping the floor and listening for the dull thud of solid backing versus the hollow ring of an unsupported span. Joists in most homes are spaced 16 inches on center, occasionally 12 inches in older construction. Record the number of squeak points — if you count more than 15–20 in a single room, the problem may be systemic subfloor detachment rather than isolated fastener failure, and a targeted repair may not be cost-effective. Accurate mapping now prevents wasted screws and unnecessary holes later.
Secure subfloor to joists with breakaway screws
🔧 Squeeeeek No More kit or Counter-Snap kit, variable-speed drill/driverUse a squeak-repair kit such as Squeeeeek No More (about $25) or Counter-Snap ($22), which includes a depth-control fixture and specially scored #8 x 3-inch breakaway screws. Place the fixture flat on the finished floor over a joist-line squeak point. Drive the screw through the hardwood, through the subfloor, and into the joist until the fixture stops the screw head at the correct depth — typically 1/8 inch below the hardwood surface. Then rock the fixture sideways to snap the screw at its scored breakpoint, leaving only a tiny stub hidden below the surface. Fill the small hole with a color-matched wood putty. Each screw adds roughly 80 pounds of withdrawal resistance. Drive screws every 6–8 inches along the joist where the squeak persists. Test by walking the area after every two or three screws — stop as soon as the noise is gone to minimize surface holes.
Shim gaps from below if accessible
🔧 Wood shims, carpenter's glue, construction adhesive, 1-1/4-inch wood screws, drill/driverIf you have basement or crawlspace access below the squeaky area, have your helper walk the floor above while you observe the subfloor from below with a bright work light. Look for visible movement — even 1/32 inch of bounce is easy to spot when the subfloor panel lifts off the joist. For small, isolated gaps, tap a wood shim (cedar or pine, about 1/16 to 1/8 inch thick) coated with carpenter's glue into the space between the joist top and the subfloor bottom. Do not force the shim — over-driving it will push the floor up and create a hump. The shim should fill the void snugly without lifting the subfloor. For longer gaps spanning 6 inches or more, apply a bead of construction adhesive (PL Premium or Loctite PL 375) along the joist top where it meets the subfloor, then press a 1x4 block against the subfloor and screw it into the side of the joist to act as a cleat. This distributes the support over a wider area and prevents future deflection.
Add blocking between joists to reduce bounce
🔧 Circular saw, tape measure, 2x8 or 2x10 lumber, 3-inch structural screws, construction adhesiveCut solid blocking from lumber that matches your joist depth — typically 2x8 or 2x10. Measure the interior distance between joists (usually 14-1/2 inches for 16-inch on-center framing) and cut each block to fit snugly. Install the blocks in a staggered line at the mid-span of the joists, alternating sides so you can face-nail through the joist into the end of each block with two 16d nails or 3-inch structural screws per end. Press each block firmly up against the subfloor before fastening — the goal is zero gap between the block top and the subfloor bottom. If the subfloor does not sit tightly against the block, apply a bead of construction adhesive to the top of the block before pushing it into position. Adding a single row of mid-span blocking to a 12-foot joist span can reduce deflection by up to 50 percent and is one of the most effective long-term squeak fixes available from below.
Lubricate board-to-board friction squeaks from above
🔧 Powdered graphite or talcum powder, squeeze-bottle wood-swelling liquidIf the squeak originates from two hardwood boards rubbing against each other at the tongue-and-groove joint rather than from subfloor movement, a surface-applied lubricant can provide immediate relief. Sprinkle powdered graphite or talcum powder liberally over the squeaky joint. Work the powder into the seam by placing a cloth over the area and stepping on it repeatedly, rocking your weight back and forth to drive the lubricant into the joint. Wipe away excess powder with a damp cloth. For a longer-lasting solution, use a squeeze bottle to apply a thin bead of wood-swelling liquid (such as Squeaky Floor Repair from Loctite, about $10) directly into the joint. The liquid absorbs into the wood fibers, causing them to swell slightly and tighten the fit, eliminating the friction noise for 6–12 months. This method works best when humidity is low and the joints are slightly open. It will not fix subfloor-related squeaks — only board-on-board noise.
When to Stop DIY and Call a Pro
Call a licensed general contractor or flooring specialist when the squeak is accompanied by visible floor sagging of more than 1/4 inch over a 4-foot span, when the subfloor feels dangerously spongy and you suspect moisture damage or wood rot, or when you count more than 20 squeak points in a single room suggesting systemic subfloor failure. If your hardwood is a prefinished engineered product thinner than 3/8 inch, driving breakaway screws risks blowing through the wear layer and ruining the board — a pro with experience in thin-profile flooring can use specialized micro-fasteners or adhesive injection instead. Structural concerns — cracked joists, termite-damaged framing, or undersized joists that exceed deflection limits (L/360 for live load per IRC) — require engineering evaluation and are beyond safe DIY scope. From a cost perspective, if the repair involves replacing subfloor panels, sistering joists, or addressing a moisture source, materials alone can run $500–$2,000 and labor adds $300–$800 per day. At that point the margin for error makes professional work a better financial decision than risking a botched DIY repair that could cost $3,000–$5,000 to undo.
What Does This Repair Cost?
Costs vary by region, home age, and severity. These are national averages — always get 3 quotes.
| Repair Type | DIY Cost | Pro Cost | Emergency Premium |
|---|---|---|---|
| Powder/lubricant between boards | $4–$8 | $75–$150 | N/A |
| Screw-down kit (Counter-Snap/Squeeeeek No More) | $9–$25 | $150–$350 | $250–$500 |
| Subfloor re-securing from below (glue + screws) | $15–$40 | $200–$600 | $400–$900 |
| Subfloor section replacement + hardwood re-install | Not recommended | $800–$2,500 | $1,500–$3,500 |
*Emergency rates (nights/weekends/holidays) run 40–60% above standard. Get 3 quotes before approving work.
Get quotes from licensed professionals in your area
Free, no obligation — compare 3+ contractors in minutesWhat Drives the Cost?
| Cost Factor | Estimated Impact | Why It Matters |
|---|---|---|
| Access from below (open basement ceiling) | Saves $200–$800 | Contractors can shim, glue, and screw from underneath without touching or refinishing the hardwood surface above |
| Number of affected areas | Adds $100–$400 per zone | Each isolated squeak zone requires separate diagnosis; multi-room issues suggest systemic subfloor problems that increase labor time |
| Hardwood species and thickness | Adds $150–$600 | Exotic or thin-milled hardwoods (3/8-inch engineered) risk splitting during screw-based repairs, requiring board replacement at $8–$25 per sq ft installed |
| Floor finish and age | Adds $200–$1,200 | Repairing squeaks on prefinished or recently refinished floors may require spot-sanding and finish blending to hide repair marks, adding significant labor cost |
In the Midwest and Northeast, seasonal squeaking that appears every November and disappears by April is almost always caused by humidity-driven wood contraction, not structural failure. Before you spend $500 on a contractor visit, invest $30–$40 in a digital hygrometer and monitor your indoor humidity. If it drops below 35% in winter, running a whole-house humidifier ($150–$300 installed) or even a portable unit keeps hardwood expanded and tight against the subfloor. I've saved clients $2,000+ by diagnosing a humidity problem instead of tearing up floors. In southern climates, the reverse can happen — excessive summer humidity causes boards to cup and squeak at edges, solvable with better HVAC dehumidification rather than any floor repair.
⚠️ Stop DIY — Call a Pro If You See These
- Floor sags visibly — more than 1/4 inch over 4 feet — near the squeak area — This indicates a structurally compromised joist or bearing point. Ignoring it can lead to progressive deflection, cracked drywall on ceilings below, and eventually a joist failure that costs $2,000–$6,000 to sister or replace within 1–3 years.
- Soft, punky subfloor that gives way under a screwdriver probe — Wood rot has advanced beyond surface damage. The subfloor has lost structural capacity and can fail suddenly under concentrated load (furniture leg, appliance). Subfloor panel replacement runs $350–$750 per 4x8 sheet installed; delaying allows rot to spread to joists, tripling the repair cost.
- Musty odor rising from floor gaps when squeak is triggered — Active mold or mildew is present in the subfloor assembly, usually from unresolved moisture intrusion. Within 6–12 months, mold can colonize multiple joist bays, creating indoor air quality hazards and remediation costs of $1,500–$4,000.
- Multiple boards pop up or tent when the room is heated — The flooring has buckled due to inadequate expansion gaps or excessive moisture beneath the slab or subfloor. Buckling stresses tongue-and-groove joints and can crack boards. Re-laying a buckled floor costs $4–$8 per square foot; a 200-square-foot room runs $800–$1,600 if addressed promptly, but full replacement at $6–$12 per square foot if boards are broken.
Frequently Asked Questions
How much does it cost to fix Hardwood Floor Squeaking?
For a straightforward repair using breakaway screw kits from above, homeowners spend $25–$50 in materials for a DIY fix covering up to 30 squeak points. If you hire a general contractor or flooring pro, expect $150–$400 for isolated squeaks in one or two rooms — most charge a minimum service call of $100–$150 plus $75–$125 per hour of labor. Systemic repairs that require subfloor re-screwing from below, adding joist blocking, or replacing damaged subfloor panels range from $500 to $2,500 depending on square footage and access. The two biggest cost drivers are accessibility — crawlspace work is 30–50 percent more expensive than open-basement work — and whether the finished floor surface must be preserved or can tolerate visible fastener holes.
Can I fix Hardwood Floor Squeaking myself?
Yes, most isolated squeaks are well within DIY capability using a breakaway screw kit ($25), a stud finder, and a drill/driver. If you have basement access below the floor, shimming gaps and adding construction adhesive are simple fixes that require no special skills. However, stop and call a pro if the subfloor feels spongy or rotted, if the floor is visibly sagging, or if you have engineered hardwood thinner than 3/8 inch — screwing through thin wear layers destroys the board. Also avoid DIY if the floor sits over a radiant-heat system, as misplaced screws can puncture PEX tubing and cause a $1,000+ leak repair.
How urgent is Hardwood Floor Squeaking?
A simple friction squeak with no structural movement is a comfort and annoyance issue, not an emergency — you can address it on a timeline of weeks to months without risk. However, if the squeak is paired with noticeable floor bounce exceeding 1/4 inch, a musty smell, or gaps widening over time, treat it as a priority and investigate within one to two weeks. Delaying a moisture-related squeak by 6–12 months can allow mold growth and wood rot to spread from the subfloor into the joists, escalating a $300 repair into a $3,000–$5,000 structural project. Seasonal squeaks tied to humidity are not urgent but will recur every winter until the root cause — usually dry indoor air or loose fasteners — is addressed.
What causes Hardwood Floor Squeaking?
The most common cause — responsible for roughly 60–70 percent of cases — is the subfloor separating from the floor joists as nails loosen over years of foot traffic and wood movement. The second most common cause is tongue-and-groove friction: hardwood boards shrink in low humidity (below 35 percent RH), and the loose-fitting tongue rubs against the groove or against the nail holding it, producing a high-pitched chirp. A third significant cause is missing or failed joist bridging, which allows joists to twist and the subfloor to flex between them, creating movement and noise at the fastener points.
Will homeowners insurance cover Hardwood Floor Squeaking?
In nearly all cases, no. Standard homeowners insurance policies exclude maintenance issues, wear and tear, and gradual deterioration — all of which describe typical floor squeaks caused by aging fasteners or seasonal wood movement. The only scenario where coverage might apply is if the squeak results from a sudden, covered peril — for example, a burst pipe that soaked and warped the subfloor. Even then, the insurer covers the water damage and resulting structural repair, not the squeak itself. If you suspect moisture damage, document it with photos and a moisture meter reading (above 19 percent MC in the subfloor is evidence of a problem), and file a claim promptly. Deductibles typically run $1,000–$2,500, so the damage must exceed that threshold for a claim to make financial sense.
How do I find a licensed general contractor for this?
First, verify the contractor's license through your state's licensing board website — every state has a public search tool. Second, confirm they carry general liability insurance (minimum $1 million) and workers' compensation; ask for a certificate of insurance and call the carrier to verify it is current. Third, get a written quote that itemizes materials, labor hours, and scope of work — avoid contractors who quote only a lump sum with no breakdown. Fourth, check at least three references from jobs completed in the last 12 months, and look at online reviews on Google and the Better Business Bureau. For hardwood floor squeaks specifically, ask whether they have experience with breakaway screw systems and subfloor access work — a contractor who specializes only in new construction may not have the diagnostic skill to trace a squeak to its exact source.
Fixing hardwood floor squeaks comes down to three decisions: first, correctly diagnosing whether the noise originates at the subfloor-to-joist connection, at the board-to-board tongue-and-groove joint, or from structural deflection caused by missing bridging or damaged framing. Second, choosing the right repair method — breakaway screws from above for inaccessible floors, shims and construction adhesive from below for accessible basements, or lubricant for surface-level friction noise. Third, recognizing when the squeak is a symptom of something more serious — moisture damage, wood rot, or structural sagging — that demands professional evaluation before you put a single screw in the floor.
Your recommended next step: grab a stud finder and a roll of painter's tape, map every squeak in the affected room, and determine whether you have access from below. If you count fewer than 15 squeak points and the subfloor feels solid, a $25 breakaway screw kit and an hour of work will likely solve the problem. If the floor bounces noticeably, feels soft, or smells musty, skip the DIY and call a licensed general contractor for a diagnostic visit — expect to pay $100–$200 for the inspection, which will be money well spent compared to chasing a structural issue with a box of screws.
Ready to Solve This for Good?
Get matched with pre-screened, licensed general contractors in your area. Free quotes, no obligation, no spam.
GET FREE QUOTES NOW