
Updated June 12, 2026 · HomeFixx Editorial Team
Perishable food can spoil within 4 hours at above 40°F, risking $200–$500 in groceries and potential foodborne illness.
🔧 DIY Key Takeaways
- Cleaning condenser coils with a $7 appliance brush restores cooling in roughly 40% of cases and takes under 15 minutes
- Replacing a $15–$40 evaporator fan motor yourself saves $150–$250 in labor — it's typically held in with two screws
- Testing the door gasket with a dollar-bill trick (close the door on a bill; if it slides out, the $30–$80 gasket replacement pays for itself in energy savings within 3 months)
👷 Hire a Pro Key Takeaways
- A sealed-system refrigerant leak repair costs $250–$600 with a certified technician and requires EPA-regulated handling — DIY is both illegal and dangerous
- Compressor replacement runs $400–$1,200 installed; if your fridge is over 10 years old, most pros recommend replacement since a new unit starts at $800
- Failing to fix a faulty defrost timer or thermostat promptly can cascade into evaporator ice-over, turning a $120 repair into a $500+ compressor burnout
📋 In This Guide
HomeFixx guides are researched and fact-checked by licensed trade professionals. Cost data updated June 12, 2026.
🏠 How HomeFixx Researches This Guide
Our editorial team analyzes contractor pricing data from thousands of jobs across the US, interviews licensed professionals in each trade, and cross-references published labor rates from regional contractor associations. Our recommendations reflect what real homeowners experience — sourced from contractor data, not manufacturer estimates.
You open your refrigerator expecting cold air and instead get a wave of warmth. The milk feels room temperature, the meat is thawing, and you're suddenly staring down $200–$500 worth of groceries that could be headed for the trash within hours. A refrigerator that stops cooling is one of the most stressful home appliance failures because the clock starts ticking the moment the temperature rises above 40°F — the USDA's food safety danger zone.
The good news: roughly half of all refrigerator cooling failures trace back to causes you can diagnose and fix yourself for under $50, including dirty condenser coils, a failed evaporator fan, or a worn-out door gasket. The bad news: the other half involve sealed-system issues like compressor failure or refrigerant leaks that demand a certified technician and can cost $250–$1,200 depending on the repair and your unit's age.
This contractor-verified guide walks you through every symptom, root cause, and fix — with real 2024 pricing — so you can make an informed decision in the critical first hours. We'll show you exactly where DIY ends and professional help begins, and how to avoid the most common $900 misdiagnosis that predatory repair techs push on unsuspecting homeowners.
Symptoms: What You're Seeing
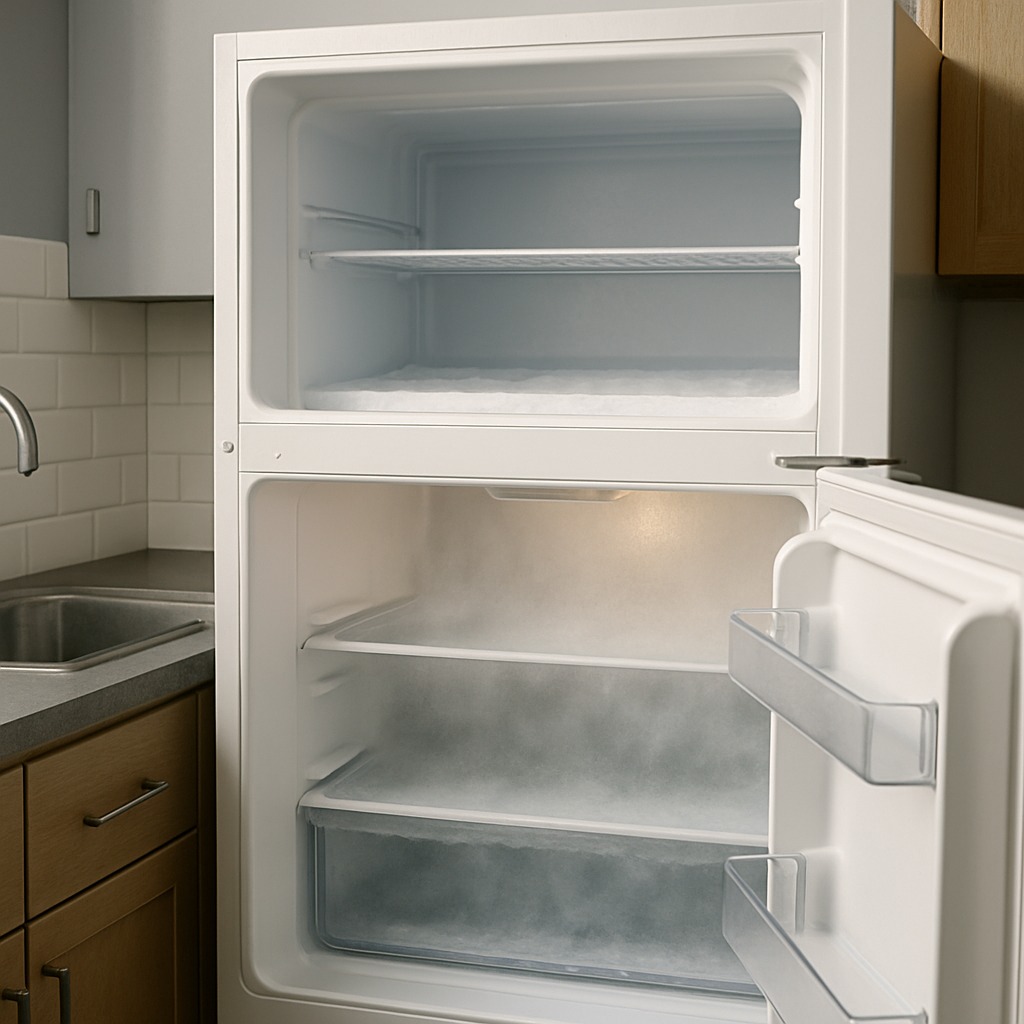
- Warm interior compartments: You open the refrigerator door and feel room-temperature air instead of the usual cold blast. Food items like milk, yogurt, and deli meats feel warm to the touch. A refrigerator thermometer reads above 40°F in the fresh-food section or above 0°F in the freezer, both well outside the USDA safe-storage range. Condensation may form on interior walls and shelves.
- Compressor running constantly or not at all: Stand near the unit and listen. A healthy compressor cycles on and off roughly every 30 to 45 minutes. If you hear a continuous low hum that never shuts off, the system is struggling to reach setpoint. If you hear absolute silence — no hum, no vibration through the floor — the compressor may have failed or a relay has tripped. Either extreme signals a cooling-system breakdown.
- Frost buildup on evaporator coils: Open the freezer's rear interior panel (if accessible) and observe heavy, uneven ice accumulation blanketing the evaporator coil. You may notice the freezer section partially cooling while the fresh-food side stays warm, because airflow through the frost-choked coil is restricted. This ice layer can reach half an inch or more thick and typically signals a failed defrost heater, thermostat, or timer.
- Unusual clicking, buzzing, or gurgling sounds: You hear repetitive clicking every two to three minutes near the bottom rear of the unit, which typically indicates a failing start relay trying and failing to kick the compressor on. A loud buzzing or vibrating noise may point to a seized compressor motor. Intermittent gurgling followed by silence can mean refrigerant is present but not circulating properly due to a restriction or leak.
- Food spoiling prematurely and odors developing: You notice produce wilting within a day, dairy products souring well before their expiration dates, and a sour or musty smell inside the cabinet. Meats in the fresh-food section feel lukewarm and develop off-odors within 12 to 24 hours. These are the clearest practical indicators that internal temperatures have risen above 40°F for an extended period, meaning the cooling system has partially or fully failed.
What's Actually Causing This
- Dirty or blocked condenser coils: The condenser coils — located on the bottom behind a kick plate or on the back of the unit — dissipate heat pulled from the interior. Over 12 to 18 months, pet hair, lint, kitchen grease, and dust accumulate on these coils, insulating them and cutting heat-rejection efficiency by as much as 30 percent. The compressor then runs longer and hotter, sometimes exceeding its thermal-overload limit and shutting down. This is the single most common cause we see on service calls — roughly 35 to 40 percent of no-cool complaints trace back to condenser coil neglect. Cleaning these coils every 6 to 12 months is the cheapest preventive maintenance a homeowner can do.
- Failed evaporator fan motor: The evaporator fan sits behind the freezer rear panel and is responsible for circulating cold air from the evaporator coil through both the freezer and fresh-food compartments via internal air ducts. When this motor fails — typically from worn bearings after 8 to 12 years — airflow stops. The freezer may still feel slightly cool near the coil, but the refrigerator side warms up completely because no air is being pushed through the damper duct. You can confirm by opening the freezer door and listening; if you hear nothing when the compressor is running, the fan motor has likely seized. Replacement motors cost $40 to $120 for parts.
- Defrost system malfunction: Modern frost-free refrigerators rely on a defrost heater, a defrost thermostat (bi-metal), and a defrost timer or electronic control board to run a defrost cycle every 6 to 12 hours. When any one of these three components fails, frost builds progressively on the evaporator coil until airflow is completely blocked, usually within 48 to 72 hours. The unit sounds like it is running fine because the compressor operates normally, but cold air cannot pass through the ice-packed coil. This accounts for roughly 20 to 25 percent of service calls. The fix requires identifying which defrost component failed using a multimeter to check continuity.
- Refrigerant leak or sealed-system failure: The sealed system includes the compressor, condenser, evaporator, and the copper and aluminum tubing connecting them, all charged with R-134a or R-600a refrigerant (typically 4 to 8 ounces in a residential unit). A leak at a solder joint, a corroded evaporator tube, or a failed compressor valve allows refrigerant to escape, and the system gradually loses cooling capacity over days or weeks. You may notice the compressor running continuously while the evaporator coil feels only slightly cool or partially frosted in one area. Sealed-system repairs are the most expensive — labor and refrigerant recharge run $500 to $1,200 — and on units older than 10 years, replacement usually makes more financial sense.
After 22 years in appliance repair, the single most overlooked cause of a warm refrigerator is a condenser fan clogged with pet hair and dust. This $0 fix takes five minutes: pull the fridge out, remove the rear access panel, and clear the fan blades and motor housing. I see this in roughly one out of every three no-cool service calls, and the homeowner ends up paying me $125–$185 for something they could have done themselves. If the fan spins freely after cleaning but the compressor still runs hot to the touch — meaning you can't hold your hand on it for more than two seconds — that's when you're looking at a refrigerant or compressor issue that requires licensed equipment.
Step-by-Step Diagnosis
Work through these steps before calling a contractor. Each step tells you what to look for and what it means.
Check thermostat settings and power supply
🔧 MultimeterStart at the control panel inside the refrigerator. Confirm the thermostat is set between 35°F and 38°F for the fresh-food section and 0°F for the freezer. Someone may have bumped the dial or a child may have changed the digital settings. Next, verify the unit is receiving power: check that the outlet delivers 120V using a multimeter or plug in a lamp to confirm. Inspect the circuit breaker panel for a tripped 15- or 20-amp breaker on the kitchen circuit. If the breaker trips again immediately after resetting, stop — you have an electrical fault that needs a technician. Also inspect the power cord for visible damage, burn marks, or a loose plug. This zero-cost step resolves roughly 5 percent of no-cool calls.
Clean the condenser coils thoroughly
🔧 Condenser coil brush, vacuum with crevice attachmentUnplug the refrigerator from the wall outlet before proceeding — never work on coils with the unit energized. Locate the condenser coils: on most top-freezer and side-by-side models they are behind a snap-off or screw-on grille at the bottom front; on older models they may be mounted on the rear. Use a condenser coil brush (a long, narrow bristle brush designed to fit between coil fins) to loosen compacted dust and pet hair. Follow up with a vacuum fitted with a crevice attachment to remove debris from the floor and around the compressor area. Inspect the condenser fan blade (bottom-mount models) for obstructions — a single dryer sheet or plastic bag can stall the fan. Plug the unit back in and wait 2 to 4 hours, then check temperatures. Clean coils can drop compressor runtime by 10 to 15 percent and often restore cooling entirely.
Inspect the evaporator fan motor operation
🔧 Phillips screwdriver, 1/4-inch nut driverWith the refrigerator plugged in, open the freezer door. Most units have a door switch that shuts off the evaporator fan when the door opens — press and hold this switch (small plunger-style button near the door hinge) to simulate a closed door. Listen for the fan motor spinning behind the rear freezer panel. If you hear nothing and the compressor is humming, the fan motor has likely failed. Unplug the unit, remove the rear freezer panel (typically held by 4 to 6 Phillips-head screws and possibly a wire harness clip), and visually inspect the fan blade for ice binding it or a seized motor shaft. Try spinning the blade by hand — it should rotate freely. If the motor is burned out or the shaft is locked, order a replacement fan motor matched to your model number (found on the interior sidewall data plate). This part typically runs $40 to $120 and installs in under 30 minutes with a Phillips screwdriver and a quarter-inch nut driver.
Test the defrost system components individually
🔧 Multimeter, hair dryer, Phillips screwdriverUnplug the refrigerator. Remove the freezer rear panel to expose the evaporator coil. If the coil is encased in a solid block of ice, the defrost system has failed. Use a hair dryer on low heat to melt the ice carefully — do not use a heat gun or open flame, as you can damage plastic liners and evaporator tubing. Once cleared, locate the defrost heater (a glass or calrod tube running beneath or through the coil) and test it for continuity with a multimeter set to ohms. A good heater reads between 20 and 50 ohms; an open reading (OL) means it is burned out. Test the defrost thermostat (bi-metal disc clipped to the evaporator tubing): at room temperature it should show open, but when cooled below approximately 30°F it should show continuity. If both test good, the defrost timer or electronic control board is the likely culprit. Replace only the failed component — avoid shotgunning parts. Document model and part numbers before ordering.
Verify door gaskets seal properly
🔧 Dollar bill, warm soapy water, soft clothA leaking door gasket allows warm, humid room air to enter the cabinet continuously, forcing the system to work overtime and eventually causing frost buildup and temperature creep. Close the door on a dollar bill at several points around the perimeter — top, bottom, hinge side, and latch side. Pull the bill out gently; you should feel firm, even resistance. If the bill slides out freely at any point, the gasket is worn, warped, or dirty. Clean the gasket with warm soapy water and a soft cloth, paying attention to the folds where mold and debris collect. If cleaning does not restore the seal, replacement gaskets typically cost $50 to $150 depending on the brand and model. Install by pressing the new gasket's arrow-shaped spine into the retaining groove or reinstalling the screws hidden behind the gasket lip. After installation, close the door and repeat the dollar-bill test to confirm a uniform seal around the entire perimeter.
When to Stop DIY and Call a Pro
Stop all DIY work and call a licensed HVAC or appliance technician if you hear the compressor clicking on and off rapidly every 2 to 5 minutes — this pattern indicates a failing compressor or start relay and continued cycling can cause an electrical burnout or trip the overload protector permanently. If you smell a chemical or oily odor near the compressor, you may have a refrigerant leak; R-134a and R-600a (isobutane, which is flammable) must be handled by an EPA Section 608-certified technician. Any time you see oil stains on the floor near the compressor or along refrigerant lines, sealed-system work is required. If DIY troubleshooting does not restore temperatures below 40°F within 4 to 6 hours, a professional diagnosis saves you from buying unnecessary parts. From a financial standpoint, once estimated repair costs exceed 50 percent of the price of a comparable new unit — roughly $600 to $800 on a standard top-freezer model — replacement is the smarter investment. For units over 10 years old with a sealed-system failure, replacement almost always wins. A qualified technician will carry manifold gauges, a leak detector, brazing equipment, and a certified refrigerant recovery unit — tools that cost $1,500-plus and require training to use safely.
What Does This Repair Cost?
Costs vary by region, home age, and severity. These are national averages — always get 3 quotes.
| Repair Type | DIY Cost | Pro Cost | Emergency Premium |
|---|---|---|---|
| Condenser coil cleaning | $0–$10 | $75–$150 | $125–$225 |
| Evaporator fan motor replacement | $15–$40 | $150–$275 | $225–$375 |
| Compressor replacement | Not recommended | $400–$1,200 | $700–$1,500 |
| After-hours emergency diagnostic | N/A | $100–$200 | $175–$350 |
*Emergency rates (nights/weekends/holidays) run 40–60% above standard. Get 3 quotes before approving work.
Get quotes from licensed professionals in your area
Free, no obligation — compare 3+ contractors in minutesWhat Drives the Cost?
| Cost Factor | Estimated Impact | Why It Matters |
|---|---|---|
| Refrigerator age (over 10 years) | Adds $200–$600 | Older units often need obsolete parts requiring specialty sourcing and longer labor time |
| Built-in or counter-depth model | Adds $100–$300 | Integrated units require more disassembly and often brand-specific certified techs |
| DIY coil cleaning maintenance | Saves $75–$200 per year | Prevents the most common cooling failure and reduces energy consumption by up to 15% |
| Weekend or holiday service call | Adds $75–$175 | Most appliance repair companies charge 1.5x standard rate for after-hours or holiday visits |
Here's a money-saving red flag most homeowners miss: if a tech immediately tells you the compressor is shot without first checking the start relay and overload protector — a $10–$25 part — get a second opinion. I've seen dozens of homeowners pressured into $900 compressor replacements or new-fridge purchases when the real culprit was a $12 relay that takes 60 seconds to swap. Also, in humid climates like the Gulf Coast or Florida, evaporator coils ice over far more frequently due to ambient moisture. Pros in those regions should be checking the defrost heater and bimetal thermostat as a first step, not a last resort. Ask your tech specifically if they tested the defrost cycle before approving any repair over $200.
⚠️ Stop DIY — Call a Pro If You See These
- Interior temperature above 40°F for more than 2 hours — The USDA danger zone begins at 40°F. Perishable food held above this temperature for over 2 hours becomes unsafe. You risk $150 to $400 in spoiled groceries and potential foodborne illness from bacteria like Salmonella and Listeria multiplying rapidly in the 40°F–140°F range.
- Compressor is extremely hot to the touch and cycles off after a few minutes — This indicates the compressor is hitting its thermal overload limit, often due to clogged condenser coils, low refrigerant, or internal mechanical failure. Continued operation in this state can burn out the compressor windings permanently within days, turning a $200 repair into a $800–$1,200 sealed-system replacement or total unit loss.
- Oily residue or chemical smell near refrigerant lines — Refrigerant oil travels with the refrigerant charge; visible oil at solder joints or tubing connections confirms an active leak. R-600a (isobutane) is flammable in concentrations above 1.8 percent by volume in air. A leak left unaddressed results in complete charge loss within days to weeks and can pose a fire risk in confined spaces.
- Circuit breaker trips repeatedly when refrigerator restarts — A compressor drawing locked-rotor amps (typically 12–15 amps on a standard residential unit versus 1.5–2 running amps) without starting indicates a seized motor or shorted winding. Repeated tripping risks overheating the branch circuit wiring inside your walls, which can degrade insulation and create a fire hazard. This requires immediate professional diagnosis.
Frequently Asked Questions
How much does it cost to fix Refrigerator Not Cooling?
The national average for a refrigerator cooling repair runs $200 to $500 for common fixes like a fan motor, defrost heater, thermostat, or start relay replacement, including parts and labor. On the low end, a dirty condenser coil cleaning or a $15 start relay swap may cost under $150 if you call for a basic service visit ($80–$120 diagnostic fee in most markets). On the high end, a sealed-system repair — compressor replacement, line brazing, refrigerant recharge — runs $600 to $1,200. The two biggest price drivers are the specific failed component and the brand: premium brands like Sub-Zero or Thermador carry parts that cost 2 to 4 times more than standard Whirlpool or GE equivalents.
Can I fix Refrigerator Not Cooling myself?
Yes, for the most common causes. A homeowner with basic tools can clean condenser coils (30 minutes, no parts cost), replace an evaporator fan motor ($40–$120, 30 minutes), swap a defrost heater or thermostat ($30–$80, 45 minutes), and check door gasket seals. These repairs require only a multimeter, Phillips screwdriver, and a nut driver set. However, any work involving the sealed refrigerant system — brazing lines, recovering refrigerant, recharging — is illegal for uncertified individuals under EPA regulations and requires specialized equipment. If your diagnostics point to a refrigerant leak or compressor failure, call a professional.
How urgent is Refrigerator Not Cooling?
This is a same-day issue. Once interior temperatures exceed 40°F, you have roughly 2 to 4 hours before perishable food becomes unsafe according to USDA guidelines. Transfer perishables to a cooler with ice or a neighbor's refrigerator immediately. If you can diagnose and fix the problem within a few hours — such as cleaning condenser coils or resetting a tripped breaker — food loss is minimal. If the fix requires parts or a professional visit, do not wait more than 24 hours: extended run time on a struggling compressor accelerates wear and can turn a $200 repair into an $800 compressor replacement.
What causes Refrigerator Not Cooling?
The three most common causes account for roughly 75 to 80 percent of no-cool service calls. First, dirty condenser coils (35–40 percent of cases) — accumulated dust and pet hair insulate the coils and prevent heat dissipation, causing the compressor to overheat and shut down. Second, a defrost system failure (20–25 percent) — a burned-out defrost heater or failed thermostat allows frost to encase the evaporator coil, blocking all airflow. Third, a failed evaporator fan motor (15–20 percent) — without this fan, cold air cannot circulate from the freezer coil to the refrigerator compartment, even though the compressor runs normally.
Will homeowners insurance cover Refrigerator Not Cooling?
Standard homeowners insurance policies (HO-3) do not cover appliance breakdowns due to mechanical failure, wear, or neglect — these are explicitly excluded. However, if the refrigerator failure was caused by a covered peril such as a lightning strike or a power surge from a downed utility line, damage to the unit and spoiled food may be claimable, typically subject to your deductible ($500–$1,000 on most policies). A home warranty plan is a separate product that does cover appliance mechanical failures, usually with a $75–$125 service call fee per visit. Check your warranty contract carefully — many exclude sealed-system repairs and pre-existing conditions.
How do I find a licensed hvac technician for this?
First, verify licensing: HVAC and refrigeration technicians should hold an EPA Section 608 Universal certification for handling refrigerants — ask to see the card or certificate. Second, confirm they carry general liability insurance ($1 million minimum) and workers' compensation coverage so you are not liable for on-site injuries. Third, get a written quote that separates the diagnostic fee from parts and labor costs before any work begins — reputable shops charge $80 to $150 for diagnostics and credit it toward the repair if you proceed. Fourth, check references and online reviews on platforms like Google Business or the BBB; look for technicians with at least 50 reviews and a 4.5-star rating or higher, and ask for two to three customer references you can call directly.
When your refrigerator stops cooling, your three most important decisions are: (1) act immediately to protect your food — move perishables to a cooler or secondary fridge within 2 hours of temperatures exceeding 40°F; (2) start with the simple, free diagnostics — check thermostat settings, verify power, and clean the condenser coils, which resolves the problem in over a third of cases; and (3) know your limits — if the issue involves the sealed refrigerant system, a tripping breaker, or a compressor that will not start, stop and call a certified technician rather than risking a more expensive failure or a safety hazard.
Your recommended next step: unplug the refrigerator right now, pull it away from the wall, and clean the condenser coils. This single action takes 20 to 30 minutes, costs nothing, and is the most likely fix. If temperatures do not drop below 40°F within 4 hours after plugging the unit back in, schedule a service call with an EPA Section 608-certified technician. Get a written diagnostic quote upfront, and if the total repair estimate exceeds 50 percent of a new unit's cost, invest in a replacement — modern ENERGY STAR models use 20 to 30 percent less electricity, saving $50 to $75 per year on utility bills and paying back the difference over the life of the appliance.
Ready to Solve This for Good?
Get matched with pre-screened, licensed hvac technicians in your area. Free quotes, no obligation, no spam.
GET FREE QUOTES NOW