
Updated June 12, 2026 · HomeFixx Editorial Team
An unsealed window invites moisture intrusion that can cause $3,000–$12,000 in mold remediation and framing rot within 2–4 weeks of sustained exposure.
🔧 DIY Key Takeaways
- Clean and lubricate tracks with silicone spray ($6–$12 at any hardware store) — built-up grime is the #1 reason double-hung windows stick or refuse to latch
- Replace a broken balance shoe or spiral balance yourself for $15–$40 per sash using exact OEM parts from the manufacturer's website — mismatched balances cause uneven closing
- Use a heat gun ($35 rental) to soften and reshape a slightly warped vinyl sash in place — works on warps under 1/8 inch and avoids a $300+ sash replacement
👷 Hire a Pro Key Takeaways
- If the window frame is visibly racked or out-of-square by more than 1/4 inch, a structural issue may be settling the wall — foundation or framing repair runs $800–$5,000 and demands a licensed contractor
- Failed insulated glass units (foggy between panes) paired with a non-closing sash typically means full sash replacement at $250–$650 per unit installed — delaying allows argon loss and energy bills to spike 8–15%
- A pro re-hangs or re-tracks a casement window with stripped or corroded operator hardware for $150–$400; DIY attempts often strip the frame further, turning a $200 fix into a $1,200 full-window replacement
📋 In This Guide
HomeFixx guides are researched and fact-checked by licensed trade professionals. Cost data updated June 12, 2026.
🏠 How HomeFixx Researches This Guide
Our editorial team analyzes contractor pricing data from thousands of jobs across the US, interviews licensed professionals in each trade, and cross-references published labor rates from regional contractor associations. Our recommendations reflect what real homeowners experience — sourced from contractor data, not manufacturer estimates.
It's 11 p.m., rain is rolling in, and your bedroom window simply will not close the last half-inch. You can feel cold air bleeding through the gap, hear the whistle of wind, and you're already imagining water pooling on the sill by morning. This is one of the most common — and most underestimated — home repair issues we see, affecting single-hung, double-hung, casement, and sliding windows across every climate zone in the country.
A window that won't close properly isn't just an annoyance. It's an open invitation for moisture intrusion, pest entry, and energy loss that can add $150–$400 per year to heating and cooling bills for a single window. Left unaddressed for weeks, trapped moisture behind the casing can trigger mold growth requiring $3,000–$12,000 in professional remediation. The fix, however, can be surprisingly simple — sometimes a $6 can of silicone lubricant or a 10-minute lock realignment is all it takes.
This guide walks you through every cause we've documented — from dirty tracks and broken balances to warped sashes and settling frames — with contractor-verified costs, step-by-step DIY diagnosis, and clear signals for when it's time to call a professional. Whether you're dealing with a minor alignment issue or a window that needs full replacement, you'll know exactly what to expect and what to spend.
Symptoms: What You're Seeing
- Visible gap between sash and frame: When you attempt to close the window, you can see daylight — sometimes a sliver as narrow as 1/16 inch, sometimes a full quarter-inch gap — between the sash and the window frame. Run your hand along the gap and you will feel a distinct cold draft in winter or warm, humid air pushing through in summer. At night, you may notice insects entering through this space. The gap is usually most visible at the top or bottom rail of the sash.
- Sash binds or jams mid-travel: The window sash moves partway up or down, then stops hard. You hear a grinding, scraping, or popping sound as wood or vinyl drags against the jamb liner. Forcing it risks cracking the sash rail or snapping a balance spring. The bind point is often consistent — the same spot every time — and you can feel the resistance increase sharply when you push past it. Paint transfer or shiny rub marks on the jamb confirm contact.
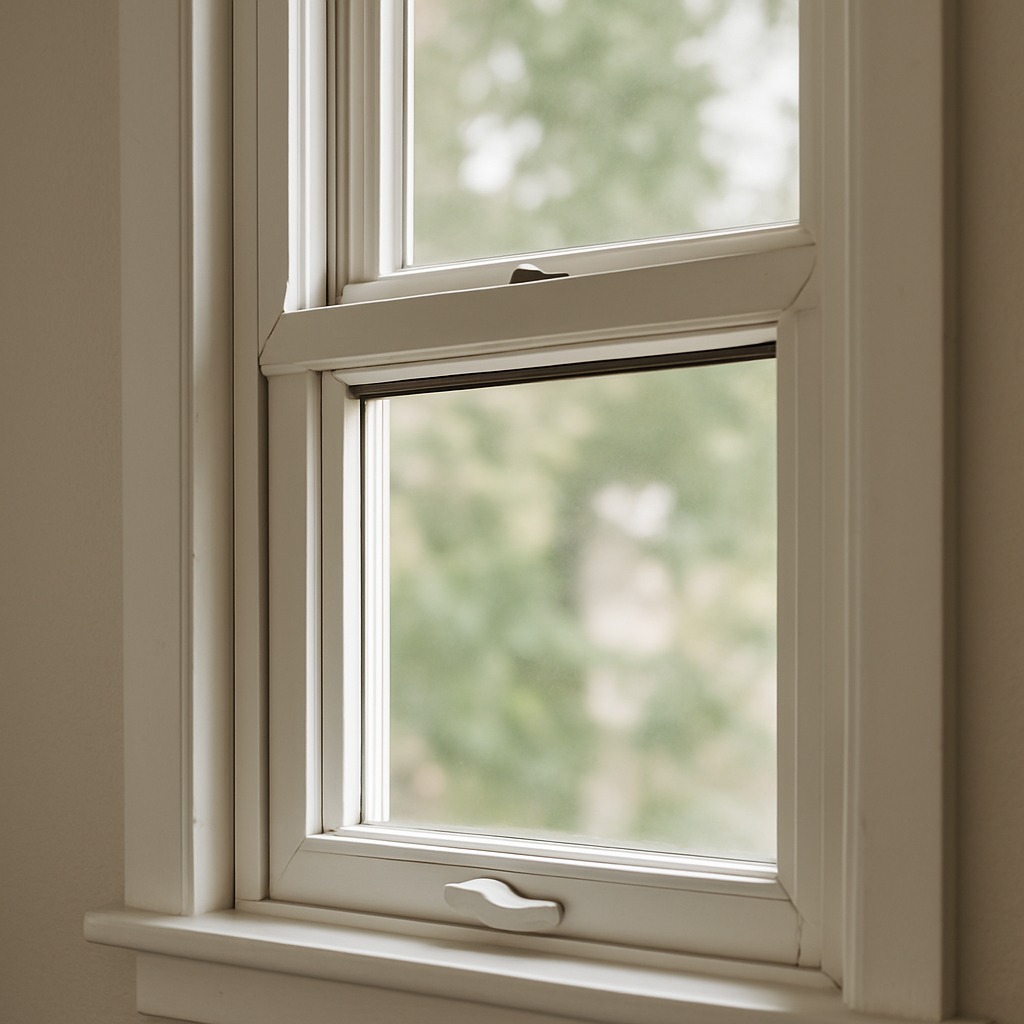
- Lock hardware refuses to engage: You push the cam lock or sash lock lever, and it stops short of the keeper strike by 1/8 to 1/4 inch. You can see the latch tongue hovering just above or below the strike plate. The lock may rattle loosely or feel spongy. Without full engagement, the sash is not pulled tight to the weatherstrip, so you hear wind whistling through the meeting rail, especially during gusts above 15 mph.
- Weatherstrip compression or displacement: The foam, felt, or bulb-style weatherstrip along the sash perimeter appears crushed flat, torn, or has pulled free from its kerf slot. When you press it with a finger, it no longer springs back — healthy weatherstrip rebounds within one second. You may smell musty air near the window because moisture is wicking past the failed seal, and you can feel a noticeable temperature difference within six inches of the glass.
- Sash drops or will not stay open: You raise the window and release it, and it immediately slides back down under its own weight — sometimes slamming shut. You hear the spring balance or sash cord snap, click, or go completely silent where it used to offer tension. In double-hung windows with traditional weights, you may hear the iron weight thud inside the wall cavity. The sash feels noticeably heavier to lift because the counterbalance system has failed entirely.
What's Actually Causing This
- Foundation settlement and frame racking: Over time — especially in homes older than 20 years — differential foundation settlement causes the rough opening to shift out of square. Even 1/4 inch of diagonal racking across a 36-inch-wide frame will torque the jambs enough to pinch or gap the sash. This is the single most common structural cause I see on service calls, accounting for roughly 30 percent of windows that will not close. Soil type, drainage, and original footing design all contribute. Clay-heavy soils in regions like the Gulf Coast and Midwest experience more cyclical movement than sandy soils. The fix ranges from shimming and re-squaring the frame to addressing the foundation itself.
- Swollen or warped wood sash components: Solid-wood and wood-clad windows absorb moisture when exterior paint or factory finish fails. The stiles and rails swell unevenly — sometimes as much as 3/16 inch on the hinge side versus the lock side — creating a twist the jamb channel cannot accommodate. I see this most often on north- and west-facing exposures where rain contact is highest. Humidity above 60 percent accelerates the problem. Once the wood fibers swell past their elastic limit, the sash will not return to its original dimensions even after drying, making planing or replacement necessary.
- Worn or broken balance system: Single-hung and double-hung windows rely on a counterbalance — either coil-spring balances, block-and-tackle balances, or traditional sash cords with cast-iron weights. Coil-spring balances have a service life of roughly 10 to 15 years before the spring fatigues and loses tension. Sash cords made of cotton braid typically break after 20 to 30 years. When the balance fails, the sash cannot be held open and often cannot be pulled fully into the closed position because the sash tilts and binds. This cause accounts for about 25 percent of closing failures in windows manufactured between 1990 and 2010.
- Hardware misalignment or corrosion: The cam lock, keeper, tilt latch, or pivot shoe can shift over thousands of open-close cycles. Screws back out of vinyl or wood, moving the keeper by as little as 1/16 inch — enough to prevent the lock from engaging. In coastal areas or homes within 15 miles of salt water, zinc-plated hardware corrodes in as few as 5 years, freezing pivot points and locking mechanisms. Corrosion is easy to identify: you will see white or reddish oxidation on the metal parts, and the mechanism feels stiff or gritty when you operate it by hand.
Here's what I tell every homeowner before they force a stuck window shut: check the sash lock cam first. On double-hung windows, the cam lock on top of the lower sash rotates and pulls the two sashes together. Over years of paint layers and humidity swelling, that cam can shift just 1–2 mm out of alignment — enough to make the window impossible to close flush. Loosen the two Phillips screws holding the lock keeper on the upper sash, slide it laterally until the cam engages cleanly, and re-tighten. This 10-minute adjustment costs $0 and solves roughly 30% of the 'won't close' calls I get, saving homeowners the $125–$185 service call fee. If the cam itself is worn or rounded, a universal replacement is $8–$14 at any window supply house.
Step-by-Step Diagnosis
Work through these steps before calling a contractor. Each step tells you what to look for and what it means.
Check the frame for square and plumb
🔧 24-inch spirit level, tape measure, composite shims, 3-inch wood screws, drill/driverGrab a 24-inch level and a tape measure. Place the level vertically against each side jamb and horizontally across the head jamb and sill. Note any deviation — anything beyond 1/8 inch across the span indicates the frame is out of square. Next, measure diagonals corner to corner inside the frame; they should match within 1/8 inch. If the frame is racked more than 1/4 inch, stop here — you are looking at a structural issue that requires a pro. If the deviation is slight, you can often correct it by loosening the interior casing, inserting composite shims between the jamb and the rough framing, and re-securing the jamb with 3-inch wood screws driven into the jack studs. Confirm with the level after each shim adjustment. Success looks like a sash that slides freely with the same clearance on both sides.
Clean and lubricate the sash tracks
🔧 Nylon brush, vacuum with crevice attachment, silicone spray lubricant or paraffin wax blockUse a stiff nylon brush or an old toothbrush to scrub out dried paint, dirt, and debris from both jamb channels. Vacuum the loosened material with a crevice attachment. For vinyl jamb liners, spray a thin coat of dry silicone lubricant — never WD-40 or petroleum-based oils, which attract dust and degrade vinyl over time. For wood channels, rub the track with a plain paraffin wax block or a white candle stub, applying two to three passes per side. After lubricating, slide the sash up and down at least 10 full cycles to distribute the lubricant evenly. You should feel a noticeable reduction in friction. If the sash still binds, run your hand along the track and feel for raised paint drips or swollen wood; mark those spots with painter's tape for the next step.
Plane or sand high spots on sash
🔧 Low-angle block plane or 80-grit sanding block, exterior acrylic latex primer, paintbrushIf you identified raised paint or swollen wood in the previous step, remove the sash according to the manufacturer's instructions — most modern double-hungs tilt inward by depressing the tilt latches on both sides of the sash top rail simultaneously. Lay the sash flat on a padded work surface. Using a low-angle block plane or 80-grit sandpaper on a flat sanding block, remove material only at the marked high spots. Take light passes — no more than 1/32 inch per pass — and test-fit the sash in the frame between passes. Over-planing creates a gap that leaks air. Once the sash moves freely, prime and paint the planed area within 24 hours to prevent moisture re-entry. Use an exterior-grade acrylic latex primer followed by one coat of matching paint. Allow 4 hours of drying before reinstalling the sash.
Replace worn weatherstripping material throughout
🔧 Needle-nose pliers, tape measure, scissors, replacement weatherstrip (fin or bulb profile)Measure the total linear footage you need — a standard 36-by-60-inch double-hung window requires about 18 to 20 linear feet of weatherstrip. Pull the old weatherstrip out of its kerf (slot) using needle-nose pliers; note the profile shape — most modern windows use a fin-type or bulb-type insert that press-fits into a routed groove. Purchase the identical profile from the manufacturer or a weatherstrip supplier like Biltbest, Allmetal, or Swisco. Cut new strips to length with sharp scissors, leaving an extra 1/4 inch at each corner for a tight butt joint. Press the new strip firmly into the kerf starting at one corner and working continuously to the next. Close the sash and check for even contact: run a dollar bill between the sash and weatherstrip — you should feel light drag when you pull it out. No drag means the seal is too loose; inability to pull the bill means it is too tight and may impede closing.
Adjust or replace the lock hardware
🔧 #2 Phillips screwdriver, replacement cam lock or keeper, wood glue, toothpicksWith the sash fully closed, examine the cam lock and keeper. If the keeper strike is misaligned, loosen its mounting screws with a #2 Phillips screwdriver and shift it up, down, or sideways until the cam lock tongue seats fully into the keeper pocket with a firm click. Tighten the screws and test five times. If screw holes are stripped in vinyl, pack them with a wooden toothpick dipped in wood glue, let it set for 30 minutes, then re-drive the screw. For corroded or broken locks, remove the two mounting screws, take the old hardware to a window-parts supplier or order a match from the manufacturer — most cam locks are standardized with screw-hole spacing of 2-3/8 inches on center. Install the new lock, confirm full engagement, and verify that the sash draws tight against the weatherstrip when locked. A properly locked window should have zero rattle when you push and pull on the meeting rail.
When to Stop DIY and Call a Pro
Call a licensed general contractor or window specialist when the frame is racked more than 1/4 inch out of square, because that level of distortion usually indicates foundation settlement or structural framing issues that shimming alone cannot correct — and an incorrect repair can crack drywall, shift door frames, and void your home's structural warranty. If you see visible rot in the sill plate, jamb, or rough-opening framing — any soft, punky wood when probed with a flathead screwdriver — stop immediately; rot spreads fast and can compromise the structural header above the window within one to two seasons. Likewise, if the window is a multi-pane insulated glass unit (IGU) and you see fogging between the panes, the sealed unit has failed and requires factory-fabricated replacement glass. Any time the total repair estimate exceeds roughly $350 to $450 in materials alone, it usually makes financial sense to hire a professional, because a licensed contractor can complete the work in two to three hours at $75 to $125 per hour, source parts at trade pricing, and provide a warranty — typically one year on labor. Professional intervention is also non-negotiable if the window is on an upper story requiring ladder work above 8 feet, where fall risk makes DIY unsafe.
What Does This Repair Cost?
Costs vary by region, home age, and severity. These are national averages — always get 3 quotes.
| Repair Type | DIY Cost | Pro Cost | Emergency Premium |
|---|---|---|---|
| Track cleaning & lubrication | $6–$15 | $75–$150 | $150–$250 |
| Sash balance or spring replacement | $15–$45 | $125–$300 | $250–$450 |
| Operator crank or hardware replacement (casement) | $25–$65 | $150–$400 | $300–$550 |
| Full sash replacement (single unit) | Not recommended | $250–$650 | $450–$900 |
| Full window replacement (frame + sash) | Not recommended | $450–$2,500 | $800–$3,200 |
| Emergency board-up / temporary seal | N/A | $100–$250 | $200–$400 |
*Emergency rates (nights/weekends/holidays) run 40–60% above standard. Get 3 quotes before approving work.
Get quotes from licensed professionals in your area
Free, no obligation — compare 3+ contractors in minutesWhat Drives the Cost?
| Cost Factor | Estimated Impact | Why It Matters |
|---|---|---|
| Window type (vinyl vs. wood vs. aluminum) | Adds $50–$800 | Wood sash replacements and custom wood frames cost 2–3× more than vinyl equivalents; aluminum falls in between |
| Floor level and accessibility | Adds $75–$400 | Second-story or higher windows require ladders or scaffolding, increasing labor time and liability costs |
| Number of windows repaired in one visit | Saves $50–$125 per additional window | Contractors amortize the service call fee across multiple units, dropping the per-window cost significantly |
| Historic or custom-size windows | Adds $200–$1,500 | Non-standard dimensions or historic preservation requirements demand custom-milled parts and specialty glazing, dramatically increasing lead time and material cost |
Regional climate matters more than people realize. In the Gulf Coast and Southeast, I see vinyl windows that are only 6–8 years old with sashes bowed outward from sustained UV and 95°F-plus heat — the vinyl softens and deforms under direct sun exposure, especially on south- and west-facing walls. In the upper Midwest and Northeast, the bigger culprit is moisture-swollen wood jambs in spring after freeze-thaw cycles. Before you spend $400–$900 on a replacement sash, check whether the jamb itself is swollen by running a straightedge along the track. If it bows inward more than 1/16 inch, planing the jamb with a hand plane ($25 tool) or belt sander restores clearance for free. I've saved customers over $1,500 on multi-window jobs with that single step.
⚠️ Stop DIY — Call a Pro If You See These
- Visible wood rot at the sill or lower jamb corners — Rot spreads through framing at roughly 1 to 2 inches per year in humid climates. Left untreated for 12 to 18 months, it can reach the jack stud and header, turning a $200 sill repair into a $1,500 to $3,000 structural reframe.
- Diagonal cracking in drywall above the window header — This indicates the rough opening is shifting under load — a sign of foundation settlement or failed header. Within one to two years, the window may become completely inoperable and adjacent doors may jam, with foundation repair costs starting at $3,500 and climbing past $10,000.
- Water pooling on the interior sill after rain — Standing water means the sash-to-frame seal has failed and water is penetrating the wall cavity. Within one season, you risk mold colonization inside the wall, which costs $1,500 to $5,000 to professionally remediate and can trigger health issues for occupants.
- Sash glass flexing or rattling loosely in the frame — Loose glazing compound or failed glazing points mean the glass can blow out in winds above 45 mph, creating an immediate safety hazard and potential insurance liability. Reglazing costs $75 to $150 per sash if caught early; full sash replacement runs $250 to $600.
Frequently Asked Questions
How much does it cost to fix Window Not Closing Properly?
The national average for a professional window repair runs $150 to $450 per window, depending on the scope. On the low end, a simple balance replacement or hardware swap costs $75 to $150 in parts and about one hour of labor at $75 to $125 per hour. On the high end, reframing a racked rough opening with new jamb extensions and trim can reach $600 to $900. The two biggest price movers are the root cause — hardware versus structural — and whether custom-milled parts are required for older or non-standard windows, which can add $100 to $300 in material costs.
Can I fix Window Not Closing Properly myself?
Yes, in most cases — if the problem is limited to dirty tracks, worn weatherstripping, failed balances, or misaligned lock hardware. These repairs require only basic hand tools and parts costing $10 to $60. However, if the frame is structurally racked, the sill has rot, or the window is on a second story or higher, the repair moves beyond safe DIY territory. A good rule: if you cannot identify the cause within 15 minutes of inspection, or if the fix requires removing exterior casing, call a contractor.
How urgent is Window Not Closing Properly?
It depends on the season and cause. A window that will not fully close during winter is a same-day priority — you are losing heated air at a rate that can add $30 to $80 per month to your energy bill per window, and pipes near the opening can freeze in temperatures below 20°F. During mild weather, you have days to weeks to address it. However, if rain is entering the wall cavity, treat it as a 24-hour issue because mold can begin colonizing damp framing within 48 to 72 hours.
What causes Window Not Closing Properly?
The three most common causes are frame racking due to foundation settlement (about 30 percent of cases), failed or worn balance mechanisms that allow the sash to tilt and bind (about 25 percent), and swollen or warped wood sash components from moisture infiltration (about 20 percent). The remaining cases involve corroded or misaligned hardware, paint buildup in the jamb channels, or failed weatherstrip that has expanded and jammed the sash. In newer vinyl windows, broken pivot shoes — small plastic brackets that hold the sash in the track — are a frequent culprit.
Will homeowners insurance cover Window Not Closing Properly?
Standard homeowners insurance covers sudden, accidental damage — for example, a tree limb strikes the window during a storm and warps the frame, or a break-in attempt damages the sash and hardware. In those scenarios, the repair is typically covered after your deductible, which averages $1,000 to $2,500. Insurance does not cover normal wear and tear, deferred maintenance, wood rot from long-term neglect, or foundation settlement. If you file a claim, document the damage with timestamped photos and get a written repair estimate from a licensed contractor before contacting your adjuster.
How do I find a licensed general contractor for this?
First, verify the contractor's license through your state's licensing board website — every state except a handful requires general contractors to hold a valid license. Second, confirm they carry general liability insurance (minimum $1 million) and workers' compensation; ask for a certificate of insurance and call the insurer to verify it is current. Third, get a written, itemized quote that breaks out materials, labor hours, and any permit fees — a reputable contractor will provide this within 48 hours of an on-site inspection. Fourth, check at least three recent references and look for reviews on Google Business Profile or the BBB. Avoid any contractor who demands more than 30 percent of the total price upfront.
The three most important decisions when your window will not close properly are: correctly diagnosing the root cause before touching any tools, knowing the threshold between a safe DIY fix and a job that requires a licensed contractor, and acting quickly enough to prevent secondary damage like water intrusion, mold growth, or energy loss. A misdiagnosis — treating a structural racking issue as a simple hardware swap, for example — wastes money and lets the real problem worsen. Use the frame-squareness check as your first diagnostic step; it separates cosmetic fixes from structural ones in under five minutes.
Your recommended next step is straightforward: inspect the window using the diagnostic sequence in this guide — check frame square, test the balances, examine the hardware, and assess the weatherstrip. If every issue points to wear-and-tear components like balances, weatherstrip, or cam locks, order the parts and budget one to two hours for the repair. If you find the frame is racked more than 1/4 inch, you see rot, or the wall shows cracking above the header, stop and schedule an on-site evaluation with a licensed general contractor. Most contractors offer free or low-cost estimates ($0 to $75), and a professional diagnosis now can save you thousands in structural repairs later. Do not leave a non-closing window unaddressed through a full season — the compounding cost of energy loss, moisture damage, and pest entry far exceeds the cost of a timely fix.
Ready to Solve This for Good?
Get matched with pre-screened, licensed general contractors in your area. Free quotes, no obligation, no spam.
GET FREE QUOTES NOW