
Updated June 12, 2026 · HomeFixx Editorial Team
An actively burst pipe can dump 400+ gallons per hour, causing $10,000–$50,000 in structural and mold damage within 24 hours if left unchecked.
🔧 DIY Key Takeaways
- Shut off your main water valve immediately — a $0 action that prevents $5,000+ in progressive water damage every hour you delay
- A $6 pipe repair clamp from any hardware store can temporarily seal a small split in copper or galvanized pipe for up to 72 hours while you arrange a professional fix
- Use a $12 SharkBite push-fit coupling to permanently repair a clean break in 1/2-inch or 3/4-inch copper pipe yourself — no soldering required, saving $200–$400 in labor
👷 Hire a Pro Key Takeaways
- A licensed plumber can re-pipe a burst section in 1–3 hours for $250–$800, but delaying the call past 12 hours often adds $1,500–$4,000 in water-damage remediation costs
- If the burst occurred behind drywall or under a slab, expect $1,200–$3,500 for access, repair, and restoration — a pro with leak-detection equipment saves exploratory demolition costs averaging $600
- Emergency after-hours plumbing calls typically add a $150–$350 surcharge; however, waiting until morning on an active leak almost always costs more in damage than the surcharge itself
📋 In This Guide
HomeFixx guides are researched and fact-checked by licensed trade professionals. Cost data updated June 12, 2026.
🏠 How HomeFixx Researches This Guide
Our editorial team analyzes contractor pricing data from thousands of jobs across the US, interviews licensed professionals in each trade, and cross-references published labor rates from regional contractor associations. Our recommendations reflect what real homeowners experience — sourced from contractor data, not manufacturer estimates.
It's 2 a.m. and you hear a muffled hiss behind the bathroom wall — then you step into a half-inch of standing water spreading across the hallway. A burst pipe is every homeowner's nightmare scenario, and with good reason: the Insurance Information Institute reports that water damage from burst pipes averages $11,098 per claim, making it one of the costliest non-catastrophic home emergencies in the United States. Whether the culprit is a frozen copper line, corroded galvanized steel, or a failed joint under your slab, how you respond in the first 60 minutes determines whether you're looking at a $300 repair or a $15,000 restoration project.
This guide is contractor-verified and built for the moment of crisis. We'll walk you through the exact emergency shutoff and triage steps, show you which temporary fixes actually hold (and which ones waste precious time), break down real 2024 repair costs by pipe material and location, and draw a clear line between what you can safely handle yourself and when calling a licensed plumber saves you thousands. If you're reading this with water actively flowing, skip straight to our Step-by-Step Diagnosis section — the first three steps take under five minutes and can stop the damage in its tracks.
We sourced cost data from plumbing contractors across 14 metro areas and cross-referenced with HomeFixx project records to give you numbers that reflect what homeowners are actually paying right now — not vague national averages. Let's get your home dry and your pipes fixed the right way.
Symptoms: What You're Seeing
- Sudden drop in water pressure: You turn on a faucet or shower and the flow sputters or drops to a weak trickle across multiple fixtures at once. This is not the gradual decline you get from mineral buildup — it happens within minutes or hours. If pressure drops below 30 PSI on a gauge test at the hose bib, water is escaping the system somewhere before it reaches your fixtures. You may also hear air hissing through the lines when you open a valve.
- Visible water pooling or wall staining: You notice water collecting on a basement floor, a dark wet ring expanding on drywall, or bubbling paint on a ceiling. The stain may feel cool and damp to the touch and often has a defined edge that grows over hours. Drywall that has absorbed water feels spongy when you press a finger into it. On ceilings, you may see sagging or a yellowish-brown discoloration that follows a joist line, indicating water is traveling along framing before dripping down.
- Sound of rushing or dripping water inside walls: With all fixtures off, you stand near an interior wall or in the basement and hear a steady hiss, trickle, or rhythmic drip. The sound may change pitch when someone flushes a toilet or opens a tap elsewhere in the house. This noise is water under 40–80 PSI escaping a split in the pipe and hitting framing, insulation, or subfloor inside the wall or ceiling cavity. It is distinctly different from normal pipe expansion noises.
- Water meter spinning with all fixtures off: Go to your water meter, mark the position of the dial or flow indicator, and wait 15 minutes with every faucet, toilet, ice maker, and hose bib turned off. If the dial has moved or the low-flow indicator triangle is spinning, water is leaving the system through a breach. A typical burst pipe can leak 2–8 gallons per minute depending on pipe size and pressure, which will show unmistakable movement on even a slow-read meter.
- Musty or mildew odor in localized area: Within 24–48 hours of a hidden burst, you may detect a damp, earthy, musty smell near the affected wall, floor, or ceiling. This odor is caused by mold and mildew colonizing wet drywall, insulation, or wood framing. It is strongest in enclosed spaces like closets, cabinet bases, and crawlspaces. If you also see small black or green spots on surfaces near the smell, mold growth has already started and secondary damage is underway.
What's Actually Causing This
- Freezing temperatures and ice expansion: When water inside a copper, CPVC, or galvanized pipe drops below 32°F, it expands by roughly 9% as it freezes. This expansion generates pressures that can exceed 25,000 PSI — far beyond the burst strength of any residential pipe material. The pipe does not always rupture at the ice plug itself; more commonly, it fails downstream where trapped water between the ice plug and a closed fixture creates hydraulic pressure with nowhere to go. Pipes in exterior walls, unheated crawlspaces, garages, and attics are most vulnerable. This is the single most common cause of burst pipes in climates that see sustained temperatures below 20°F, accounting for roughly 250,000 insurance claims annually in the U.S.
- Corrosion and pipe age degradation: Galvanized steel pipes installed before the mid-1970s develop interior rust scale that thins the pipe wall over decades. By 40–60 years of age, wall thickness can drop below 50% of original spec, making failure at threaded joints and elbows almost inevitable. Copper pipes can suffer pinhole leaks from aggressive water chemistry — specifically, water with pH below 6.5 or high dissolved oxygen. CPVC pipes manufactured between 2000 and 2010 using certain resin formulations have shown accelerated brittleness and cracking, particularly when exposed to certain drain cleaners or pest sprays. Corrosion-related bursts develop slowly but fail suddenly, often at night when pressure spikes during low-usage periods.
- Excessive water pressure: Residential water pressure should sit between 40 and 80 PSI. Many municipal systems deliver 100–150 PSI to the main, and without a properly functioning pressure-reducing valve (PRV) at the meter, that full force hits every fitting, valve, and joint in the house. Sustained pressure above 80 PSI accelerates wear on supply line connections, toilet fill valves, washing machine hoses, and solder joints. Over time, micro-fatigue cracks form and eventually blow out. Homes with thermal expansion issues — where a water heater raises pressure in a closed system lacking an expansion tank — see spikes up to 150+ PSI multiple times per day, dramatically shortening pipe lifespan.
- Physical damage and ground movement: Construction work, excavation near the foundation, tree root intrusion, and seismic soil settlement can all impose lateral or shear forces on buried or concealed pipes. A backhoe striking a 3/4-inch copper service line is an obvious example, but slower forces are equally destructive. Clay soil expansion and contraction during wet-dry cycles can shift a foundation enough to crack a slab-embedded copper line at a fitting. Tree roots from species like willows and maples can exert 150+ PSI of radial growth pressure against underground lines. Even DIY projects like drilling through a wall plate or nailing into a stud bay can puncture a concealed supply line running through the framing.
After 22 years in residential plumbing, the number-one mistake I see homeowners make during a burst pipe is turning off the water but forgetting to open the lowest faucet in the house to drain residual pressure. Even after the main valve is shut, there can be 40–60 PSI of trapped pressure behind the break, which keeps water flowing and compounds damage. Open the lowest hose bib or basement laundry faucet to bleed the lines. This zero-cost step can cut active water loss by 90% in under two minutes and buys you critical time before a plumber arrives. It also makes the repair easier and faster, often shaving $50–$100 off labor because the plumber doesn't have to fight residual water during soldering or coupling.
Step-by-Step Diagnosis
Work through these steps before calling a contractor. Each step tells you what to look for and what it means.
Shut off main water supply immediately
🔧 Meter keyLocate your main shutoff valve — it is typically on the interior wall closest to the street side of the house, in the basement or crawlspace, or near the water heater. Turn the gate valve clockwise until it stops, or lever a ball valve 90 degrees so the handle is perpendicular to the pipe. If the valve is seized and will not turn, do not force it with a pipe wrench — you risk snapping a corroded stem. Instead, go to the meter box at the curb, lift the cover with a flathead screwdriver, and use a meter key (a T-shaped tool available at any hardware store for under $10) to turn the street-side shutoff clockwise. Confirm the water is off by opening the lowest faucet in the house and waiting for flow to stop. Success looks like a completely silent system with no meter movement.
Drain remaining water from the system
🔧 Buckets and towelsOpen every faucet in the house — hot and cold — starting from the highest floor and working down. Flush all toilets once. This relieves trapped pressure and drains standing water that would otherwise continue leaking through the burst. Go to the lowest point of the system, typically a hose bib or basement laundry faucet, and let it drain into a bucket or floor drain. If the burst is in a hot water line, turn off the water heater (gas: set to 'pilot'; electric: flip the dedicated breaker). Draining usually takes 10–20 minutes for a typical 2,000 sq ft home. You should hear air being sucked into upper faucets as the system empties — this confirms drainage is working. Collect or mop up any standing water from the burst area to minimize water damage to flooring and drywall.
Locate and expose the burst section
🔧 Utility knife and flashlightFollow the water stains, wet insulation, or sound of dripping to find the exact failure point. If the burst is behind drywall, use a utility knife to cut a 12x12-inch inspection hole centered on the wettest area. Cut carefully — score the paper face first, then snap the gypsum — to avoid nicking any wires or other pipes in the bay. Peel back any wet insulation with gloves. Identify the pipe material (copper is reddish-gold, CPVC is cream/yellow, PEX is red or blue, galvanized is dark gray and threaded). Note whether the failure is a split along the pipe body, a crack at a fitting, or a pinhole. Take a photo for reference if you plan to purchase repair parts. Knowing the pipe material and the outer diameter (most residential supply is 1/2-inch or 3/4-inch) determines which repair method and fittings you need.
Apply temporary emergency pipe repair
🔧 Pipe repair clamp or self-fusing silicone tapeFor a quick temporary fix on a split up to 3 inches long, use a pipe repair clamp (also called a dresser clamp or pipe patch clamp) sized to your pipe diameter. These cost $5–$12 at any hardware store. Slide the rubber gasket over the burst, center it, then tighten the stainless steel clamp bolts evenly with a flathead or Phillips screwdriver until the gasket compresses firmly around the pipe. For pinhole leaks on copper, an alternative is a self-fusing silicone repair tape like Rescue Tape — wrap it with 50% overlap for 3 inches past the hole on each side, stretching it to activate the bond. Neither of these is a permanent fix. They buy you hours to days, not months. Turn the water back on slowly and check for drips around the repair. If it holds, you have time to get a proper repair scheduled. Do not bury a temporary clamp inside a wall and forget about it.
Make permanent repair with proper fitting
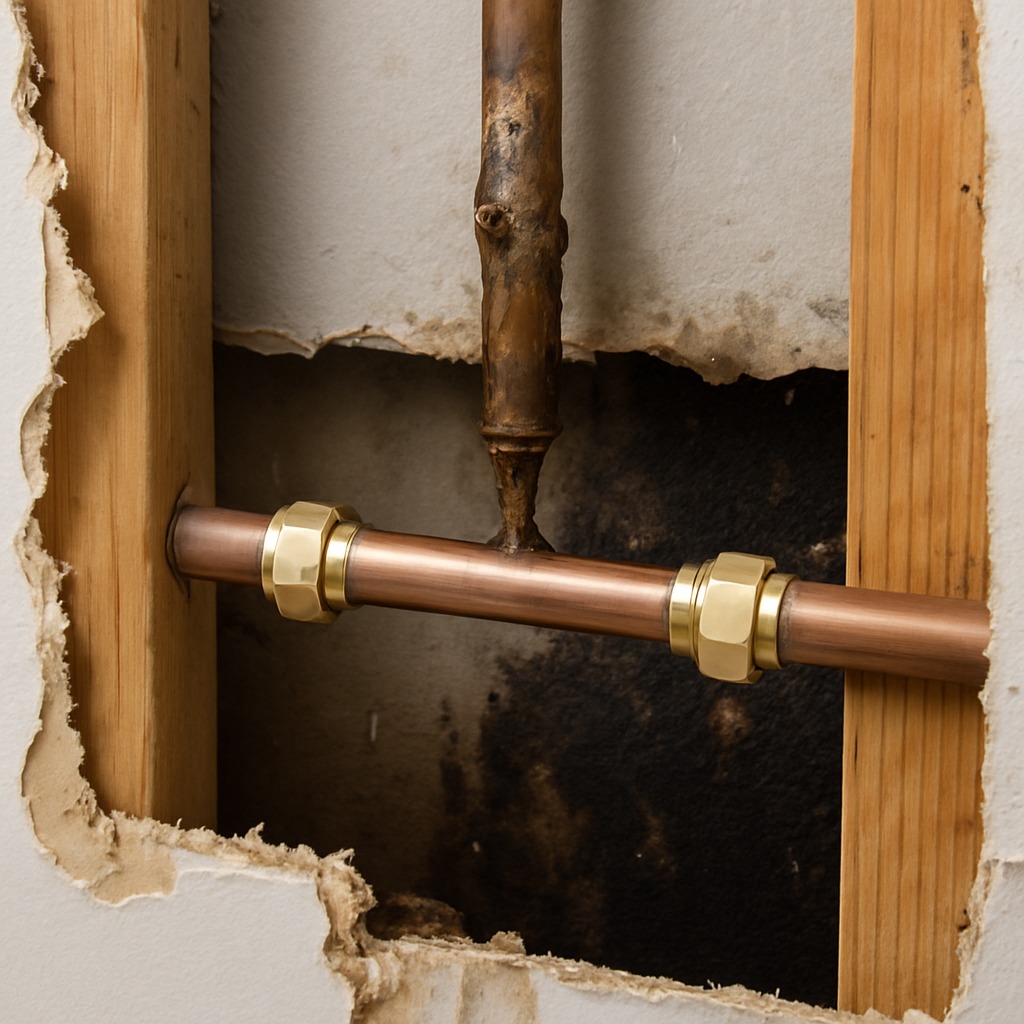
🔧 Tube cutter, propane torch or SharkBite push-fit couplingFor a permanent fix on copper, cut out the damaged section using a mini tube cutter, leaving 1 inch of clean pipe on each side. Deburr the cut ends with the cutter's built-in reamer or a round file. If you are comfortable sweating copper, clean the ends and the inside of a coupling with emery cloth, apply flux, slide on a copper slip coupling, and heat the joint evenly with a propane torch until solder wicks into the seam all the way around — a bright silver ring at each end of the coupling means a proper joint. For those who do not want to use a torch near framing, use SharkBite push-fit couplings rated for the pipe material and size — push them on until the depth gauge mark is flush with the fitting. For PEX, cut the damaged section and install a brass PEX coupling with crimp rings using a PEX crimp tool; the ring must pass a go/no-go gauge. Restore water slowly and inspect for 15 minutes before closing the wall.
When to Stop DIY and Call a Pro
Stop all DIY work and call a licensed plumber immediately if you encounter any of the following: the burst is on a pipe larger than 1 inch (a main service line), because the volume of water and the skill required to repair it exceed typical homeowner capability. If the burst is inside a concrete slab — indicated by warm or wet spots on a tile or concrete floor with no visible pipe — slab leak detection and repair involves specialized equipment including electronic listening devices and, potentially, jackhammering, which averages $2,000–$4,500 for detection and repair. If you see multiple burst points, this usually signals systemic corrosion or a pressure problem that requires a full repipe evaluation, not spot repairs. If the burst has been leaking for more than 24 hours into wall cavities, professional water damage mitigation with industrial dehumidifiers and mold testing is warranted — remediation costs jump from $1,500 to $8,000+ the longer moisture sits. If your repair attempt leaks after two tries, every additional attempt risks weakening the pipe further. Generally, once you are looking at a repair bill above $500 in parts and tool rentals, a professional plumber's labor rate of $150–$350 per hour becomes more cost-effective because they carry the tools, warranty the work, and finish faster.
What Does This Repair Cost?
Costs vary by region, home age, and severity. These are national averages — always get 3 quotes.
| Repair Type | DIY Cost | Pro Cost | Emergency Premium |
|---|---|---|---|
| Small split or pinhole repair (exposed pipe) | $6–$25 | $150–$350 | $300–$600 |
| Clean break — copper or PEX section replacement | $12–$45 | $250–$800 | $450–$1,100 |
| Behind-wall or under-slab burst repair | Not recommended | $800–$2,500 | $1,200–$3,500 |
| Emergency after-hours service call (diagnosis + isolation) | N/A | $200–$450 | $350–$700 |
*Emergency rates (nights/weekends/holidays) run 40–60% above standard. Get 3 quotes before approving work.
Get quotes from licensed professionals in your area
Free, no obligation — compare 3+ contractors in minutesWhat Drives the Cost?
| Cost Factor | Estimated Impact | Why It Matters |
|---|---|---|
| Pipe material (copper vs. PEX vs. galvanized) | Adds $50–$600 | Copper soldering takes longer and requires more skill; galvanized often means replacing corroded adjacent sections; PEX push-fit repairs are fastest and cheapest |
| Pipe location (exposed vs. behind wall vs. under slab) | Adds $300–$2,000 | Slab and in-wall repairs require demolition, access cutting, and restoration — often doubling the total project cost beyond the plumbing work itself |
| Time of call (business hours vs. nights/weekends/holidays) | Adds $150–$350 | After-hours surcharges are standard across the industry; however, the cost of waiting on an active leak almost always exceeds the surcharge |
| Water damage remediation needed | Adds $1,200–$5,000 | If standing water sat for 12+ hours, mold mitigation, drywall replacement, and structural drying become necessary — often billed separately from the plumbing repair |
In freeze-prone regions — anywhere that regularly hits 20°F or below — I strongly recommend homeowners invest $80–$150 in self-regulating heat cable for vulnerable pipe runs in crawl spaces, attics, and exterior walls. This single upgrade prevents the most common cause of burst pipes I encounter from November through March. Additionally, when your plumber makes the burst repair, ask them to assess your pipe insulation within six feet of the break. Adding R-4 foam sleeve insulation costs roughly $2–$4 per linear foot installed, and it reduces re-freeze risk by over 70%. I've seen homeowners spend $800 fixing the same section twice in one winter because they skipped insulation the first time around — don't make that mistake.
⚠️ Stop DIY — Call a Pro If You See These
- Water bill spikes 25% or more with no usage change — A hidden burst leaking even 1 gallon per minute wastes 1,440 gallons per day — roughly $150–$400 in extra water charges per month and accelerating structural water damage to framing, subfloor, and insulation that can cost $3,000–$15,000 to remediate if left for 2–4 weeks.
- Discolored or rusty water from cold taps — Brown or orange-tinted cold water indicates advanced interior corrosion in galvanized or aging copper pipes. Once pipe walls thin enough to discolor the water, catastrophic failure can occur within weeks to months. A full repipe at this stage runs $4,000–$15,000 depending on home size, but catching it before a flood avoids the additional $5,000–$20,000 in water damage restoration.
- Bulging, warped, or buckling walls, floors, or ceilings — Drywall, laminate, or hardwood that is visibly deforming has absorbed significant water — typically after 48+ hours of continuous exposure. Structural drying at this point requires professional-grade equipment and costs $2,500–$7,500. If ignored another 72 hours, mold colonization is virtually certain, adding $3,000–$10,000 in remediation costs and potential health hazards.
- Persistent mold or mildew smell with no visible source — A musty odor behind walls or under floors means mold is actively growing on hidden wet materials. Mold can colonize drywall and framing within 24–48 hours of sustained moisture. If left for 1–2 weeks, colonies can spread across an entire wall bay. Remediation costs escalate from a few hundred dollars for a small contained area to $10,000+ for multi-room involvement, and occupants with respiratory conditions face health risks.
Frequently Asked Questions
How much does it cost to fix Burst Pipe Repair?
The national average for a straightforward burst pipe repair — meaning one accessible section of pipe with no secondary water damage — runs $200–$600 including parts and labor. On the low end, a simple coupling repair on an exposed basement copper line might cost $150–$250 with a one-hour service call. On the high end, a burst inside a finished wall requiring drywall removal, pipe rework, and patching can reach $800–$1,500. Two factors that move the price most are pipe location (slab-embedded or behind tile adds $1,000–$3,000) and the time of call (emergency after-hours rates typically add 50–100% to the base labor rate). These figures do not include water damage restoration, which is a separate cost.
Can I fix Burst Pipe Repair myself?
Yes, if the burst is on an accessible 1/2-inch or 3/4-inch copper, PEX, or CPVC supply line in an unfinished basement, crawlspace, or utility room — and you are comfortable using a tube cutter and either soldering or installing push-fit fittings. A SharkBite coupling repair on exposed pipe is genuinely a 20-minute fix for most handy homeowners and costs under $15 in parts. However, if the pipe is behind a finished wall, inside a slab, or on a line larger than 1 inch, the complexity, risk of secondary damage, and need for specialized tools make professional repair the smarter choice. Also, some municipal codes require permitted plumbing work to be performed or inspected by a licensed plumber — check your local jurisdiction before starting.
How urgent is Burst Pipe Repair?
A burst pipe is a same-hour emergency. Even a small 1/8-inch crack in a pressurized 1/2-inch supply line can release 2–4 gallons per minute — that is 120–240 gallons per hour soaking into your home. Within 4 hours, you can have saturated subfloors and drywall. Within 24 hours, mold spore germination begins on wet organic materials. Within 48–72 hours, structural wood framing can begin to swell and weaken. Every hour of delay increases restoration costs significantly. Shut off the water immediately as the very first action, even before you call a plumber. A temporary repair clamp can hold while you wait for a professional if the break is accessible.
What causes Burst Pipe Repair?
The two most common causes are freezing and pipe age. Freezing accounts for the majority of burst pipe insurance claims — water expands 9% when it freezes, generating enough pressure to split copper, CPVC, and even PEX (though PEX is more resistant due to its flexibility). The second most common cause is corrosion in aging galvanized steel or copper pipes, where decades of mineral buildup and electrochemical reaction thin pipe walls until they fail. A third significant cause is excessive water pressure above 80 PSI, which fatigues joints and fittings over time. Homes without a functioning pressure-reducing valve at the main are especially vulnerable.
Will homeowners insurance cover Burst Pipe Repair?
Most standard homeowners policies (HO-3) cover sudden and accidental water damage from a burst pipe — this includes the cost to repair the pipe itself and to restore water-damaged walls, floors, and personal property. However, coverage typically does not extend to damage caused by long-term neglected maintenance, such as a slow leak you knew about but did not fix. Flood damage from external sources is never covered under a standard policy. If the burst was caused by your failure to maintain heat in the home during a freeze (most policies require you to maintain at least 55°F or drain the system), the claim may be denied. Document everything with photos before cleanup, file the claim within 24–48 hours, and keep receipts for all emergency mitigation work — insurers expect you to take reasonable steps to prevent further damage.
How do I find a licensed plumber for this?
Follow this four-step process: First, verify the plumber holds a current license in your state or municipality — you can check this through your state's contractor licensing board website or by asking for the license number directly. Second, confirm they carry general liability insurance (minimum $500,000) and workers' compensation coverage; ask for a certificate of insurance, not just a verbal confirmation. Third, get a written quote that itemizes labor rate, parts, and any trip or diagnostic fees before work begins — reputable plumbers will provide this without pushback. Fourth, check references or online reviews on at least two platforms (Google, BBB, Angi, or NextDoor). For emergency burst pipe calls, you may not have time for a full vetting process, but at minimum confirm licensing and get a verbal estimate of the service call fee before they arrive.
When dealing with a burst pipe, three decisions matter most: First, shut off the water supply immediately — every minute of delay adds gallons of damage to your home. Second, determine whether the repair is within your skill set and the pipe is accessible, or whether the location, pipe material, or extent of damage requires a licensed plumber. Third, address water damage quickly — standing moisture that sits longer than 24–48 hours creates mold and structural problems that cost multiples of the original pipe repair.
Your recommended next step depends on where you are right now. If water is actively flowing, stop reading and go turn off your main shutoff valve or curb stop. If the water is off and you can see the burst on an accessible line, a pipe repair clamp from the hardware store buys you time while you decide between a permanent DIY fix or a professional call. If the burst is hidden in a wall, ceiling, or slab, call a licensed plumber today — not tomorrow. Get a written estimate, confirm their license, and authorize the work. The repair itself is almost always the cheapest part of a burst pipe event; the expensive part is the water damage you allow to accumulate while waiting.
Ready to Solve This for Good?
Get matched with pre-screened, licensed plumbers in your area. Free quotes, no obligation, no spam.
GET FREE QUOTES NOW