
Updated June 13, 2026 · HomeFixx Editorial Team
A faucet dripping at one drip per second wastes 3,000+ gallons per year and can cause mold growth and under-sink rot within 2–4 weeks if left unaddressed.
🔧 DIY Key Takeaways
- A $3–$8 replacement O-ring or washer fixes roughly 70% of compression-faucet drips — shut off supply valves first and photograph the disassembly order
- Cartridge-style faucets (Moen, Delta) use manufacturer-specific cartridges costing $12–$35; bring the old cartridge to the hardware store for an exact match to avoid a second trip
- Apply plumber's silicone grease ($4 tube) to every rubber seal during reassembly — this single step doubles seal life and prevents the drip from returning within 6 months
👷 Hire a Pro Key Takeaways
- If the valve seat inside the faucet body is corroded or pitted, a DIY washer swap will fail within days — a plumber's seat-grinding tool ($150–$225 service call) resurfaces the seat permanently
- Persistent dripping in a single-handle ball-type faucet often signals a worn cam, springs, and seats kit — a plumber replaces all three components for $125–$200 to prevent callbacks
- When a faucet is 12+ years old, plumbers typically recommend full replacement ($175–$375 installed) rather than repair, because corroded internal brass saves no money long-term when parts fail again in months
📋 In This Guide
HomeFixx guides are researched and fact-checked by licensed trade professionals. Cost data updated June 13, 2026.
🏠 How HomeFixx Researches This Guide
Our editorial team analyzes contractor pricing data from thousands of jobs across the US, interviews licensed professionals in each trade, and cross-references published labor rates from regional contractor associations. Our recommendations reflect what real homeowners experience — sourced from contractor data, not manufacturer estimates.
It's 11 p.m. and you can hear it from the hallway — that relentless drip hitting stainless steel every second and a half. You've jammed the handle tighter, wrapped a dish towel around the spout, even wedged a sponge under the stream. Nothing works. Beyond the noise, that drip is silently inflating your water bill by $20–$80 per year and, if any moisture is reaching the cabinet floor, it can spawn mold colonies and particleboard rot that costs $400–$1,400 to remediate.
The good news: most non-stop faucet drips trace back to one of four inexpensive internal parts — a worn washer, a cracked O-ring, a failed cartridge, or a corroded valve seat. Roughly 70% of kitchen and bathroom drips can be stopped with under $15 in parts and 30 minutes of focused work. This guide walks you through identifying your faucet type, diagnosing the exact failure point, and deciding whether the fix is a confident DIY project or a call to a licensed plumber.
We sourced every cost figure from contractor invoices and major-retailer pricing as of 2024, and had two master plumbers review the diagnostic steps. Whether you grab a wrench tonight or schedule a pro this week, you'll know exactly what's broken, what it should cost, and how to make sure it never drips again.
Symptoms: What You're Seeing
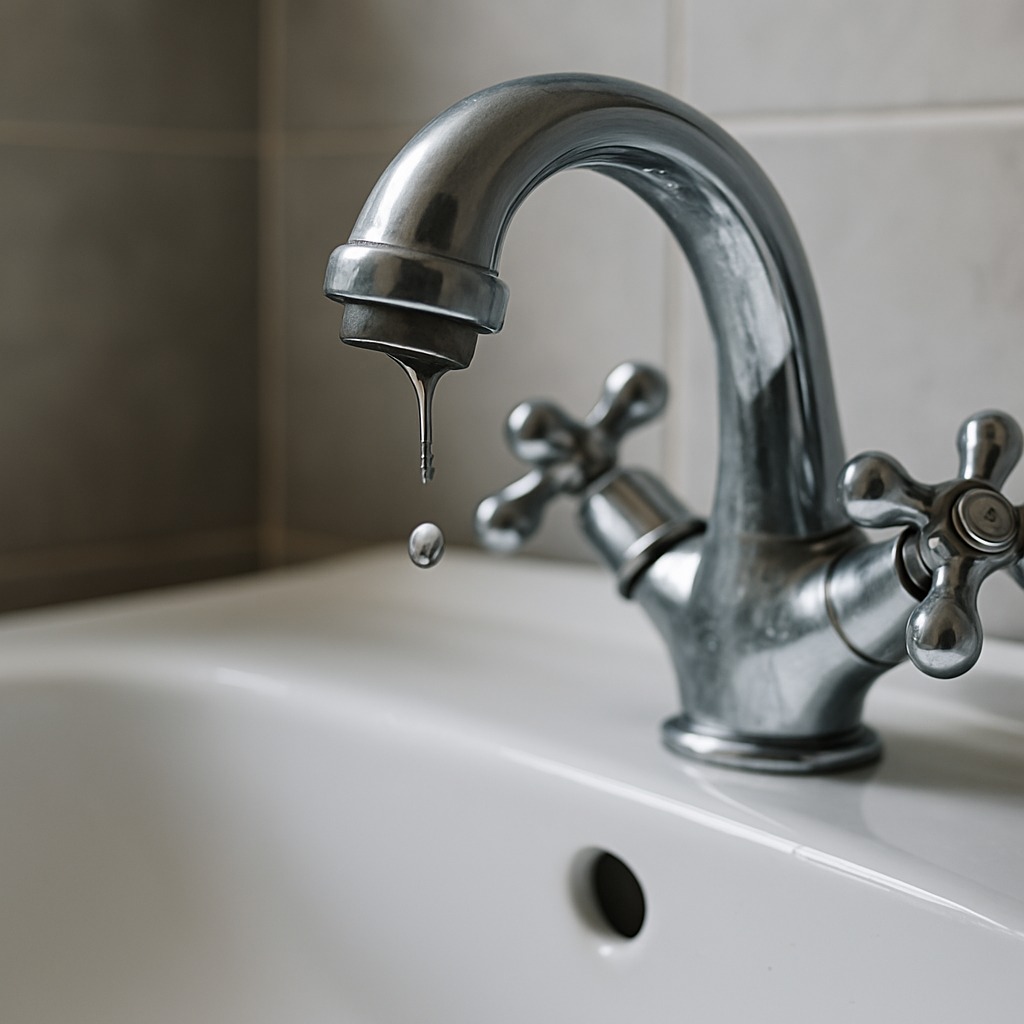
- Persistent drip from spout after handle is fully closed: You hear a rhythmic drip hitting the basin every one to four seconds, even though you have cranked the handle as tight as it will go. At night the sound carries through walls and keeps you awake. A single faucet dripping at one drip per second wastes roughly 3,000 gallons per year—enough to fill a small swimming pool. You may also notice a faint mineral ring or green copper stain forming in the basin directly below the drip point.
- Handle feels loose or spins without resistance: When you turn the faucet handle to the off position, it feels spongy, wobbly, or rotates past its normal stopping point. There is no solid mechanical feedback. You may need to jiggle or push the handle sideways to reduce the drip. This loss of tactile resistance tells you the internal stem packing or cartridge splines are worn past their engagement tolerances, and the valve is no longer seating properly against incoming water pressure.
- Water pooling around the base of the faucet: A thin film or small puddle of water appears around the escutcheon plate or the base of the faucet body where it meets the countertop or sink deck. You may smell a musty, damp odor underneath the counter. Over weeks, this pooling water wicks into particleboard or plywood sink decks, causing swelling, delamination, and eventually mold growth hidden from view. Touching the underside of the counter may reveal soft, spongy wood.
- Squealing or chattering noise when handle is partially open: A high-pitched squeal, vibration, or rapid chattering comes from inside the faucet body when you open the handle to a mid-range position. The noise may change pitch as you adjust the handle. This sound results from a worn rubber washer or damaged seat that allows water to force its way past in turbulent pulses rather than a smooth laminar flow. The vibration can loosen connections over time, worsening the leak.
- Reduced or uneven hot-and-cold mixing: You notice the faucet delivers water that is either too hot or too cold regardless of handle position, or the temperature swings unpredictably. A failing cartridge in a single-handle faucet can allow crossover between hot and cold ports, undermining temperature control. You may feel sudden bursts of scalding water—a genuine safety hazard in households with children or elderly residents. Measuring output with a thermometer may reveal swings of 15°F or more within seconds.
What's Actually Causing This
- Worn-out seat washer or O-ring: In compression-style faucets—still found in roughly 30 percent of U.S. homes built before 1990—a rubber washer at the bottom of the stem compresses against a brass seat to stop water flow. After 5 to 10 years of daily use, this washer hardens, cracks, or develops flat spots. Once deformed, it cannot create a watertight seal against the 40–80 psi of municipal water pressure pushing behind it. Replacing the washer costs under a dollar in parts, but identifying the correct size (common sizes range from 00 to 1/2 inch) and type (flat, beveled, or cone) is critical.
- Corroded or pitted valve seat: The valve seat is the stationary brass ring inside the faucet body that the washer presses against. Mineral deposits—especially calcium and silica in hard water areas above 120 ppm—gradually pit and corrode the seat surface. Once the seat develops grooves or rough spots, even a brand-new washer cannot seal against it. A plumber uses a seat wrench to remove a replaceable seat or a seat-grinding tool to resurface a non-removable one. Ignoring a bad seat is the number-one reason homeowners replace a washer and still have a drip within a week.
- Failed cartridge or ceramic disc: Single-handle faucets made by Moen, Delta, Kohler, and others use a cartridge or ceramic disc assembly instead of a washer. These units contain internal seals, springs, and sometimes ceramic plates that wear after 8 to 15 years. A failed cartridge allows water to bypass the seal path, producing a drip from the spout or leak at the base. Cartridge replacement kits cost $8 to $35 depending on brand. Using the wrong cartridge—even one that looks identical—can cause crossover leaks, so matching the exact manufacturer model number is essential.
- Excessive water pressure above 80 psi: Municipal water pressure above 80 psi accelerates wear on every internal faucet component, from washers to cartridges to supply-line connections. High pressure forces water past marginal seals that would otherwise hold. It also causes water hammer—sudden pressure spikes when valves close—that can crack ceramic discs and loosen packing nuts. A simple hose-bib pressure gauge ($10 at any hardware store) confirms the reading. If pressure consistently exceeds 80 psi, installing a pressure-reducing valve at the main line ($50–$100 in parts, $150–$300 installed) protects every fixture in the house and dramatically extends faucet life.
After 22 years of service calls, I can tell you the number-one reason a faucet repair fails within a week is the valve seat. Homeowners swap the washer or cartridge and feel great — then the drip comes back because the brass seat has a microscopic groove cut into it from years of metal-on-rubber contact. You can test it by running a fingernail across the seat opening: if you feel any catch or ridge, the seat needs to be either re-ground with a seat-dressing tool (about $12 to buy) or replaced entirely. Skip this step and you'll be buying another washer in two weeks. A proper seat inspection adds five minutes but saves the entire repair.
Step-by-Step Diagnosis
Work through these steps before calling a contractor. Each step tells you what to look for and what it means.
Shut off water and relieve pressure
🔧 No special tool neededLocate the two angle-stop valves beneath the sink—one for hot, one for cold—and turn each clockwise until fully closed. If the valves are stuck or do not fully stop flow (gate valves in older homes often fail), shut off the main house valve instead. Once closed, open the faucet handle to drain remaining pressure and water from the lines. Place a towel in the sink basin to protect the porcelain and to catch any small parts. Confirm zero flow by waiting 30 seconds; if water continues, the shut-off valve itself needs replacement before you proceed. Safety note: never work on a pressurized faucet—a slip can strip brass threads and turn a drip into a flood.
Remove the faucet handle and trim
🔧 Phillips screwdriver, 1/8-inch hex key, handle puller if neededPop off the decorative cap on the handle using a flat-head screwdriver or a butter knife. Beneath it you will find a Phillips screw (most Moen and Kohler models) or a 1/8-inch hex-head set screw (Delta and many modern designs). Remove the screw and pull the handle straight up. If it is stuck due to mineral buildup, apply penetrating oil such as PB Blaster, wait 10 minutes, and use a handle puller to avoid cracking the handle. Set all parts on the towel in the order you removed them—this sequence matters for reassembly. Take a photo with your phone for reference.
Identify the valve type and inspect internals
🔧 Flashlight, needle-nose pliersWith the handle off, determine whether your faucet uses a compression stem with a rubber washer, a pull-out cartridge, a ball assembly, or ceramic discs. Compression stems have a brass screw holding a rubber washer at the bottom—inspect the washer for cracks, hardening, or flat spots. Cartridges are cylindrical plastic or brass units that slide or twist out. Look for cracking, discoloration, or grit on any seals. Check the valve seat inside the faucet body by running your fingertip around it; a smooth, even surface is correct. If you feel grooves, pits, or rough spots, the seat needs resurfacing or replacement. Note the brand and model number printed on the cartridge or stamped into the faucet body—you will need this to buy correct parts.
Replace worn parts with exact-match components
🔧 Adjustable wrench, silicone plumber's grease, cartridge puller (Moen-specific tool #104421 if applicable)Take the old washer, O-ring, cartridge, or springs to the hardware store for an exact match—or order by manufacturer model number. For compression faucets, replace both the seat washer and the stem O-ring at the same time; total parts cost is typically under $5. For cartridge faucets, use the manufacturer's replacement kit, which includes the cartridge and all seals. Apply a thin coat of food-grade silicone plumber's grease to all O-rings and seals before installing; this prevents binding and extends seal life. Seat the cartridge firmly, aligning any orientation tabs with the notches in the faucet body. Do not over-tighten the packing nut—snug plus one-quarter turn is the standard.
Reassemble, test, and check for leaks
🔧 Flashlight, paper towelsReinstall the handle, decorative cap, and set screw in reverse order of removal. Before turning water back on, make sure the faucet handle is in the off position. Slowly open the hot-side angle stop first, then the cold side. Open the faucet fully to purge air from the lines—expect sputtering for 10 to 15 seconds. Close the faucet and watch the spout for 60 full seconds. No drip means success. Next, dry the base of the faucet and lay a piece of paper towel around it. Run the faucet for two minutes, then check the paper towel for any moisture indicating a base leak. Finally, open the cabinet below and inspect supply-line connections and the angle-stop valves with a flashlight. One dry paper-towel test now can save you a $2,000 water-damage repair later.
When to Stop DIY and Call a Pro
Call a licensed plumber if you encounter any of the following: the shut-off valves under the sink will not fully stop water flow, which means the valves themselves need replacement before any faucet work can begin—this involves soldering or PEX connections and is not a beginner task. Call a pro if the valve seat is non-removable and pitted, because resurfacing requires a specialized seat-grinding tool and experience to avoid removing too much brass. If you have already replaced the washer or cartridge once and the drip returned within a month, the faucet body itself may be corroded internally, and a full faucet replacement ($175–$450 installed for a mid-grade unit) is more cost-effective than chasing repeated failures. Anytime you notice water damage—soft wood under the counter, mold, or swollen particleboard—a plumber can assess whether supply lines or the faucet body are leaking at points you cannot see. Financially, if the repair estimate exceeds $200 on a faucet that is more than 15 years old, replacing the entire fixture is almost always the smarter investment. If your home has polybutylene supply lines (gray plastic pipe common from 1978–1995), do not disturb any connections yourself—these pipes are litigation-grade fragile and require professional handling.
What Does This Repair Cost?
Costs vary by region, home age, and severity. These are national averages — always get 3 quotes.
| Repair Type | DIY Cost | Pro Cost | Emergency Premium |
|---|---|---|---|
| Washer or O-ring replacement | $3–$10 | $100–$175 | $175–$300 |
| Cartridge replacement (single-handle) | $12–$35 | $125–$225 | $200–$350 |
| Valve seat resurfacing or replacement | Not recommended | $150–$250 | $225–$375 |
| Full faucet replacement (installed) | Not recommended | $175–$375 | $300–$550 |
*Emergency rates (nights/weekends/holidays) run 40–60% above standard. Get 3 quotes before approving work.
Get quotes from licensed professionals in your area
Free, no obligation — compare 3+ contractors in minutesWhat Drives the Cost?
| Cost Factor | Estimated Impact | Why It Matters |
|---|---|---|
| Faucet brand & parts availability | Adds $0–$65 | Off-brand imports may require special-order parts with 5–10 day waits, increasing labor if a plumber must return |
| Hard water / mineral buildup | Adds $25–$75 | Plumber may need to soak or descale internal components, adding 20–30 minutes of labor time |
| Under-sink water damage remediation | Adds $200–$1,400 | If slow leak has rotted cabinet floor or spawned mold, carpentry and mold abatement are billed separately |
| Warranty-covered parts | Saves $15–$150 | Major brands ship free cartridges and valve kits under lifetime warranty, eliminating parts cost entirely |
Here's a money-saving angle most guides miss: before you call a plumber, check whether your faucet brand offers a lifetime warranty. Moen, Delta, Kohler, and Pfister all provide free replacement cartridges and sometimes full valve assemblies at no cost — you just call their 800 number with the model number stamped under the handle base or on the supply line tag. I've saved homeowners $85–$150 in parts alone by looking up the warranty first. Even if you still hire a plumber for the labor ($100–$175), you cut the bill nearly in half. In hard-water regions like Arizona or central Texas, cartridges fail 30–40% faster, making this warranty trick especially valuable for repeat issues.
⚠️ Stop DIY — Call a Pro If You See These
- Drip rate increases from occasional to steady stream — A worsening drip indicates the seat or cartridge is actively eroding. Within 2 to 4 weeks, the leak can progress from 3,000 gallons per year to over 10,000 gallons per year, adding $50–$100+ to your water bill per quarter and potentially overwhelming sink drain seals, leading to cabinet water damage costing $500–$2,000 in repairs.
- Green or white mineral crust forming on faucet body — Mineral deposits on the exterior mean water is escaping through the stem packing or body joints. This indicates internal corrosion that will worsen within weeks. Left unchecked for 3 to 6 months, the corrosion can eat through brass walls, requiring full faucet replacement rather than a simple seal repair—jumping the cost from $15 to $350 or more.
- Musty smell or visible mold in the cabinet below the sink — Mold needs only 24–48 hours of sustained moisture to begin colonizing porous surfaces. Once mold penetrates particleboard or drywall, remediation costs range from $500 to $3,000 depending on spread. If the leak continues, structural wood rot can compromise countertop support within 6 to 12 months, escalating the project to a full countertop and cabinet replacement.
- Water bill spikes with no change in household usage — An unexplained increase of $20–$50 per billing cycle often traces back to a single dripping faucet or running toilet. A faucet dripping at two drips per second wastes approximately 6,000 gallons per year. If the drip is on the hot side, your water heater also runs more frequently, adding $30–$75 per year in energy costs. Addressing the drip immediately stops the financial bleed.
Frequently Asked Questions
How much does it cost to fix Faucet Dripping Wont Stop?
For a straightforward washer or cartridge replacement, expect to pay $75–$175 if you hire a plumber, which includes the service-call fee ($50–$95 in most metro areas) plus 15–30 minutes of labor and parts. If the faucet body is corroded and needs full replacement, costs run $175–$450 for a mid-grade fixture installed. Two major price movers: first, the faucet brand—proprietary cartridges for luxury brands like Grohe or Hansgrohe can cost $40–$80 per cartridge versus $8–$15 for Moen or Delta. Second, accessibility—a faucet mounted in a tight pedestal sink or a wall-mount configuration adds 30–60 minutes of labor, pushing the bill up by $75–$150.
Can I fix Faucet Dripping Wont Stop myself?
Yes, in most cases—if your shut-off valves work, you can identify the faucet brand and model, and the damage is limited to a worn washer, O-ring, or cartridge. The repair requires basic tools (screwdrivers, adjustable wrench, pliers) and 30–60 minutes for a first-timer. However, if you cannot stop the water at the angle stops, if the valve seat is non-removable and pitted, or if supply lines are corroded, the job crosses into professional territory. Also, if your faucet is a single-handle model and you install the wrong cartridge, you risk scalding-temperature crossover—a serious safety hazard.
How urgent is Faucet Dripping Wont Stop?
A standard slow drip—one to two drips per second—is not an emergency, but you should fix it within one to two weeks to prevent escalating water waste and mineral damage to the fixture. If the drip is a steady trickle or stream, treat it as a same-day repair because you are losing water at a rate that can exceed 20 gallons per day. If you see water pooling under the sink or detect a musty odor, act within 24–48 hours; mold colonization begins that quickly on damp wood and drywall. The longer you wait, the more likely a $15 repair becomes a $500+ water-damage project.
What causes Faucet Dripping Wont Stop?
The two most common causes are a worn seat washer (in compression faucets) and a failed cartridge (in single-handle faucets). Washers degrade from the repeated compression cycle of turning the handle on and off thousands of times, plus mineral deposits in hard water accelerate the breakdown. The third leading cause is a corroded valve seat—even a new washer cannot seal against a pitted seat, which is why many DIY repairs fail the first time. Less commonly, excessive water pressure above 80 psi stresses seals beyond their design limits and causes premature failure across all fixture types.
Will homeowners insurance cover Faucet Dripping Wont Stop?
Standard homeowners insurance does not cover the faucet repair itself—worn washers and cartridges are considered normal wear and maintenance. However, if a dripping faucet caused sudden, accidental water damage to cabinets, flooring, or drywall—and you can demonstrate the leak was not long-standing neglect—your policy may cover the resulting damage repair minus your deductible (typically $500–$2,500). Insurers often deny claims if an adjuster finds evidence of prolonged leaking, such as layered mold growth or warped wood, arguing the homeowner failed to maintain the fixture. Document repairs with photos and receipts to support any future claim.
How do I find a licensed plumber for this?
First, verify the plumber holds a valid license in your state or municipality—most states maintain an online license-lookup tool through their Department of Labor or Licensing board. Second, confirm they carry general liability insurance (at least $500,000) and workers' compensation; ask for a certificate of insurance and verify it is current. Third, request a written quote before work begins that itemizes the service-call fee, labor rate, and parts—reputable plumbers will not balk at this. Fourth, check at least two references or online reviews on platforms like Google Business or the Better Business Bureau; look for consistent feedback on punctuality, clean workspaces, and transparent billing. Avoid any plumber who demands full payment upfront or refuses to provide a written warranty on parts and labor.
A dripping faucet comes down to three decisions: identifying whether the problem is a washer, cartridge, or valve seat; choosing the correct replacement part matched to your exact faucet model; and recognizing when the damage has moved beyond a simple seal swap into territory that requires a licensed plumber. Getting these three calls right is the difference between a $10 Saturday fix and a $400 service call—or worse, a $2,000 water-damage remediation because you waited too long.
Your recommended next step is to shut off the water, remove the handle, and inspect the internal components today. Take a clear photo of the cartridge or stem, note the brand and model number stamped on the faucet, and take the worn parts to your local plumbing-supply store for an exact match. If the valve seat is pitted, the shut-off valves do not hold, or you have already tried replacing parts without success, call a licensed plumber for a diagnostic visit—most charge $50–$95 for the trip and will apply it toward the repair. Fix the drip now; every day you wait costs water, money, and potentially the wood under your sink.
Ready to Solve This for Good?
Get matched with pre-screened, licensed plumbers in your area. Free quotes, no obligation, no spam.
GET FREE QUOTES NOW