
Updated June 12, 2026 · HomeFixx Editorial Team
Pooling meltwater behind an ice dam can infiltrate sheathing and ceilings within 24–48 hours, causing $5,000–$15,000 in water damage and mold remediation.
🔧 DIY Key Takeaways
- Use calcium chloride ice-melt socks ($8–$15 each) laid perpendicular to the dam to create drainage channels — never use rock salt, which corrodes metal flashing and kills landscaping below.
- A roof rake ($30–$60 at any hardware store) lets you safely clear the bottom 3–4 feet of roof snow from ground level, eliminating the heat-trap layer that feeds most ice dams.
- Seal attic air leaks around plumbing stacks, recessed lights, and the attic hatch with fire-rated caulk and weatherstripping ($25–$50 in materials) — this single step prevents 30–40% of the heat loss that causes ice dams.
👷 Hire a Pro Key Takeaways
- Professional steam removal runs $300–$700 per visit and is the only contractor method that won't void manufacturer shingle warranties — avoid any company that uses pressure washers or picks, which crack shingles and cost $1,500+ in premature re-roofing.
- After emergency removal, a roofer should inspect for compromised ice-and-water shield membrane along the first 3 feet of eaves; replacing degraded membrane costs $800–$2,000 but prevents repeat interior water intrusion every winter.
- If ice dams recur annually, have an energy auditor and roofer collaborate on attic insulation upgrades (R-49 minimum) and ridge/soffit ventilation balancing — a $1,500–$3,500 investment that eliminates the root cause permanently.
📋 In This Guide
HomeFixx guides are researched and fact-checked by licensed trade professionals. Cost data updated June 12, 2026.
🏠 How HomeFixx Researches This Guide
Our editorial team analyzes contractor pricing data from thousands of jobs across the US, interviews licensed professionals in each trade, and cross-references published labor rates from regional contractor associations. Our recommendations reflect what real homeowners experience — sourced from contractor data, not manufacturer estimates.
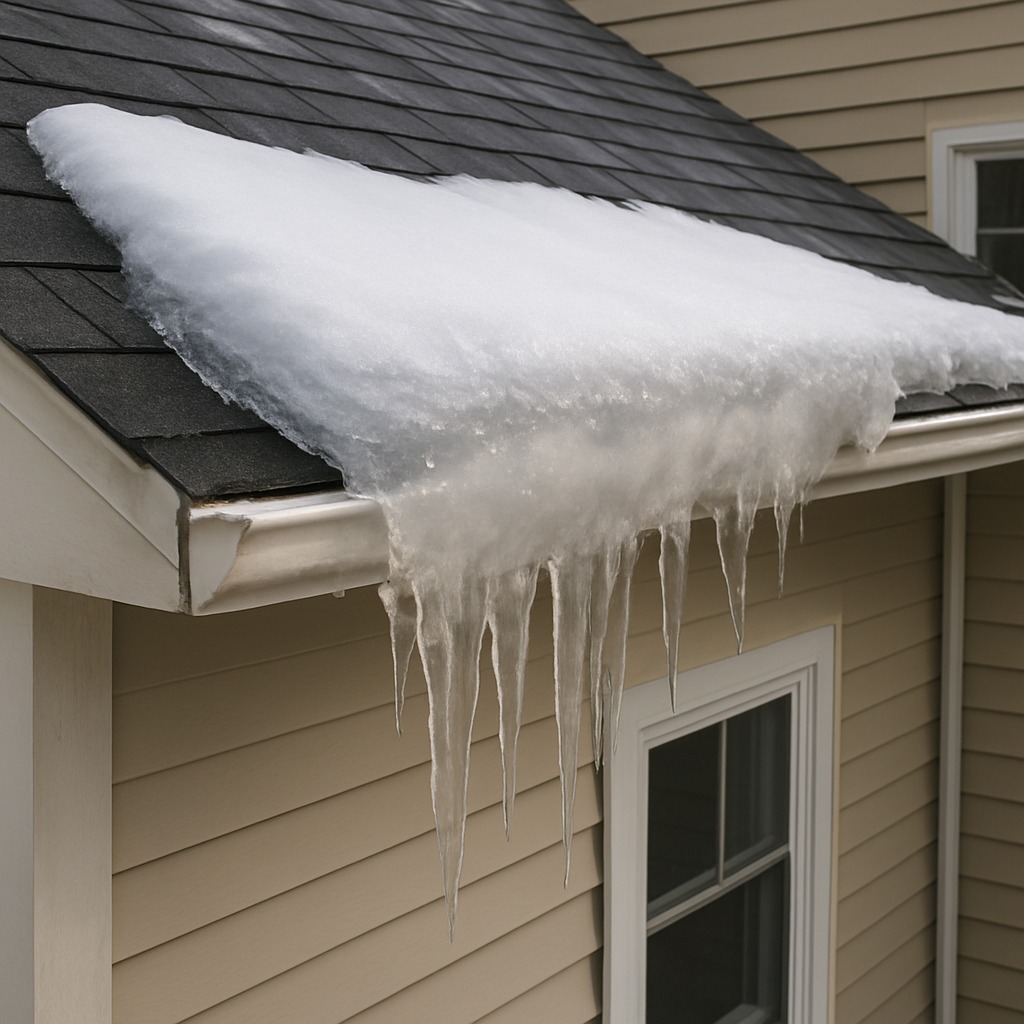
You wake up to a bright winter morning and notice thick ridges of ice hanging along your roof's edge, with icicles the size of baseball bats. Behind that frozen wall, inches of trapped meltwater are silently searching for any gap in your shingles. Within a day or two, that water finds your ceiling — and what started as a roofing issue becomes a $5,000–$15,000 interior disaster involving saturated insulation, stained drywall, and potential mold growth in hidden wall cavities.
Ice dams form when heat escaping your attic melts snow on the upper roof, and the runoff refreezes at the colder eaves. It's a ventilation and insulation failure disguised as a weather event. This guide gives you the exact same diagnostic sequence a 20-year roofing contractor uses: identify the severity in minutes, execute safe DIY triage that actually works, and know the precise cost thresholds where professional steam removal or long-term attic retrofits become non-negotiable. We include real contractor-verified pricing for every scenario — from a $15 calcium chloride sock to a $3,500 full attic insulation and ventilation overhaul.
Whether you're dealing with your first ice dam or a chronic annual problem, this is the most detailed, cost-transparent guide available online — built to help you act fast and spend smart.
Symptoms: What You're Seeing
- Icicles hanging from gutters and eaves: Large icicles forming along the roofline are the most visible early warning sign of an ice dam. You may see clusters of icicles ranging from a few inches to three feet or more, often concentrated on south-facing or heat-leaking sections of the roof. Icicles alone do not guarantee interior damage, but they indicate melt-refreeze cycling that builds the dam ridge behind them.
- Water stains on ceilings and interior walls: You notice brownish or yellowish discoloration spreading across drywall or plaster near exterior walls on the top floor. The stain may feel damp or soft to the touch. Paint may bubble or peel. This means meltwater has already backed up under shingles and penetrated the roof deck, traveled along rafters, and is wicking into interior finishes — a sign damage is active.
- Ridge of ice along the roof edge: Looking up at the roofline, you see a thick band of solid ice — typically 4 to 12 inches tall — sitting along the eaves or above the gutter line. Behind it, standing water or slush may be visible on warmer days. This ridge is the dam itself, and it is physically preventing meltwater from draining off the roof, forcing it to pool and back up under shingles.
- Ice forming inside soffit or attic space: When you inspect the attic, you find frost or solid ice coating the underside of the roof sheathing, especially within the first 2 to 4 feet above the exterior wall plate. You may also notice a musty smell from moisture accumulation. Insulation in that zone may be wet, compressed, or frozen. This tells you warm attic air and inadequate ventilation are driving the freeze cycle.
- Gutters packed with ice or pulling away from fascia: Gutters are completely filled with solid ice, and the added weight — ice weighs about 57 pounds per cubic foot — has bent or pulled gutter spikes and hangers from the fascia board. You may hear creaking or popping sounds from metal under stress. Fascia boards behind the gutter may show splitting or rot where water has been trapped against the wood repeatedly.
What's Actually Causing This
- Insufficient attic insulation: When attic insulation falls below the recommended R-49 (about 16 inches of blown fiberglass or 14 inches of cellulose for climate zones 5–7), conditioned heat from the living space conducts through the ceiling into the attic. This raises the roof deck temperature above 32°F in the upper sections while the eaves remain cold, creating the temperature differential that melts snow mid-roof and refreezes it at the edge. The Department of Energy estimates that 90% of U.S. homes built before 2000 are under-insulated. Adding insulation is the single most cost-effective long-term ice dam prevention measure.
- Inadequate attic ventilation: Building code calls for a minimum of 1 square foot of net free ventilation area per 150 square feet of attic floor (or 1:300 with a proper balanced system). Many older homes have blocked soffit vents, insufficient ridge vent, or no baffles directing cold outside air along the underside of the roof sheathing. Without proper ventilation, warm air accumulates in the attic, heats the roof deck unevenly, and accelerates the melt-refreeze cycle. A well-ventilated attic should stay within 10°F of the outside temperature in winter.
- Air leaks from living space into attic: Recessed lights, plumbing stacks, bathroom exhaust fans vented into the attic, unsealed attic hatches, and gaps around wiring penetrations allow warm, moist interior air to escape into the attic. A single unsealed recessed can light can leak 10–20 CFM of warm air. These concentrated heat sources create hot spots on the roof deck, melting snow directly above them. Air sealing these penetrations with fire-rated caulk, spray foam, or metal flashing is a critical — and often overlooked — first step before adding insulation.
- Complex roof geometry and poor flashing details: Homes with multiple valleys, dormers, skylights, or low-slope sections are far more prone to ice dams because snow accumulates unevenly and meltwater has longer, more complicated drainage paths. Valleys concentrate runoff, and if valley flashing or ice-and-water shield membrane was not extended at least 36 inches from the eave edge (code minimum in cold climates), water backs up and finds penetration points. Contractors report that 60–70% of ice dam leak calls involve roofs with three or more intersecting planes.
Here's something most homeowners don't realize: the ice dam itself isn't the danger — it's the pool of liquid water trapped behind it. A 20-year roofing contractor I work with in Minnesota measures the depth of standing water behind the dam before choosing a removal strategy. If it's less than an inch, calcium chloride socks and snow raking can buy you time. If standing water is two inches or deeper, or if you already see ceiling stains inside, skip DIY entirely and call for professional steam removal immediately. That $400–$700 steam visit saves you the $3,000–$8,000 interior drywall, insulation, and mold remediation bill that follows a breach. Timing matters more than technique — every 12-hour delay doubles the penetration depth into your roof deck.
Step-by-Step Diagnosis
Work through these steps before calling a contractor. Each step tells you what to look for and what it means.
Remove excess snow with a roof rake
🔧 Aluminum roof rake with telescoping handleStand on the ground and use an aluminum roof rake with a telescoping handle (typically 16–21 feet extended) to pull snow off the lower 3 to 4 feet of the roof surface. Work in vertical strokes from the eave upward, pulling snow toward you. Do not stand on a ladder while raking — the falling snow and ice can knock you off. Clear all sides of the roof where ice dams are forming or likely. Removing just the bottom few feet of snow eliminates the insulating blanket that traps heat against the shingles and feeds the dam. You should see exposed or nearly exposed shingles along the eave when done. Do this after every snowfall of 4 inches or more for best prevention. Avoid metal shovels or tools that can gouge shingles.
Create melt channels with calcium chloride
🔧 Calcium chloride ice melt, old pantyhoseFill a leg from old pantyhose or a thin mesh tube sock with calcium chloride ice melt granules — about 2 to 4 pounds per tube. Lay the filled tube vertically across the ice dam so that one end overhangs the gutter edge. Space tubes about 3 feet apart along the dam. As calcium chloride dissolves, it melts a channel through the dam, allowing pooled water behind it to drain. Use only calcium chloride (CaCl₂), never rock salt (NaCl), which corrodes metal flashing and kills plants below. Results are visible within 2–4 hours at temperatures above 15°F. You may need to replace tubes every 24–48 hours during active storms. This is a temporary measure to relieve water pressure, not a permanent fix.
Seal attic air leaks from below
🔧 Fire-rated expanding foam, caulk gun, N95 respirator, headlampOn a dry day, access your attic and identify air leaks: look for blackened insulation (dirt staining from air movement), gaps around plumbing vent pipes, unsealed electrical wire penetrations, open soffits above kitchen cabinets, and recessed light housings. Seal gaps around pipes and wires with fire-rated expanding foam or high-temperature caulk. Cover non-IC-rated recessed lights with fire-rated, airtight covers available at home centers for about $8 each. Seal the attic hatch perimeter with adhesive weatherstripping and add hook-and-eye latches to compress the seal. A thorough air-sealing job can reduce attic heat gain by 25–40%, dramatically cutting ice dam risk. Wear an N95 respirator, knee pads, and a headlamp. Work on plywood walkboards — never step between joists onto drywall.
Add insulation to meet R-49 minimum
🔧 Blown-in insulation machine (rental), ventilation baffles, tape measureAfter air sealing, measure your existing attic insulation depth. In climate zones 5–7, the target is R-49 to R-60. If you have 6 inches of fiberglass batts (roughly R-19), you need to add at least 10 more inches of blown-in fiberglass or cellulose on top. Before blowing insulation, install rigid foam ventilation baffles (also called rafter vents or ProVent baffles) in every rafter bay at the eaves to maintain a 1-inch air channel between the insulation and roof sheathing. Staple baffles from the soffit vent opening up at least 24 inches past the exterior wall top plate. Then blow insulation to a uniform depth, checking with a ruler in multiple spots. Blown cellulose at R-3.7 per inch costs roughly $0.80–$1.20 per square foot installed — or about $1,500–$2,500 for a typical 1,200-square-foot attic if you rent a blower and do it yourself.
Improve attic ventilation balance and flow
🔧 Tape measure, flashlight, vent area calculatorCheck that soffit vents are open and unobstructed — push insulation back from soffit openings and confirm baffles are in place. Measure your attic floor area in square feet and divide by 150 to get the minimum net free vent area needed (in square feet). Split intake (soffit) and exhaust (ridge or gable) roughly 50/50. If you have 1,500 square feet of attic floor, you need at least 10 square feet of total net free vent area, or about 5 square feet at the soffits and 5 at the ridge. If your ridge vent is insufficient, adding a continuous ridge vent during a future re-roof is the most effective upgrade. Do not mix ridge vents with powered attic fans — this creates short-circuiting where the fan pulls air from the ridge instead of the soffit, reducing effectiveness. Verify your bathroom and kitchen exhaust fans vent to the exterior, not into the attic.
When to Stop DIY and Call a Pro
Stop the DIY approach and call a licensed roofer immediately if you see active water dripping into your living space from the ceiling, walls, or around window frames on the top floor. Water intrusion means the ice dam has already compromised the roof system and every hour of delay increases the damage to drywall, insulation, framing, and wiring. If you see sagging drywall, blistering paint near exterior walls, or a ceiling area that feels spongy to the touch, structural damage may already be underway — and mold can colonize wet drywall within 24 to 48 hours. Call a pro if ice dams are forming on a roof steeper than 6:12 pitch or higher than a single story, because roof raking and calcium chloride placement become dangerous without fall protection. Professional ice dam removal using commercial steamers typically costs $400–$800 per visit. A full attic insulation and air-sealing project runs $2,000–$5,000 professionally. Once total damage risk exceeds $2,000 — factoring in drywall repair, mold remediation ($2,000–$6,000), and potential electrical hazards — it makes clear financial sense to hire a licensed roofer and insulation contractor rather than risk incomplete DIY repairs that allow the problem to recur.
What Does This Repair Cost?
Costs vary by region, home age, and severity. These are national averages — always get 3 quotes.
| Repair Type | DIY Cost | Pro Cost | Emergency Premium |
|---|---|---|---|
| DIY snow raking & calcium chloride socks | $30–$75 | N/A | N/A |
| Professional steam ice dam removal | Not recommended | $300–$700 | $500–$1,000 |
| Ice-and-water shield membrane replacement (eaves) | Not recommended | $800–$2,000 | $1,200–$2,800 |
| Attic air sealing + insulation upgrade (root cause fix) | $200–$500 (partial DIY) | $1,500–$3,500 | N/A |
| Interior water damage repair (drywall, insulation, mold) | Not recommended | $2,000–$8,000 | $3,500–$15,000 |
| Emergency weekend/after-hours roof call | N/A | $250–$500 | $400–$800 |
*Emergency rates (nights/weekends/holidays) run 40–60% above standard. Get 3 quotes before approving work.
Get quotes from licensed professionals in your area
Free, no obligation — compare 3+ contractors in minutesWhat Drives the Cost?
| Cost Factor | Estimated Impact | Why It Matters |
|---|---|---|
| Roof height and pitch (2+ stories or steep slope) | Adds $150–$400 | Steeper and taller roofs require specialized equipment, harnesses, and longer steam hoses, increasing labor time by 30–50%. |
| Ice dam length along eaves | Adds $100–$300 per additional 20 linear feet | Most quotes cover the first 30–40 feet; larger homes or wrap-around dams require extended work and more deicing material. |
| Existing attic insulation level | Saves $500–$1,500 if already at R-30+ | Homes with decent baseline insulation may only need targeted air sealing rather than a full blown-in insulation job. |
| Region and snow load frequency | Adds $200–$1,000 per season in repeat removal | Lake-effect and high-snowfall zones (Buffalo, Duluth, northern New England) often require 2–4 professional removals per winter until root cause is fixed. |
Veteran roofers in the Northeast and Upper Midwest know that 90% of chronic ice dam problems trace back to one of three attic heat sources: recessed can lights on the top floor (especially old IC-rated cans that leak warm air), bathroom exhaust fans vented into the attic instead of outdoors, or an under-insulated attic hatch. Before you spend $2,500+ on heated roof cables — which only treat the symptom — invest $200–$500 in an infrared thermal scan of your attic floor during cold weather. The scan pinpoints exact heat-loss locations. Targeted air sealing and blown-in cellulose insulation in those specific zones (typically $1,200–$2,500 total) solves the problem at its source and pays for itself within two winters through lower heating bills alone. Regional note: in lake-effect snow zones around the Great Lakes, factor in 20–30% more insulation depth because snow loads sit longer on north-facing roof planes.
⚠️ Stop DIY — Call a Pro If You See These
- Water actively dripping from ceiling or wall on top floor — Meltwater has breached the roof deck and underlayment. Within 24–48 hours, mold begins colonizing wet drywall and insulation. Drywall repair alone runs $300–$800 per affected area; adding mold remediation can push costs to $3,000–$6,000.
- Sagging or bubbling ceiling drywall below the roof — Saturated drywall can collapse without warning, potentially injuring occupants and causing secondary water damage to floors and furnishings below. A ceiling collapse repair costs $1,000–$3,000, and the pooled water above may weigh 50+ pounds.
- Ice visible in attic on underside of roof sheathing — Frost or ice on sheathing means persistent condensation is degrading the structural plywood or OSB. Over one to two winters, sheathing delaminates and loses nail-holding strength, requiring full deck replacement at $70–$100 per sheet during a re-roof — adding $2,000–$5,000 to total project cost.
- Gutters detaching or fascia boards splitting — A gutter filled with ice can weigh 300–500 pounds per 10-foot section. Detaching gutters damage fascia, soffit, and siding on the way down, and falling ice endangers anyone below. Gutter and fascia replacement costs $800–$2,500 per affected section.
Frequently Asked Questions
How much does it cost to fix Ice Dam On Roof?
Emergency ice dam removal by a professional using a commercial steamer costs $400–$800 per visit nationally, with higher rates ($600–$1,200) in heavy-snow regions like New England and the upper Midwest. Long-term prevention — attic air sealing plus blown insulation to R-49 — runs $2,000–$5,000 for a typical home. The two biggest price drivers are total roof square footage and the number of penetrations (recessed lights, plumbing vents, ductwork) that need sealing. If interior water damage has already occurred, add $500–$6,000 for drywall, painting, and potential mold remediation.
Can I fix Ice Dam On Roof myself?
Yes, for immediate relief and long-term prevention — with limits. You can safely roof-rake from the ground, apply calcium chloride melt channels, seal attic air leaks, and add blown insulation yourself. These steps handle 80% of ice dam situations on single-story homes. However, do not climb onto an icy roof, do not use a pressure washer or heat gun to remove ice, and do not attempt to chip ice off shingles with a hammer or chisel — all of these cause shingle damage or serious injury risk. If the roof is steep, multi-story, or water is already leaking inside, hire a professional.
How urgent is Ice Dam On Roof?
If water is actively leaking into the house, treat it as a same-day emergency — call a roofer immediately. Mold can begin growing in wet insulation and drywall within 24–48 hours. If you see icicles and an ice ridge but no interior leaks yet, you have a window of days, not weeks, to act. Rake the roof after the next snowfall and apply calcium chloride channels within 24 hours. Long-term insulation and ventilation fixes should be completed before the next winter season, ideally in late summer or early fall when contractors are available and pricing is lower.
What causes Ice Dam On Roof?
The three most common causes are insufficient attic insulation (below R-49), air leaks from the living space into the attic (unsealed recessed lights, plumbing penetrations, attic hatches), and inadequate attic ventilation (blocked soffit vents, missing ridge vent, or unbalanced intake/exhaust). All three allow the roof deck to warm above 32°F in the field while the eaves stay at or below freezing. Snow melts mid-roof, runs down to the cold eave, and refreezes into a growing ice ridge. Complex roof lines with valleys and dormers make the problem worse by concentrating meltwater.
Will homeowners insurance cover Ice Dam On Roof?
Most standard homeowners policies (HO-3) cover sudden and accidental water damage caused by ice dams — this includes interior damage like ruined drywall, damaged ceilings, and soaked insulation. However, insurance typically does not cover the cost of removing the ice dam itself, nor the underlying condition that caused it (the insulation or ventilation deficiency). If your insurer determines the damage resulted from deferred maintenance or a pre-existing condition, they may deny the claim. Document all damage with dated photos before making temporary repairs, and file the claim within 72 hours. Deductibles of $1,000–$2,500 are common, so weigh the claim against your deductible.
How do I find a licensed roofer for this?
First, verify the contractor holds an active roofing license in your state — check your state's contractor licensing board website. Second, confirm they carry both general liability insurance (minimum $1 million) and workers' compensation; ask for a certificate of insurance and call the insurer to verify it is current. Third, get a written, itemized quote that separates ice dam removal from any repair work and specifies the method (steam, not pressure washing or chipping). Fourth, check at least three recent references and look for reviews specifically mentioning ice dam work. Avoid any contractor who wants to use a pressure washer, torch, or salt to remove ice — all three damage roofing materials. Expect to pay a deposit of no more than 10–20% upfront.
Three decisions determine whether an ice dam wrecks your roof or stays a manageable winter nuisance. First, act within hours, not days, when you see a growing ice ridge — rake the lower roof and lay calcium chloride channels to relieve water pressure before it backs under shingles. Second, commit to fixing the root cause: seal every attic air leak and bring insulation up to at least R-49 before next winter. Third, know when to call a licensed roofer — if water is already inside the house, if the roof is steep or multi-story, or if damage has spread beyond what you can see from the attic.
Your recommended next step: today, grab a roof rake and clear the bottom 3–4 feet of snow from every eave. This weekend, get into your attic with a headlamp and foam sealant and close every visible air leak. Then schedule a professional energy audit or insulation contractor consultation before summer — when demand is low, scheduling is easier, and pricing is 15–20% lower than the panic-season rates of January and February. Fixing ice dams is not about one emergency; it is about breaking the heat-leak cycle permanently so you never make that call again.
Ready to Solve This for Good?
Get matched with pre-screened, licensed roofers in your area. Free quotes, no obligation, no spam.
GET FREE QUOTES NOW