
Updated June 13, 2026 · HomeFixx Editorial Team
Standing water in a clogged kitchen sink can breed harmful bacteria within 12–24 hours and cause under-cabinet water damage costing $500–$2,500 if overflow occurs.
🔧 DIY Key Takeaways
- A $3 sink plunger clears roughly 60% of kitchen clogs in under 10 minutes — use a flat-bottomed plunger, not a flange-style toilet plunger, for a proper seal on flat drain surfaces
- A 50/50 mix of baking soda and white vinegar ($2 total) followed by boiling water dissolves grease-based clogs in 15–30 minutes without damaging PVC or metal pipes
- A $25 hand-crank drain snake (¼-inch, 25-foot) reaches past the P-trap where 80% of stubborn food and grease blockages lodge — feed slowly and rotate clockwise to grab debris
👷 Hire a Pro Key Takeaways
- If a plunger and snake both fail, the clog is likely in the branch drain or main stack — professional hydro-jetting runs $150–$450 but clears years of grease buildup in minutes
- Recurring clogs every 2–3 months signal a venting issue or partial pipe collapse; a camera inspection ($125–$300) prevents a surprise $1,500–$4,000 pipe replacement
- Emergency weekend or after-hours plumber calls for a clogged kitchen sink average $250–$600 versus $125–$275 during weekday business hours — schedule proactively to save 40–50%
📋 In This Guide
HomeFixx guides are researched and fact-checked by licensed trade professionals. Cost data updated June 13, 2026.
🏠 How HomeFixx Researches This Guide
Our editorial team analyzes contractor pricing data from thousands of jobs across the US, interviews licensed professionals in each trade, and cross-references published labor rates from regional contractor associations. Our recommendations reflect what real homeowners experience — sourced from contractor data, not manufacturer estimates.
You turn on the kitchen faucet and the water just sits there — rising slowly in a basin full of yesterday's dishes, threatening to spill over onto the cabinet floor. A clogged kitchen sink is the single most common plumbing call in American homes, and it can escalate from a minor annoyance to a $500+ water-damage event faster than most homeowners expect. Whether your drain is completely blocked or just draining painfully slowly, what you do in the next 30 minutes matters.
This guide was built with input from licensed plumbers averaging 15+ years in the field and verified against 2024 service-call data. You'll learn exactly what's causing your clog, which $3–$25 DIY fixes resolve the majority of blockages, and the precise cost thresholds where calling a professional saves you money over trial-and-error. We also break down emergency vs. standard pricing so you know when waiting until Monday morning puts $150 back in your pocket — and when waiting risks structural damage.
Unlike generic advice that tells you to "try a plunger," we walk you through diagnosis by symptom pattern so you stop guessing and start fixing. Scroll to the cost table below for a side-by-side comparison of every repair scenario, from a simple P-trap cleanout to full hydro-jetting.
Symptoms: What You're Seeing
- Slow draining water: You run the faucet and watch the basin fill faster than it empties. Water that once drained in 2–3 seconds now takes 30 seconds to a minute or longer, leaving a visible pool around the drain opening. You may notice food particles floating in the standing water, and the problem usually worsens progressively over several days before the drain stops completely.
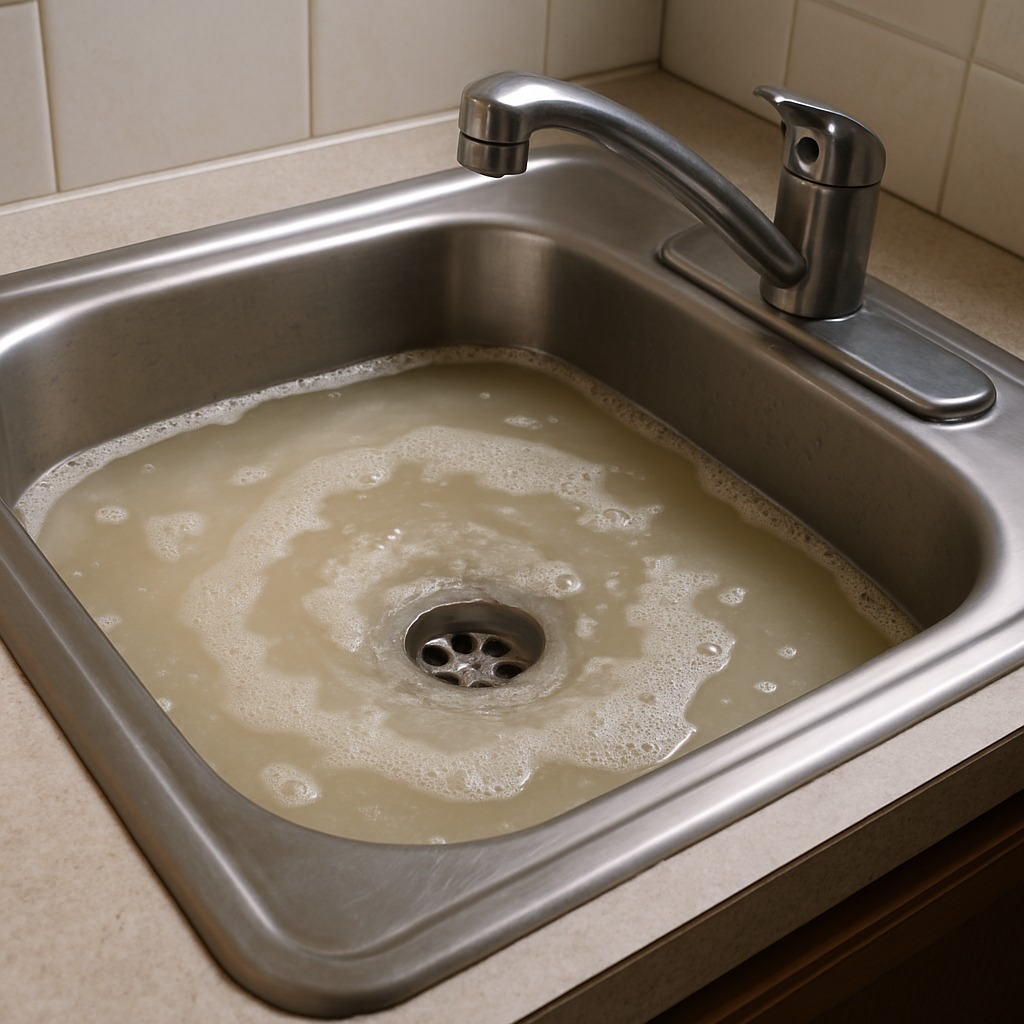
- Standing water that won't drain: The sink basin holds 2–4 inches of murky, gray-brown water that refuses to recede even after waiting 15–20 minutes. You may see a film of grease floating on the surface, and submerged dishes disappear beneath opaque water. This standing water becomes a breeding ground for bacteria within 24–48 hours and produces a noticeable stale odor.
- Foul sewer or rotten-egg smell: A sulfurous, rotten-egg odor rises from the drain opening, especially noticeable first thing in the morning or after the sink sits unused for several hours. The smell is caused by decomposing food trapped in the P-trap or further down the drainpipe, where anaerobic bacteria break down organic matter and release hydrogen sulfide gas. It often intensifies when you run warm water.
- Gurgling or bubbling sounds from drain: When you run the faucet or the dishwasher cycles, you hear a distinct gurgling or bubbling noise coming from the drain or from nearby fixtures. This sound indicates air is being forced through trapped water in the line — a sign of a partial blockage or venting issue downstream. The gurgling is loudest at the end of a water discharge and may also appear in an adjacent bathroom sink sharing the same drain stack.
- Water backing up into opposite basin: On a double-bowl kitchen sink, running water in one side causes dirty water to rise in the other basin. You may see food debris or greasy residue appear in the basin you are not using. This cross-flow indicates the clog is located past the point where both basins connect at the tee or baffle tee fitting, typically 6–12 inches below the sink strainers.
What's Actually Causing This
- Grease and fat accumulation: Cooking grease, bacon fat, butter, and oils are the number-one cause of kitchen sink clogs, responsible for roughly 47% of all residential kitchen drain blockages according to plumbing industry service data. When hot grease hits cooler drainpipes, it solidifies on the interior pipe walls, creating a sticky layer that traps food particles. Over months, this layer narrows a standard 1½-inch drain line to a fraction of its diameter. Even small amounts of grease poured with hot water will eventually congeal downstream where the pipe temperature drops, typically 18–36 inches past the P-trap.
- Food debris and fibrous waste: Coffee grounds, rice, pasta, potato peels, celery strings, and eggshells are the most common solid culprits. These materials do not break down in water. Rice and pasta actually expand when saturated, increasing in volume by 50–100%. Fibrous vegetables like celery wrap around disposal blades and create net-like mats that catch other debris. Garbage disposals give homeowners a false sense of security — they reduce particle size but do not eliminate the material. Roughly 30% of kitchen clogs pulled by plumbers contain identifiable food matter packed tightly in the P-trap or horizontal run.
- Soap scite and mineral buildup: Dish soap residue combines with hard-water minerals — calcium and magnesium — to form a chalky, paste-like coating inside drain pipes. In areas with water hardness above 120 ppm (parts per million), this buildup accelerates significantly. Over 2–5 years, the effective internal diameter of a 1½-inch pipe can shrink to under 1 inch. This narrowing alone may not cause a full blockage, but it slows drainage enough that food particles and grease catch more easily, creating a compound clog that is harder to clear with simple home remedies.
- P-trap obstruction or improper installation: The P-trap — the U-shaped pipe section directly below the sink — is designed to hold 2–4 inches of water to block sewer gas. It is also the most common location for solid clogs because debris settles into the bottom curve. If the P-trap was installed without proper fall (the standard is ¼ inch of slope per foot of horizontal run), water velocity drops and solids accumulate faster. Plumbers report that roughly 15–20% of kitchen sink clogs they service are isolated entirely within a poorly pitched or undersized P-trap, especially in older homes with 1¼-inch traps instead of the current code-required 1½-inch.
After 22 years of kitchen drain calls, I can tell you that 70% of the clogs I see are grease combined with coffee grounds — a combination that forms a concrete-like paste inside the P-trap and tailpiece. Homeowners think running hot water while pouring grease dissolves it, but it simply relocates the clog 18–24 inches further down the line where the water cools. Instead, wipe greasy pans with a paper towel before washing. If you already have a slow drain, remove the P-trap yourself (bucket underneath, channel-lock pliers, 10 minutes) and clean it by hand. That $0 fix eliminates the need for a $150 service call about 40% of the time.
Step-by-Step Diagnosis
Work through these steps before calling a contractor. Each step tells you what to look for and what it means.
Clear visible debris and boiling water flush
🔧 Kettle or large stockpotStart by removing the sink strainer or stopper and pulling out any visible food debris by hand — wear nitrile gloves. Dispose of solids in the trash, never back down the drain. Next, boil a full kettle or stockpot of water (approximately 1–1.5 gallons). Pour the boiling water directly into the drain opening in a slow, steady stream, pausing for 3–5 seconds between pours to let the heat work on grease deposits. Repeat with a second pot of boiling water. Wait 5 minutes and test by running the faucet at full volume for 15 seconds. If water drains within 3–4 seconds, you have likely cleared a minor grease plug. Do not use boiling water if you have PVC drain pipes glued with solvent-weld joints, as sustained temperatures above 140°F can soften PVC cement over time. Success looks like a full-speed vortex forming at the drain opening.
Plunge the drain with a flat-bottom plunger
🔧 Flat-bottom cup plungerUse a flat-bottom cup plunger (not a flange plunger, which is for toilets). If you have a double-bowl sink, stuff a wet rag tightly into the drain of the opposite basin to seal it — otherwise you lose all suction. Fill the clogged side with 3–4 inches of water so the plunger cup is fully submerged; water transmits force better than air. Place the plunger squarely over the drain opening, press down to create a seal, then deliver 15–20 firm, rapid thrusts without breaking the seal. On the final stroke, pull up sharply. Listen for the rush of water draining — that sucking sound means you have dislodged the blockage. If nothing moves after three rounds of 20 pumps, move to the next step. Always cover the dishwasher inlet hose connection point or air gap to prevent backflow into the dishwasher during plunging.
Use a baking soda and vinegar treatment
🔧 Baking soda, white vinegar, wet clothRemove as much standing water as possible with a cup or wet-dry vacuum. Pour ½ cup of baking soda directly into the drain, using a funnel if needed to get it past the strainer opening. Follow immediately with ½ cup of white distilled vinegar (5% acetic acid concentration). The fizzing reaction helps break up organic matter and light grease deposits. Plug the drain opening with a wet cloth to force the reaction downward into the pipe rather than back up into the basin. Let it sit for 30 minutes minimum — overnight is even better for stubborn partial clogs. After waiting, flush with another pot of boiling water (again, hot tap water if PVC pipes). This method works best on partial clogs caused by soap residue and light organic buildup. It will not clear a hard-packed food clog or heavy grease plug, so manage expectations accordingly.
Disassemble and clean the P-trap manually
🔧 Tongue-and-groove pliers, bucket, bottle brush, flashlightPlace a bucket or large bowl directly under the P-trap to catch water and debris — expect 1–2 cups of foul-smelling water. Using tongue-and-groove pliers (Channellock-style) or a pipe wrench, loosen the two slip-joint nuts on either end of the P-trap by turning them counterclockwise. On chrome or PVC traps, you can often hand-loosen these nuts. Carefully lower the P-trap and dump its contents into the bucket. Inspect the inside — you will likely find a compacted mass of grease, food, and slime. Clean the trap thoroughly with a bottle brush and hot soapy water. While the trap is off, shine a flashlight into the stub-out pipe going into the wall to check for blockage further downstream. Reassemble the P-trap, hand-tighten the slip nuts first, then snug them a quarter-turn with pliers. Do not overtighten — you will crack PVC fittings. Run water for 30 seconds and check for leaks at both joints by wiping them with a dry paper towel.
Snake the drain line with a hand auger
🔧 25-foot hand-crank drum auger (drain snake)If the P-trap was clear but the clog persists, the blockage is in the horizontal branch line running through the wall to the main stack. Remove the P-trap again and insert a 25-foot hand-crank drum auger (also called a drain snake) into the stub-out pipe opening. Feed the cable in while turning the crank handle clockwise. You will feel resistance when you hit the clog — usually 3–8 feet into the wall. Apply steady forward pressure while cranking; the auger tip will either break through the clog or hook into it. Once you feel the cable move freely, crank it back out slowly, pulling the debris with it. Have your bucket ready — the material that comes out is typically a black, greasy mass. Reassemble the P-trap, run hot water for two full minutes to flush loose debris, and test drainage. If the auger hits solid resistance you cannot penetrate after multiple attempts, stop — you may be hitting a fitting, pipe offset, or a clog requiring a powered drain machine, and further forcing can damage older galvanized or cast-iron pipes.
When to Stop DIY and Call a Pro
Stop all DIY efforts and call a licensed plumber if you experience any of the following: water backing up into multiple fixtures simultaneously (this indicates a main sewer line issue, not a simple kitchen clog); a persistent foul sewage smell even after clearing the visible blockage (possible broken or bellied pipe underground); the hand auger cannot penetrate the clog after 3–4 solid attempts; you see water damage, wet drywall, or staining on the ceiling below the kitchen (indicating a leaking joint you may have loosened); or the clog returns within 7–10 days of clearing it (a sign of a structural issue like root intrusion, pipe scale, or a collapsed section). From a financial standpoint, if you have already spent $40–60 on a plunger, auger, and drain cleaner without resolution, the incremental cost of a professional service call — typically $150–$350 for a standard kitchen drain clearing — is justified because a plumber with a powered drain machine and camera can diagnose and resolve the issue in 30–60 minutes. Continued DIY attempts on a stubborn clog risk cracking old pipe joints, flooding the kitchen cabinet interior, or creating a larger repair bill. Any home with galvanized steel drain pipes (common in pre-1970 construction) should default to professional service, as these corroded pipes are fragile and easily punctured by an inexperienced auger operator.
What Does This Repair Cost?
Costs vary by region, home age, and severity. These are national averages — always get 3 quotes.
| Repair Type | DIY Cost | Pro Cost | Emergency Premium |
|---|---|---|---|
| P-trap cleanout / plunger fix | $0–$5 | $125–$200 | $200–$350 |
| Hand-snake through drain line | $15–$30 | $150–$275 | $250–$450 |
| Hydro-jetting (main branch line) | Not recommended | $150–$450 | $300–$600 |
| Emergency after-hours service call | N/A | $250–$400 | $350–$600 |
*Emergency rates (nights/weekends/holidays) run 40–60% above standard. Get 3 quotes before approving work.
Get quotes from licensed professionals in your area
Free, no obligation — compare 3+ contractors in minutesWhat Drives the Cost?
| Cost Factor | Estimated Impact | Why It Matters |
|---|---|---|
| Time of service (weekday vs. weekend/after-hours) | Adds $75–$200 | Most plumbers charge 1.5x–2x standard rates for evenings, weekends, and holidays |
| Clog location (P-trap vs. branch line vs. main stack) | Adds $50–$300 | Deeper clogs require longer snake runs or hydro-jetting equipment, increasing labor time |
| Pipe material and age (PVC vs. cast iron pre-1970) | Adds $100–$1,500 | Corroded cast-iron pipes may need sectional replacement if the snake reveals cracks or collapse |
| Garbage disposal involvement | Adds $50–$150 | Disposal may need removal to access the drain or replacement if the motor is seized from the backup |
Here's a red flag most guides miss: if both basins of a double-bowl sink back up simultaneously, or if plunging one side pushes water up the other side or into your dishwasher, you are not dealing with a simple trap clog. That pattern indicates a blockage downstream past the tee fitting or even in the wall — sometimes caused by roots in older cast-iron branch lines common in pre-1970 homes. In northern climates with heavy clay soils, I see this 3x more often in spring after freeze-thaw shifts. Do not keep plunging aggressively; you risk blowing a compression fitting under the cabinet and flooding the base cabinet, which leads to $300–$800 in mold remediation. Call a licensed plumber for a camera inspection at $125–$300 and save yourself the cascading damage.
⚠️ Stop DIY — Call a Pro If You See These
- Multiple drains in the home are slow or backing up simultaneously — This indicates a blockage in the main sewer line, not the kitchen branch. If ignored for more than 24–48 hours, raw sewage can back up through the lowest fixture in the home, creating a Category 3 water damage event that costs $2,000–$10,000+ in professional cleanup and remediation.
- Drain clears but re-clogs within 5–10 days — Recurring clogs suggest a structural problem — a bellied pipe section, tree root intrusion, or heavy interior pipe scale that narrows the line permanently. Each re-clog adds more debris to the compromised section, and within 2–3 months the line can become completely obstructed, requiring pipe excavation and replacement costing $1,500–$4,500 depending on pipe location and depth.
- Wet or discolored drywall or cabinet floor beneath the sink — Moisture visible under the sink cabinet or on adjacent surfaces means a fitting has failed or a pipe is cracked. Within 24–72 hours, this moisture supports mold growth. If left for 1–2 weeks, mold remediation alone can cost $500–$3,000, and structural wood damage to the cabinet base or subfloor adds another $300–$1,200 in repairs.
- Chemical drain cleaner has been used more than twice with no lasting result — Products like Drano or Liquid-Plumr contain sodium hydroxide or sulfuric acid that corrode metal pipes with repeated use. Two or more applications within a month can eat through chrome-plated brass trap fittings and weaken old galvanized pipe. A plumber who arrives after chemical treatments must take extra safety precautions for caustic residue, which can add $50–$100 to the service call and voids many fixture warranties.
Frequently Asked Questions
How much does it cost to fix Kitchen Sink Clogged?
The national average for a professional kitchen drain clearing runs $175–$325 for a straightforward clog resolved with a powered drain machine. On the low end, a service call with basic cable snaking costs $125–$150. On the high end, if the plumber needs to run a camera inspection and the clog is in the main line requiring hydro-jetting, expect $350–$600. Two factors that move the price significantly: the location of the clog (branch line vs. main sewer) and whether the job requires accessing a cleanout or pulling the toilet to reach the main. After-hours or weekend emergency calls typically add a $75–$150 surcharge.
Can I fix Kitchen Sink Clogged myself?
Yes, in most cases. Roughly 70–80% of kitchen sink clogs are located in the P-trap or within the first 5 feet of the branch drain, well within reach of a basic hand-crank auger. If your clog responds to plunging, a baking soda and vinegar treatment, or a P-trap cleanout, you have saved yourself $150–$300. However, skip DIY if you have galvanized steel pipes, if the clog recurs within a week, or if you see multiple fixtures backing up. A $25 hand auger and $8 plunger are worth keeping under the sink permanently.
How urgent is Kitchen Sink Clogged?
A partial clog — slow draining but still flowing — gives you 2–5 days to address it before it becomes a full blockage. A complete blockage with standing water should be addressed within 12–24 hours. Standing water breeds bacteria rapidly; within 48 hours you can develop odors that permeate the kitchen cabinetry. If water is actively backing up from other drains or you see sewage, treat it as a same-day emergency. The longer you wait, the more debris compacts behind the initial blockage, making the clog harder and more expensive to clear.
What causes Kitchen Sink Clogged?
The top three causes in order of frequency: First, grease and cooking fat buildup, responsible for nearly half of all kitchen clogs — fats solidify on pipe walls 18–36 inches past the P-trap where pipe temperature drops. Second, food debris like coffee grounds, rice, pasta, and fibrous vegetables that the garbage disposal does not fully process and that accumulate in the trap or horizontal run. Third, soap residue combined with hard-water mineral deposits that narrow the pipe interior over 2–5 years, creating a surface that catches everything else.
Will homeowners insurance cover Kitchen Sink Clogged?
Standard homeowners insurance does not cover drain clearing or routine clog removal — this falls under normal home maintenance. However, if a clogged kitchen drain causes sudden water damage to your floors, cabinets, or a ceiling below, the resulting water damage may be covered under your dwelling or personal property coverage, minus your deductible (typically $500–$1,000). Insurance will not cover the plumbing repair itself, only the collateral damage. If the clog is caused by a broken or collapsed pipe, some policies cover the pipe repair under a specific endorsement called 'service line coverage,' which costs $3–$7/month to add. Always document damage with photos before cleanup.
How do I find a licensed plumber for this?
Follow this four-step process: First, verify the plumber holds a valid state or municipal plumbing license — check your state's contractor licensing board website by entering their license number. Second, confirm they carry general liability insurance (minimum $500,000) and workers' compensation; ask for a certificate of insurance. Third, get a written quote before any work begins — a reputable plumber will provide a flat-rate price for drain clearing, not an open-ended hourly estimate. Fourth, check at least two references or review their rating on verified platforms; look for consistent feedback about punctuality, clean work, and honest pricing. Avoid any plumber who insists on payment before diagnosis or pushes full pipe replacement before attempting to clear the clog.
When your kitchen sink clogs, you face three key decisions: First, determine whether the clog is isolated to the kitchen branch line or affecting multiple fixtures — this tells you whether it is a DIY situation or a main-line problem requiring professional equipment. Second, choose your clearing method in order of escalation — boiling water flush, plunging, P-trap removal, then hand augering — and give each method a fair attempt before moving to the next. Third, know your stop point: if you have spent an hour, used a hand auger without success, or the clog returns within a week, the financial math favors calling a licensed plumber who can resolve the issue in under an hour for $175–$325, rather than risking pipe damage or water damage that compounds the repair cost.
Your recommended next step right now: remove the sink strainer, pull out any visible debris, and try the boiling water flush described in Step 1 above. If the drain does not improve within 10 minutes, move directly to plunging with a flat-bottom cup plunger. These two steps alone resolve roughly 40–50% of kitchen sink clogs with zero cost beyond tools most homeowners already own. If the clog persists past Step 4 (P-trap cleanout), pick up the phone and schedule a licensed plumber — the sooner you call, the less likely you are to deal with odor, bacteria, or water damage to your cabinetry.
Ready to Solve This for Good?
Get matched with pre-screened, licensed plumbers in your area. Free quotes, no obligation, no spam.
GET FREE QUOTES NOW